Cede Interface Order
In SICS you run the Cede Interface Order from SICS System Administation Utility desktop to load records into the system. Select Cede Interface Order, and the system allows you to select an existing order or create a new one.
Create New Cede Interface Order
Select Create New from Find Cede Interface Orders and the order screen appears
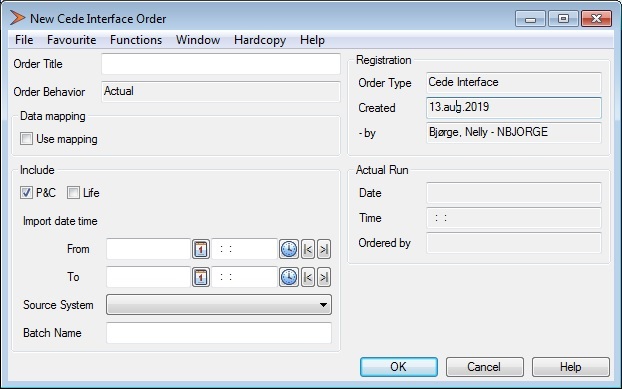
- Enter a unique Order Title to be able to distinguish between the orders
- Select to include P&C, Life or both tables
- Enter an import date time span to filter the records
- Enter Source System to indicate from which system the data is taken from
-
Enter Batch Name to indicate the records to be included
- Save the order
Select Run order to execute the order.
The order execution has the following steps:
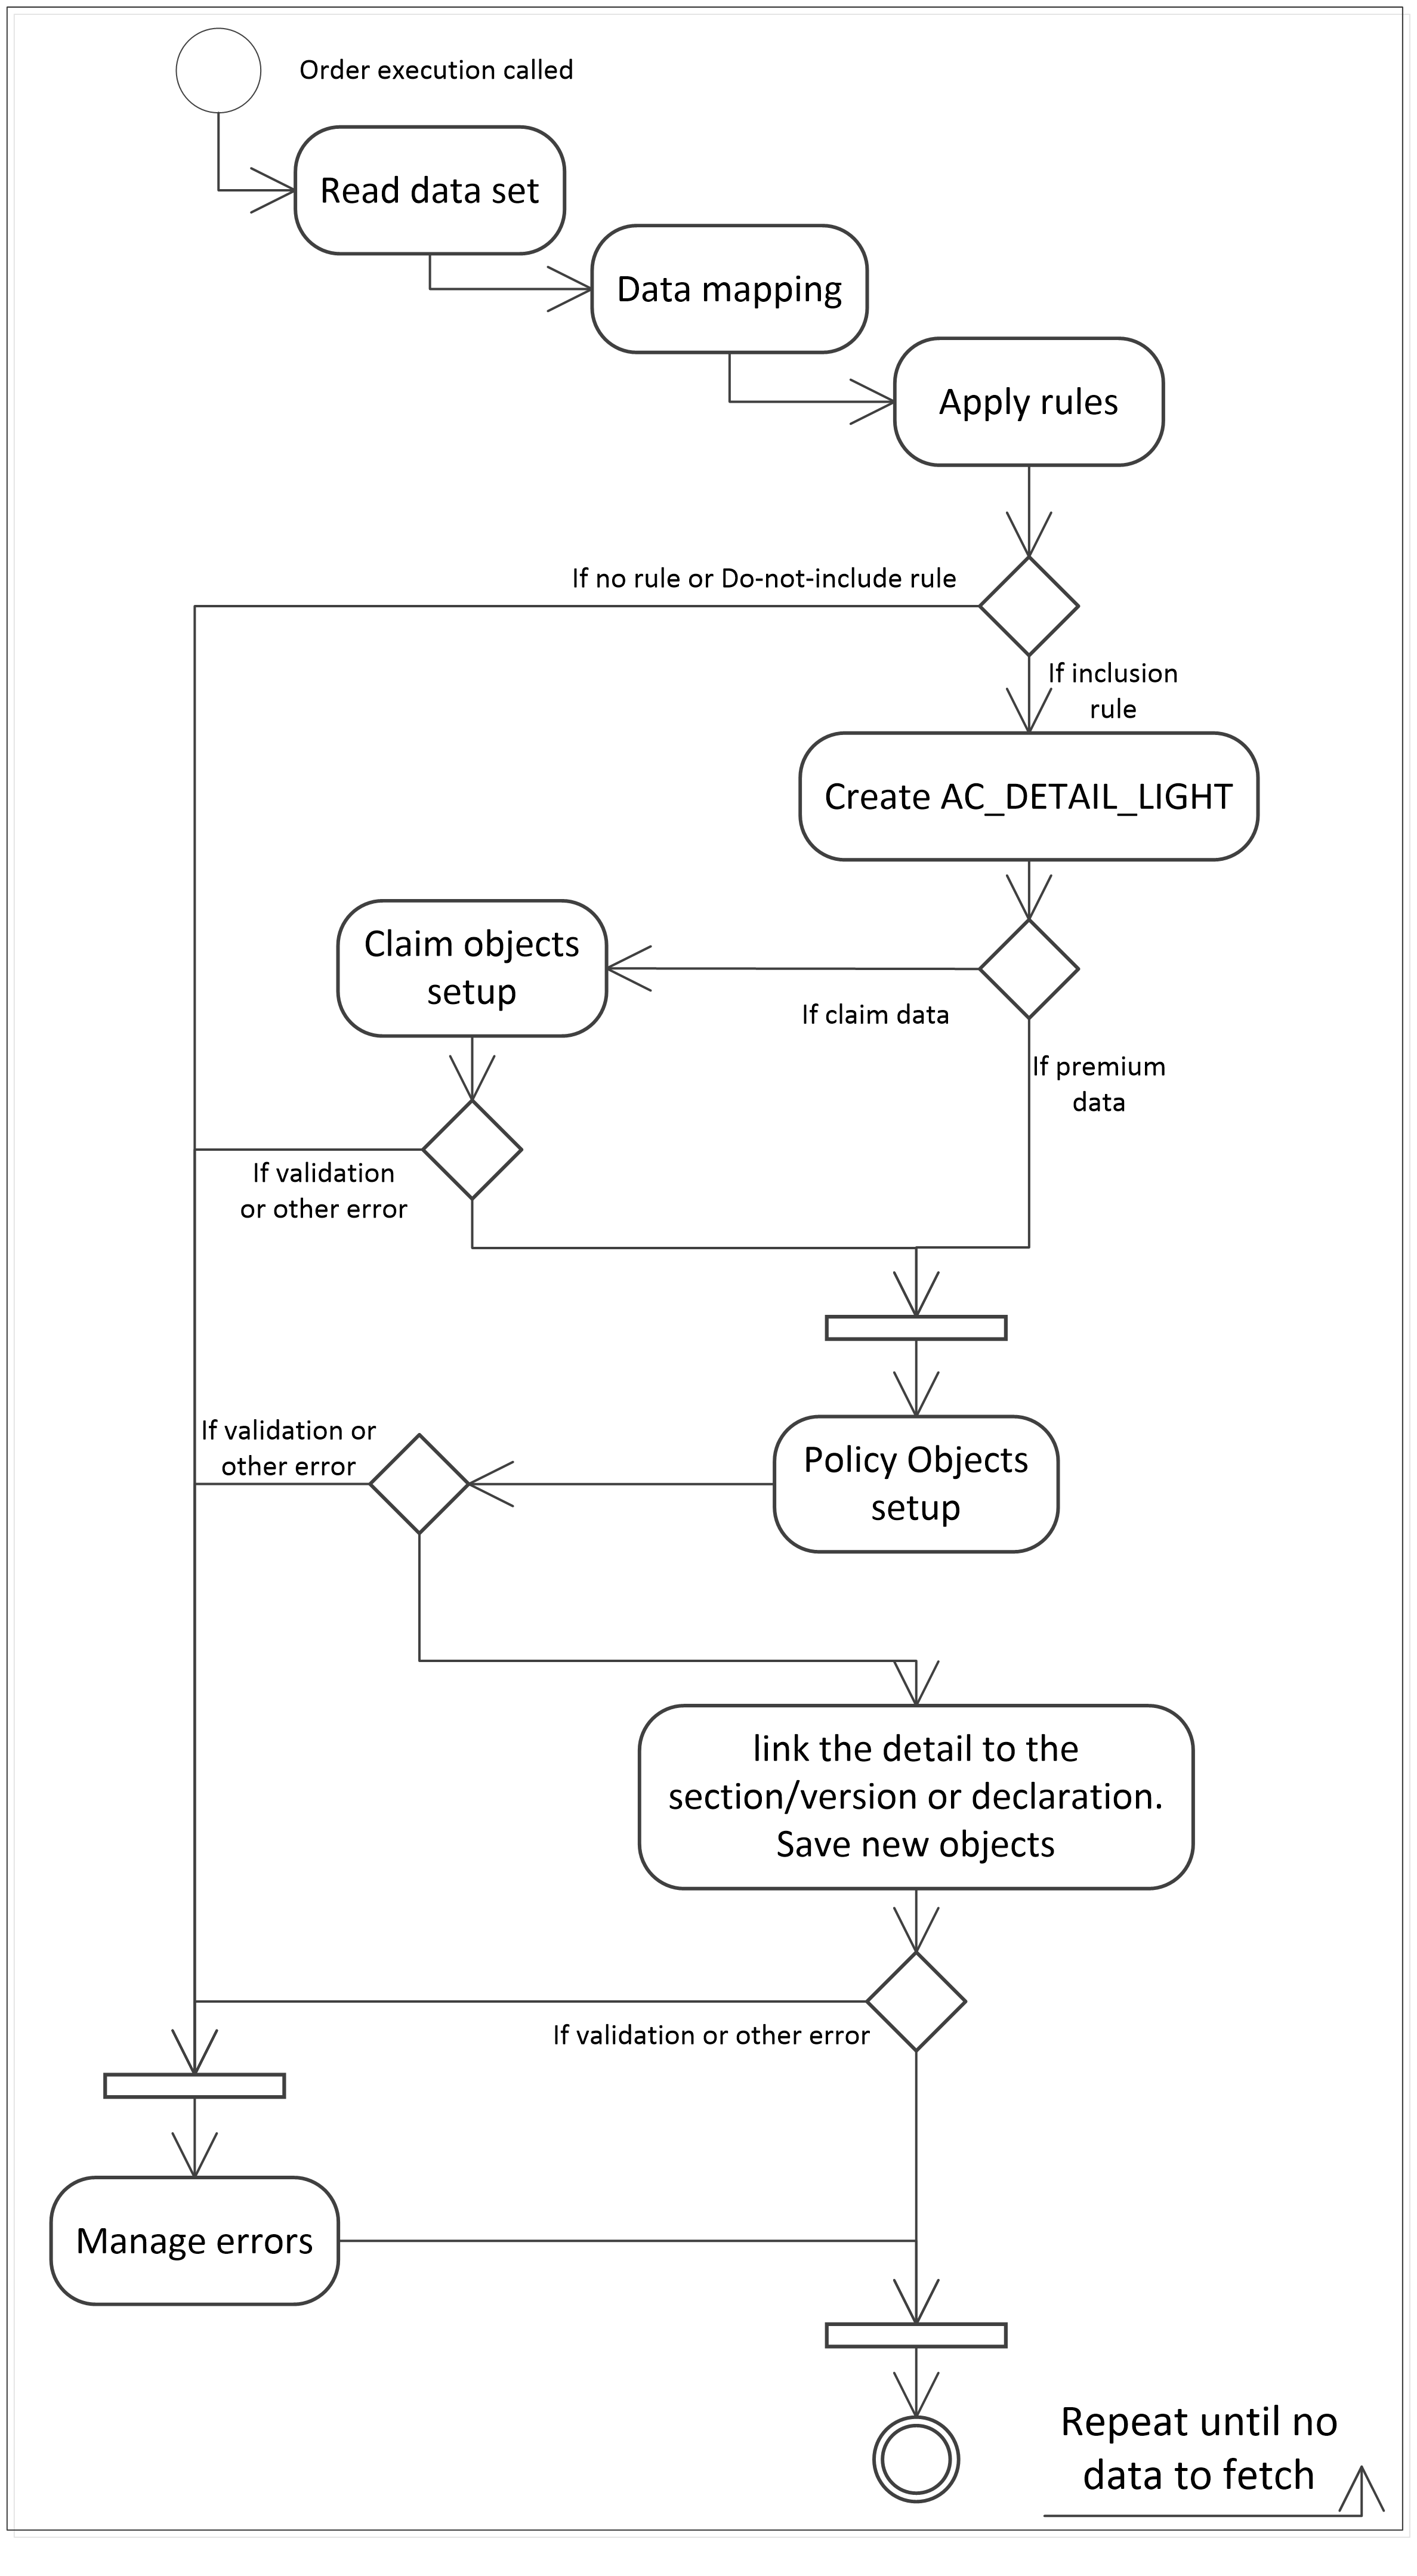
Data Read: The Cede Interface Table record are accessed iteractively, ordered by Creation TS.
Data Mapping: Based on the “DATA MAPPING DEFINITION” records, the attributes defined are updated from the source value to the target value, considering the source system. Data are translated on the target structure, not on the source.
Apply Rules: A valid Interface Rule is looked up, and the associated actions are applied (i.e. record inclusion / exclusion / redirection). To apply the rules, each source row must be evaluated against the available selection-rules: MCOB’s, COB’s, SCOB’s, UDF’s, RU’s, Base Companies, UY’s, Entry codes, and Main limit. If a Rule is not found, or too many rules are found, an error message is logged, and the row is not processed. If a rule that match the source is found, then the associated extraction-rule is evaluated:
- Include/Exclude rule option - if this attribute is set then the record will be processed. If unset, it won’t be processed. If unset, no other extraction attributes are relevant. An exclusion log will be produced with the reason of exclusion.
- Policy Id (redirection of target section) - if set, this business ID is associated to the output. In SICS is searched for a policy / section with same Policy ID, UY, Section name. If found, the section information is assigned to the source row, for further processing. No changes in the entry tables are applied. If the source record policy id (Policy ID + IP START) already exists in SICS, the redirection of the section is not done.
- Claim incurred at least - if this attribute is set AND the source record is a claim record, the record will be processed only if the incurred amount of that claim is at least this amount. If the incurred value is below the limit, the process will log an exclusion message with the reason of exclusion (Excluded as incurred is below the limit). If the incurred value is same or above the limit then the process will free the source rows that in the past have been set as excluded for this reason, i.e. considered once again for processing.
- Incurred value calculation: The incurred amount is the sum of the detail amounts of all the source rows associated to the claim (successfully processed or to be processed).
- Records with the AS_AT flag set to yes: in this case, for this specific entry code the sum of the detail amounts will be the most recent value (by as of date). PLEASE NOTICE: within the same Entry Code, all the bookings must be set with the same AS AT flag value (e.g. all the reserves will be AS AT = Yes). A mixed scenario will produce unexpected interface results.
- ROE: If the various involved amounts are expressed in different currencies, they will be converted to the rule currency (as at the as-of-date of the source row) and compared.
- Headline Loss case: If a claim record is associated to a Headline Loss Identifier, the record will never be excluded because of the Claim Incurred rule.
Create AC_DETAIL_LIGHT: An accounting detail is created with the relevant accounting data coming from the source row.
Objects setup
Objects described below are valid for both P&C and Life data, if not clearly specified. If the rule associated to the source record is set to create policy objects, the process creates the objects if they are not existing in SICS (the whole policy or the section amendment, etc.). In some context this behaviour can be not applicable (e.g. claims data coming from a system not perfectly synchronized with the main policies system).
Simple section lookup: if the associated rule is set to not create the objects, then a simple section lookup will be performed. Simple section lookup is made using: Policy Identifier, IP start date. Section name, Attachment period from and to dates, Main Class, Class and Subclass of Business, Additional Classifications from 1 to 11, Origin of Business. If the Simple Section Lookup fails, then an error is logged (“No section found”) and the source record is rejected. The following applies if the associated rule defines to create the policy objects:
Policy and Insured Period Lookup: This process manages every new Insured Period as a new Light Policy. The target Policy & Insured Period is looked up via Policy Identifier and IP start date. Note that this function does not support policy renewals intentionally. Every new Insured Period is modelled as a new Policy.
If the policy and the corresponding IP is not found then new objects are created. The relevant info is taken from the source row.
- P&C ONLY Risk Unit Group: If the RUG referenced by the source row already exists the system link the new policy to the existing objects, otherwise a new RUG will be created and linked to the policy.
SECTIONS Lookup: When the target Policy & Insured Period is found or created, then the target section is looked up (within the IP sections list) using: Section name, Attachment period from and to dates, Main Limit, Legal Area, Main Class, Class and Subclass of Business, Additional Classifications from 1 to 11, Origin of Business. Reporting Units from 1 to 3 and Peril. If the section is not found, a new section is created with the belonging information. The Attachment Period from-to for Sections could lie within its insured period or not, a check against this compatibility will not be made.
Amendments Lookup: The process skips this step if the section has not been found and therefore is created. After the section is found, an appropriate target amendment is searched (it could even be the version zero, i.e. the non-amended section), within the section’s amendments set, via these attributes: Main Limit, Attachment Period From, Attachment Period To. If not found, then a new objects set for the amendment is created. The process sequences the section amendments via the section version number. This number is given based on the Creation TS of the source record; in case of amendments out of sequence coming from the interface, all the version numbers of the section are updated properly to re-sequence the amendments.
- LIFE ONLY: “Amendments” in Life are also known as “transactions”
Declarations Lookup:
- P&C ONLY: The source row belongs to a declaration if the declaration fields are set. A declaration search is made to reuse any existing compatible declaration. The lookup fields are: Section name, Declaration No, Declaration name, Declaration attachment period from and to, Declaration main limit, Insurable Object Id-name-type, Declaration classifications (as per Sections lookup). If no declaration is found, a new declaration is created. Then the parent section is searched (via Section Name only) assuming that the classifications items are the same ones as for the declaration. (It is assumed that all the declarations belonging to a section have the same classification as the parent section itself). Amendments (versions) of declaration and parent sections are not supported.
IO Lookup: If not found, the Insurable Object (IO) is created using the source record information
- LIFE ONLY “IO” in Life is “Person”
The created accounting detail is linked to the found / created section.
Claim objects setup: In case of claim records (type 2 and 4), there is a check that the claim exists in SICS. If a claim does not exist, a new claim is created. The newly created claim is linked to the section with the attachment period that includes the claim date of loss. If more than one attachment period is found, the latest one (higher section version number) is used. If the Headline Loss referenced by the source object exists in SICS, the system links the new Claim to the existing HL, otherwise a Headline Loss will be created and linked.
The created accounting row is linked to the claim.
Execute Order via Batch Server
The Cede Interface can be executed via Batch Server.
- Open the Cede Interface Order function and choose New Template
- Fill in the order details
- Save the order. The order is now ready to be run via scheduler
- Open the Periodic Functions / Scheduler / Scheduled Jobs function and create a new Job Template
- Create a new Job Step, with Job Step Type = Cede Interface Order
- Open the Parameters panel to choose the newly created Cede Interface Order template
- Select the parameters of the Job Template
- Save the Job Template
For more information on how to use the SICS Scheduler functionality, refer to this section of System Administration Guide.
Execute Order via Command Line
The Cede Interface Order can be executed via a Windows Command Line.
- Create a Cede Interface Order Template as explained in the section above, and set the Job Activation to “On Call Only”.
The Job can be executed using the “-b” parameter of the SICS SysAdmin Command Line invocation, e.g.: >run-sics.bat sysadmin pc “-duMY_USER –dpMY_PASSWORD –dnDB_NAME –deENV_NAME –bMY_JOB_NAME” When the execution is completed a Return Code is set. It can be 0 (terminated with no errors) or 1 (application error).
For more information on how to run order via Command Line refer to this section of the System Administration Guide.