User Prefs
SICS lets you set preferences that affect your daily working environment within the system. There are default values that affect the Create New Business wizard, the Find Business, Find Claims window, and Accounting Worksheets. Your default values for the classification on the Create New Business wizard depend on the class of business, base company, and reporting unit(s). Setting these default values can speed up the registration process for you, but they are different for all users, which is why each user can set them individually. All defaults are set in the User Preferences window, which is accessed by selecting User Preferences from the File menu on the SICS desktop. (This window can also be accessed by clicking the User Preferences icon in the System Administration folder.)
To make changes to the User Preferences, you must first select the ‘Edit’button from the area that requires change.
Copy User Preferences from Another User #
Setting up user preferences, e.g. for a new user, you may save time by starting with copying the preferences from an existing user:
- Start the SICS Desktop
- Select System Administration, or
- Select the File menu
- Select User Preferences
- Select the File menu
- Select Copy User Preferences from another User
Search for User Preferences #
The user preferences are divided into categories based on the functionality that they affect. These categories are listed alphabetically. Each category is further categorised in sub categories, again based on the affected functionality. The categories are expandable in a tree view, which you can expand to the lowest level.
Search for a specific user preference
- Start the SICS Desktop
- Select System Administration, or
- Select the File menu
- Select User Preferences
- In the top text field, start to write the word you want to find, e.g. " busin…." or “perio…”. Once you have entered three characters, the system lists only categories containing preferences that match the search text
- Enter more characters, and the results will be narrowed down.
Define Default Base Companies Settings #
In the base companies category you can set default values which affect the create and find features in SICS.
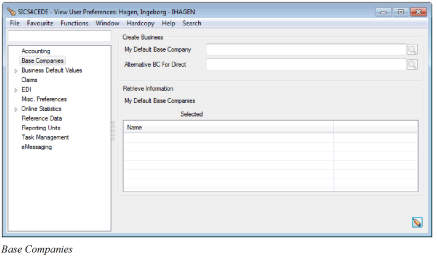
Create Business #
Define default base company to be used when creating new business
- From the SICS Desktop, select System Administration and then User Preferences. Alternatively, select User Preferences from the File menu on the SICS Desktop
- Select Base Companies
- Open in edit mode and select wanted base company
- If wanted, select an alternative base company for direct businesses
- Press OK
My Default Base Company
Creating new business, SICS automatically defaults the selected base company as reinsurer/insurer
Values: All base companies registered in SICS are available
Validations: Only one base company can be selected
Relevant when: Main part of your work is linked to a specific base company
Alternative BC for Direct
Creating new direct business, SICS automatically defaults the selected base company as insurer
Values: All base companies registered in SICS are available
Validations: Only one base company can be selected
Relevant when: Main part of your work with direct businesses is related to another base company than the one selected as My Default Base Company
Retrieve Information #
You use the Retrieve Information/My Default Base Companies when you only wantto retrieve information for one or a few of your company’s registered base companies. An example of use could be when your company operates worldwide and youonly want to find the information for your location.
Define base companies from which you want to retrieve information such as e.g. claims and businesses
- From the SICS Desktop, select System Administration and then User Preferences. Alternatively, select User Preferences from the File menu on the SICS Desktop
- Select the Base Companies tab
- Open in edit mode and move wanted base companies from the available to the selected list
- Press OK
My Default Base Companies
When you only want to retrieve information for one or a few of your company’s registered base companies, you select the companies relevant e.g. to your location.
SICS extracts information for selected base company(ies) for the following features:
- Find Business
- Find Claims
- Business Partner Ledger
- Business Partner Financial Ledger
- Create Accounting Orders and Periodic Functions. When orders and periodic functions have Base Company as Classification filter criteria then these Base Companies from the My Default Base Companies are defaulted here.
Values: All base companies registered in SICS are available
Validations: Multiple base companies can be selected
Eelevant when: Most of your work is related to one or a few of your company’s registered base companies
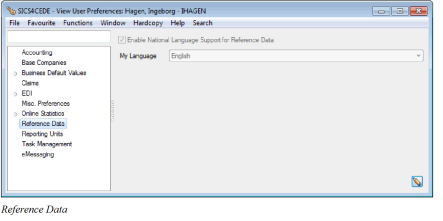
Enable National Language Support #
The Reference Data category in the User Preferences window lets you enable national language support.
Activate the language support for your user
- From the SICS Desktop, select System Administration and then User Preferences. Alternatively, select User Preferences from the File menu on the SICS Desktop
- Select Reference Data
- Open in edit mode and select Enable National Language Support for Reference Data
- Select wanted language from the drop down
- Press OK
Enable National Language Support for Reference Data
Selected: When selected, National Language Support (NLS) is “on.” You can then use the drop-down list to select a language. Each individual user can specify which language to use. All reference data values are then displayed according to the chosen language for that user.
Cleared: National Language Support is not enabled, all reference data values are shown according to their fixed names (not any language dependent names).
My Language
Your preferred language in which reference data values are displayed
Values: Customized by your company, e.g. English, French, German, Norwegian etc.
Validations: Only available if parameter Enable National Language Support for Reference Data is selected
Relevant when: You prefer to have reference data values displayed in a specific language
Define Default Misc. Preferences #
SICS is set up with some default behaviours. Some of these behaviours can be changed to suit your own preferences.

Set your own preferences for SICS behaviour
- From the SICS Desktop, select System Administration and then User Preferences. Alternatively, select User Preferences from the File menu on the SICS Desktop
- Select Misc. Preferences
- Open in edit mode and select, if wanted, Document User Group
- If wanted, select other preferences
- Press OK
Document User Group
Documents produced by you will be stored in the folder defined for the selected document user group instead of in the default file.
Values: Customized by your company. Document User groups are defined in System Parameter Maintenance /Document Handling
Validations: Only one Document User Group can be selected
Relevant when: Your company want to store all documents produced by a certain group of employees in the same folder
Open Properties Automatically if Unique Match (Find Windows)
Selected: When you do a search in a Find: window, and there is only one match to this query, the properties window opens automatically
Not selected: If only one match to the query, object found must be manually opened
Relevant when: When only one object matches your search, you assume this is the wanted object and you save some time by having the found object opened automatically
Transfer Automatically if Unique Match (Find-and Transfer Windows)
Selected: Instead of using the Transfer option on the pop-up menu in the display list, the system automatically transfers the object if the match is unique. This option applies to the find-and-transfer feature which you can find in several windows and options within the system: For example, the Find: Business, Create New Business, and Group Business windows.
Not selected: No automatic transfer even if only one object is found
Relevant when: When only one object matches your search, you assume this is the wanted object and you save some time by having the found object automatically transferred
Allow Saving of Container Changes (Column Changes)
Selected: You can change and save your personal settings in some of the Find windows. In the pop-up menu (right mouse click in the display list’s heading) you get the following options; Save Settings, Delete Settings and Retrieve Settings.
Not selected: Changed column settings cannot be saved
Relevant when: You want to have your personalized column settings
Show Reference Data Type Comment as Hover Help on Drop-Downs Lists
Selected: A ToolTip (in SICS called Hover Help) will appear on most drop-down lists showing reference data. Your SICS System Administrator has to define a comment in the Notes field in the Edit Reference Data window for a selected data type before you can see the Hover help in SICS.
Not selected: No Hover Help pointing at reference data drop downs
Relevant when: You want to be able to view more details about the reference data values without having to open Reference Data Maintenance
Show Currency Name As Hover-Help on Currency Drop-Down Lists
Selected: Hover Help (a ToolTip) will appear on all Currency drop-down lists. The Hover Help shows you the full name of the currency that you have chosen.
Not selected: No Hover Help pointing at currency drop downs
Relevant when: You want to see the full name of the selected currency
Default Basic Status for Find Assumed/Administrative Business
Selected: The selected status(es) are defaulted in Find Business (Period/Status tab)when searching for Assumed or Administrative Businesses. You can select Definite or Pending or both.
Not selected: All statuses are included in the search, i.e. none are defaulted
Relevant when: You want to limit the search in Find Business to Definite and/or Pending businesses only
Confirm Cancel (Edit Window)
Selected: Cancelling or closing an edit window, the system gives you the following message “Unsaved changes will be lost. Do you want to continue?”
Not selected: No confirm message is given when closing or cancelling an edit window
Relevant when: You feel the confirmation when cancelling or closing an edit window is redundant
Always Open Window in Maximized Size
Selected: Opening a window in SICS, window is presented in maximized size.
Not selected: Windows are opened in standard SICS size
Relevant when: This feature is very useful especially if you often work with windows containing several columns that SICS cannot display in a default size window.
Do Not Display Hidden Estimation Items
Selected: Estimation Items defined as hidden in Underwriters Estimates system parameters are not displayed on the Pricing and Adjusted Estimates on the business. When the Multi GAAP module is active, the same applies to Period Estimates.
Not selected: Items defined as “hidden” are displayed
Relevant when: Not all estimation items are necessary to display in Underwriters Estimates condition
Open Notifiers Automatically on Login
Selected: SICS always opens the Notifier window every time you log in to SICS
Not Selected: Notifier is not automatically opened upon login
Relevant when: You want to see if there are any new changes in the Notifiers on a regular basis
Use Customized Desktop on Login
SICS gives you the option to set the system so it, by default, always use Custom Desktop every time you log on to SICS.
Configure Custom Desktop: Please see chapter Custom Desktop for details.
Use Workbench
Selected: The Workbench presents treaties and cedent’s programs per cedent. This offers especially underwriters a good overview of treaties from the same cedent. Even if workbench is not displayed on your desktop, SICS will create and store items that would have been displayed if workbench was displayed. Configure the desktop to display the workbench, all stored items are displayed.
Not selected: No values are added to the workbench, even if the workbench is displayed on your customized desktop.
Relevant when: Underwriters most often see reinsurance treaties from the same cedent and covering the same portfolio as one program. The workbench facility helps the underwriter to keep a good overview and to maintain information per cedent
Attach Viewed Businesses to Workbench
Selected: When the workbench facility is in use, by selecting this parameter, viewed treaties and cedent’s programs are automatically added to your workbench.
Not selected: Only updated treaties and cedent’s programs are added to your workbench
Relevant when: You want your workbench to display all treaties and cedent’s programs viewed by you
Default Type of Name for Find Business Partner
Companies you have a relation with can be registered with different type of names. Searching for existing business partners, you can set up the system to search on more that just the defaulted ‘current’ name.
Values:Current
Former
Alternative
Relevant when: Before e.g. registering business partner, you want to make sure this relationship does not already exists. By having a default selection that covers more types of names you widen your search.
Default Status for Find Business Partner
A business partner ’s status indicates if the company is valid and is allowed to make business agreements.
Values: Active
Inactive
All
Relevant when: Searching for business partners you want to include as default e.g. both active and inactive companies (i.e. ‘All’) and not only ‘Active’ companies as is the system default
Include all shares in placement list
Selected: All shares of a placement of an outward cedent’s contract or excess of loss protection for common account will be displayed on the placement list.
Not selected: The placement list shows the shares only from the latest status of each participant (current share). For example, at definite stage, only written and signed share are displayed while offered share, which is normally given at an earlier stage, is not.
Relevant when: You always want to see any share entered on the share conditions of the participant.
Show Long Description
Selected: Business’ Section Overview display details such as external identifier, status and currency for each section, cession and declaration
Not selected: Only section/cession and declaration name is displayed in business' section overview
Relevant when: You want to minimize the information displayed
Default Section Overview Structure Column Width
Selected: The column width of the ‘Structure’ column (the first column) on a contract’s Structure tab are set according to the number of pixels entered. (To get the equivalent in characters, this number should be divided by 8-10)
Default value: 155
Values: Number
Min 1, Max 1000
Not selected: Field cannot be empty. If number is deleted, default value is automatically set.
Relevant when: You want to make sure that all details about a section/cession or declaration is displayed
Simplified Overview when Sections, Cession and Declarations more than
Selected: Business' Section Overview only displays the business' structure (sections, cessions and declarations) and no business conditions, when number of sections/cessions and declarations exceeds the number entered.
Note! When the Section Overview is opened in a simplified view, the Edit button is not available.
Not selected: Business' Section Overview displays business conditions for all sections/cessions and declarations
Relevant when: The purpose of this parameter is to avoid a slow response time for showing the Cession list for a business with a large number of cessions. SICS uses less time to generate the simplified view.
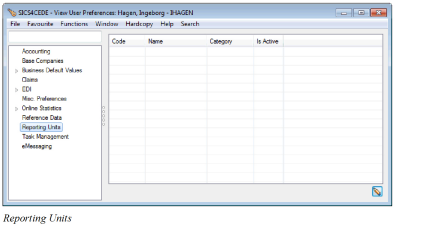
Define Default Reporting Units #
The Reporting Units category in the User Preferences window lets you add and/or remove reporting units that are used as defaults when creating a new business.
Register reporting units to be defaulted when creating new business
- From the SICS Desktop, select System Administration and then User Preferences. Alternatively, select User Preferences from the File menu on the SICS Desktop
- Select Reporting Units
- Open in edit mode and select Add/Remove Reporting Units from the pop-up menu
- Select wanted Category from the drop-down list
- Move wanted reporting unit(s) from the available to the selected list.
- To remove reporting units, move wanted reporting unit(s) from the selected to the available list
- Press Save
- Press OK
Code
Unique identification of a reporting unit
Values: Text field
Minimum number of characters: 1
Maximum number of characters: 12
Validations: Field cannot be empty
Name
Unique name often describing the reporting unit
Values: Text field
Minimum number of characters: 1
Maximum number of characters: 80
Validations: Field cannot be empty
Category
Used to indicate in which area the reporting unit belongs
Values: Customized by your company, e.g. Segment Code, Profit Centre, Person
Validations: Only one category can be selected
Is Active
Indication whether the reporting unit is active or not
Values: Yes/No
Validations: Field cannot be empty
Define Business Default Values #
In the Business Default Values category, you may set up defaults that are used when you for example create a new policy or search for an existing one.
My Default Values #
To ease the registration of a new business in SICS, you can pre-define a set of default business values.

- From the SICS Desktop, select System Administration and then User Preferences. Alternatively, select User Preferences from the File menu on the SICS Desktop
- Select Business Default Values
- Open in edit mode and select wanted Level of Business, Type of Business and Life Cycle Status
- Select, if wanted, Coverage Tree View, Default Base Currency and Default Domicile of Insured
- Select wanted business wizard layout. Pages is defaulted
- In the Coverage section enter, if wanted, e.g. Main Class and Class of Business to be defaulted
- In the Method section enter, if wanted, type of participation, e.g. Excess of Loss or Quota Share. Values available correspond to the Type of Business selected as default
- Press OK
Level of Business
Creating new business, selected level of business is defaulted on the wizard’s first page
Values: None, Administrative Business, Assumed Business, Assumed Business Template, Cedent Program. Cedent’s Contract, Insured’s Contract, Intermediary Placement, Joint Contract, Master Agreement, Other Reinsurer’s Participation, outward Cedent’s Contract, Own Retention, policy Ceded, Policy Light Business, Portfolio Program, Protection Program, Reinsurance Program, Retrocessionaire’s Participation, Unplaced Share, XL CA Administrative, XL CA Inward, XL CA Outward
Relevant when: Most new contracts registered by you are for the same level of business and you want to default this value in the create new business wizard
Type of Business
Creating new business, selected type of business is defaulted on the wizard’s first page
Values: None. Facultative Program, Non-Prop Direct, Non-Prop Facultative, Non-Prop Treaty, Not Specified, Proportional Direct, Proportional Facultative, Proportional Treaty, Treaty Program
Validations: Values available depend on level of business selected
Relevant when: Most new contracts registered by you have the same type of business and you want to default this value in the create new business wizard
Life Cycle Status
Creating new business, selected life cycle status is defaulted on the wizard’s first page
Values: None, Authorized by Reinsurer, Declined to Quote, Inactive Agreement, Informational Agreement, New Agreement Offered, New Quote Requested, Offer Accepted, Offer Declined, Quote Not Taken Up, Quote Taken Up, Quoted, renewal Offered, Renewal Quote Requested
Relevant when: Most new contracts registered by you have the same life cycle status and you want to default this value in the create new business wizard
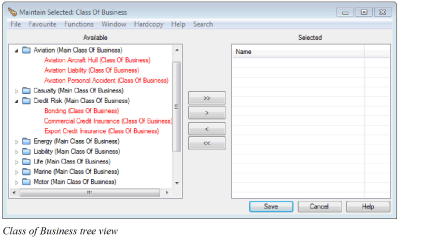
Coverage Tree View
Selected: Creating new business, on the Classify Business section/page, classification types belonging to the class of business hierarchy are displayed in a tree structure. The same classification types are displayed in a tree structure also in the Coverage section/ My Default Values.
Cleared: Classification types belonging to the class of business hierarchy are not displayed in a tree structure.
Relevant when: You prefer to display the class of business hierarchy in a tree structure instead of the classic view
Default Base Currency
Selected: System defaults the main currency in the new business wizard to the base currency of My Default Base Company in user preferences. If no base currency is recorded for defaulted base company or if no default base company is selected, main currency is set to the default base currency defined in the system parameters.
Cleared: No main currency is defaulted in the new business wizard
Relevant when: Most new contracts registered by you have the same main currency as your selected default base company
Default Domicile of Insured
Selected: Creating a new direct or facultative business (any level), the insured’s domicile country is defaulted as “Country” in the new business' coverage
Cleared: Creating new business, insured’s domicile country is not defaulted as “Country” in the coverage section
Relevant when: Most new direct and facultative contracts registered by you have the same country as the selected insured’s domicile country
Wizard layout: Pages
All business wizards, e.g. for creating new contracts, placing contracts or renewing contracts, are in a “next-page” style. Which pages are shown depend on basic information entered on the first page and on your system administrator’s wizard pagesconfiguration. You can navigate in the wizard using the “Next” and “Previous” buttons.
Values: Selected/ Not selected
Default: Selected
Validations: Automatically deselected if Scrollable layout is selected
Relevant when: You prefer the “next-page” style to be your wizard layout
Wizard Layout: Scrollable:
Most SICS business wizards are in an ‘all in one page’ style, organizing terms and conditions as collapsible sections. The scrollable wizards are the wizards for creating new contracts from scratch, updating existing contracts, changing life cycle status and renewing contracts. The rest of the wizards will be in a ‘next page’ style. In the scrollable wizards, the top most section corresponds to the first page of the “next -page” style wizard, and the subsequent section is not displayed until you have entered sufficient information in the first section, etc. You can navigate in the wizard using the vertical scroll bar.
Values: Selected/ Not selected
Default: Not selected
Validations: Automatically deselected if Pages layout is selected
Relevant when: You want a more flexible navigation e.g. in the create new business wizard, i.e. you can navigate up and down in the wizard without loosing already registered details
Coverage
Registering new businesses in SICS, you can set up the system to default several values in the coverage area.
Values: All business coverage values in the system, both system defined and values customized by your company. Examples of values:
- Reinsurance Product
- Main Class of Business
- Class of Business
- Sub Class of Business
- Perils
- Origin of Business
- Additional Classifications
- Fund Type
Validations: In addition there is a dependency between values in the coverage section, e.g. class of business depend on main class of business selected.
Relevant when: Setting up defaults that cover the majority of your work is time efficientand reduces the chances of errors when registering new businesses.
Method
Registering new businesses in SICS, you can set up the system to default the method of participation.
Values: Values available depend on your selection for Type of Business. Examples of values:
- Quota Share
- Surplus
- Open Cover
- Excess of Loss
- Stop Loss
Validations: Values available depend on type of business selected
Relevant when: Setting up defaults that cover the majority of your work is time efficient and reduces the chances of errors when registering new businesses.
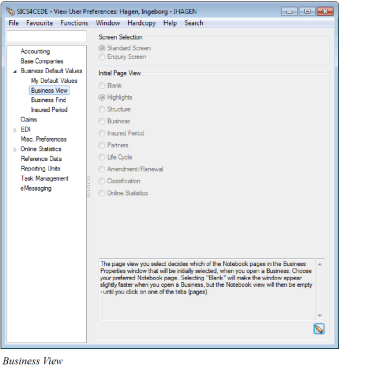
Business View
On the Business View, you select which tab you prefer to view first when you open a contract.
Decide how you want your business to be presented when first opened:
- From the SICS Desktop, select System Administration and then User Preferences. Alternatively, select User Preferences from the File menu on the SICS Desktop
- Expand the Business Default Values category
- Select Business View, and open in edit mode
- Select Standard Screen (defaulted) or Enquiry Screen
- If Standard Screen, indicated which of the business properties tab should be the opening window
- Press OK
Screen Selection #
Standard Screen: When you open your business, the first window the system shows is the business properties. Which of the business properties tab is presented, depends on your selection in Initial Page View (see below). Standard Screen is the default selection.
Enquire Screen: When you open your business, the first window the system shows is a detailed business overview with information from multiple SICS functions, all within one single window. In addition to the business properties, it shows information like claims list, insured period(s) overview and online statistics.
Initial Page View: Indicate which business properties sub tab you prefer to view first when you open a contract. The “Blank” option opens the business without loading the data for each tab until you click that particular tab. (This makes performance faster in the system.)
Note! Not all of the named tabs appear in all of the business windows. If you select a tab as the tab for which you want information to appear first, and that tab does not exist in the business you open, then the system defaults to the next tab.
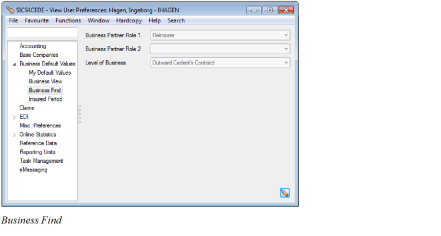
Business Find #
Many users have their majority of work on one specific level of business.
Other users may want to find businesses where a certain business partner has the role of e.g. Cedent.
Set up values to be defaulted in Find Business
- From the SICS Desktop, select System Administration and then User Preferences. Alternatively, select User Preferences from the File menu on the SICS Desktop
- Expand the Business Default Values category
- Select Business Find, and open in edit mode
- Select, if wanted, Business Partner Role 1 and 2
- Select, if wanted, Level of Business to be defaulted
- Press OK
Business Partner Role 1
Role selected is defaulted to the Role field in the find business facility.
Values:None
Administrator
Agent
All
Appointed Agency
Appointed Agent
Broker
Cedent
Fire Brigade Co.
Former Broker
Former Cedent
Former Original Cedent
Former Reinsurer
Insured
Mortgagee
Original Cedent
Original Reinsurer
Other Broker
Other Cedents
Other Reinsurer
Potential Cedent
Pre-Producer
Producer
Reinsurer
RI Broker
Relevant when: For example, if you only want to find businesses where the business partner’s role is Cedent, you select Cedent from the drop-down list and SICS automatically sets Cedent as default in the role field when you open the find business window.
Business Partner Role 2
Role selected is defaulted to the Role 2 field in the find business facility.
This field lets you add a second role for your business partner.
Values:None
Administrator
Agent
All
Appointed Agency
Appointed Agent
Broker
Cedent
Fire Brigade Co.
Former Broker
Former Cedent
Former Original Cedent
Former Reinsurer
Insured
Mortgagee
Original Cedent
Original Reinsurer
Other Broker
Other Cedents
Other Reinsurer
Potential Cedent
Pre-Producer
Producer
Reinsurer
RI Broker
Relevant when: If some of your company’s business partners have two roles, for example, both cedent and broker, you can select Cedent in the first drop-down list and Broker in the second. SICS automatically sets Cedent as default in the Role 1field and Broker in the Role 2 field when you open the find business window.
Level of Business
The value selected in this field will be defaulted in the level of business field in Find Business.
Values: None
Assumed Business
Cedent’s Contract
Outward Cedent’s Contract
Retrocessionaire Participation
Intermediary Placement
Protection Program
XL CA of Outward
XL CA of Inward
Administrative Business
Unplaced Share
Portfolio Program
Master Agreement
Reinsurance Program
Cedent’s Program
Assumed Business Template
Insured’s Contract
Own Retention
Joint Contract
Relevant when: If the majority of you work e.g. is on outward cedent’s contracts, you select Outward Cedent’s Contract as your default level of business. This will then override the system default.
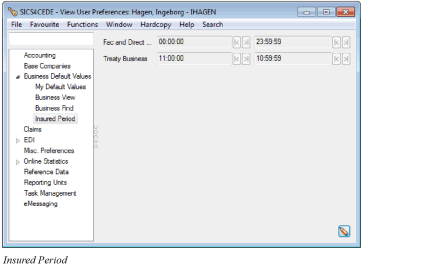
Insured Period
Some users may work in an area where the standard start and end time of the insured period differ from the insured period set as default for the entire system (system parameter settings).
Set up insured period from and to time to be defaulted in create new business wizard
- From the SICS Desktop, select System Administration and then User Preferences. Alternatively, select User Preferences from the File menu on the SICS Desktop
- Select the Business Default Values category
- Select Insured Period, and open in edit mode
- Select, if wanted, From and To Time for Fac. and Direct Business and/or Treaty Business
- Press OK
Fac and Direct Business
Selected: From and to time entered will be defaulted in the create new business wizard when creating new direct or facultative business. The time entered here has priority over the system parameter settings.
Cleared: From and to time set up in system parameter maintenance (Business/ Insured Period) are defaulted. If no default from /to time is given, system automatically gives:
From time:00:00:00
To time:23:59:59
Relevant when: The area in which you have the majority of your work have a different standard from/to time then the one set up in system administration
Treaty Business
Selected: From and to time selected will be defaulted in the create new business wizard when creating new treaty business. The time entered here has priority over the system parameter settings.
Cleared: From/to time set up in system parameter maintenance (Business/ Insured Period) are defaulted. If no default from /to time is given, system automatically gives:
From time: 00:00:00
To time: 23:59:59
Relevant when: The area in which you have the majority of your work have a different standard from/to time then the one set up in system administration
Define Default Accounting Settings #
The Accounting category in the User Preferences window lets you select default values that are used, for example, on the business ledger.
To set the accounting user preferences:
- Select ‘User Preferences’ from File menu on the SICS desktop or from the System Administration menu.
- Select the Accounting category and open in edit mode
- Set the required accounting preferences.
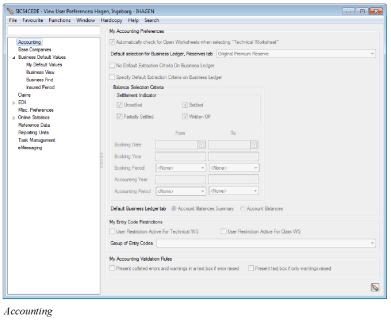
Automatically check for Open Worksheets when selecting “Technical Worksheet”: When you’re making manual bookings and you want the system to automatically show you the open worksheets on the business, you can select the Automatically check for Open Worksheets when selecting “Technical Worksheet” parameter If you don’t select the parameter, the system doesn’t search for any open worksheets and displays an ‘empty’ Select Open Worksheet window.
Default selection for Business Ledger, Reserves tab: You use this option when you want to set the default view for the type of reserves shown on the Reserves tab on the business ledger. For example, always show the Original Premium Reserve details as per default.
No Default Extraction Criteria on Business Ledger: On Account Balances tab on a business ledger some criteria for searching the balances are user defined when you click Find Now. If you want SICS to find all balances as per default (i.e. no user defined extraction criteria is selected), you select the No Default Extraction Criteria on Business Ledger check box.
If you not select the check box, the following criteria are pre-selected by the SICS: Only Unsettled and Partially Settled balances are retrieved. Only Balances with a Booking Date between today’s date and the 1st of January last calendar year. Only Balances with a Booking year equal to or higher than current calendar year less 1.
Specify Default Extraction Criteria on Business Ledger: This option is only enabled if the above parameter, No Default Extraction Criteria On Business Ledger, is not selected. By selecting this new parameter the system enables the Balance Selection Criteria (same criteria as you will find on the Business Ledger) and by entering wanted criteria here, the system will use this as default Balance Criteria on the Business Ledger. These default Balance Criteria can be modified before selecting Find Now on the Business Ledger.
Default Business Ledger tab: By selecting on of the options in this field, you can choose to show the Account Balances tab or the Account Balances Summary tab as default view when you open a business ledger on a business.
Automatic Calculation Sum All Unsettled Amounts On Business Ledger: By selecting this option, the Sum All Unsettled Amounts field on the Account Balances tab on the Business Ledger will be calculated automatically when opening the business ledger. In case you are working with large business ledgers, with a large number of bookings, e.g. on prop treaty OCC ledgers, you can get a better performance by switching this field Off. By doing this the Sum All Unsettled Amounts field is not automatically calculated. Instead a Calculate button will appear beside the field so that you can decide when this sum should be calculated.
Define Default Entry Code Restrictions Settings: When you are making manual bookings and you only use a specific set of Entry Codes, you can define the SICS in such a way that it only provides a list of Entry Codes relevant for you and your work.
For example, if you are booking on Facultative Business, you need a certain list of Entry Codes. If you however book on Treaty Business, you need a list of different and several more Entry Codes.
To set the entry codes:
- Select User Preferences from File menu on the SICS desktop or from the System Administration menu.
- Select Edit from the ‘Menu’ button.
- Select the Accounting tab.
- Define the type of Worksheet for which the restriction is valid by selecting one of or both of the following check boxes:
- User Restriction Active For Technical WS
- User Restriction Active For Claim WS
- Select a predefined Entry Code Group containing the Entry Codes relevant for your manual bookings from the drop-down list.
Note! The Entry Code Groups are defined in the Entry Code Group Category Entry Code User Restriction. For further information about Entry Code Groups, refer to the Handle Reference Items chapter in the System Administrator’s Guide.
Field description 2. - My Entry Code Restrictions
| Field | Description | Location |
| User Restriction Active for Technical WS | Activate or inactivate the Entry Code Restriction when you are making bookings in Technical Worksheet.
Values:
Selected
Cleared
Functional Impact:
Entry Code field in Technical Worksheet
Mandatory: No | |
| User Restriction Active for Claim WS | Activate or inactivate the Entry Code Restriction when you are making bookings in Claim Worksheet.
Values:
Selected
Cleared
Functional Impact:
Entry Code field in Claim Worksheet
Mandatory: No | |
| Group of Entry Codes | List of Entry Code Group Names for which Entry Codes has been defined.
Values:
Entry Code Group
Derived from: Entry Code Groups defined for the Entry Code Group Category Entry Code User Restriction
Functional Impact: The list of Entry Codes available for you in Technical-/Claim Worksheet
Mandatory: N | |
Present collated errors and warnings in a text box if error raised: If the corresponding system parameter is checked then you may turn off this functionality if you do not wish to have the separate text box presented listing errors. (See Validation Rules in the System Administrator’s Guide for more information.) Present text box if only warnings raised: If the corresponding system parameter is checked then you may turn off this functionality if you do not wish to have the separate text box presented listing warnings only.
Define Default Claims Preference #
The Claims category in the User Preferences window lets you select default values related to the claim handling in SICS.
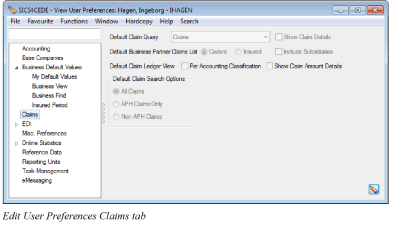 ‘Default Claim Query:‘In this drop-down list you can select the query type for a claim that you want to use in Find Claims. You can define default queries, which override the query set by your System Administrator.
‘Default Business Partner Claims List: ‘When you open claims list for a business partner, you can select to default following values:
‘Default Claim Query:‘In this drop-down list you can select the query type for a claim that you want to use in Find Claims. You can define default queries, which override the query set by your System Administrator.
‘Default Business Partner Claims List: ‘When you open claims list for a business partner, you can select to default following values:
‘Cedent or Insured:‘Indicator of whether the claims list should display claims linked to businesses on which the business partner has the role as Cedent or Insured.
‘Include Subsidiaries:‘Indicator that the claims list will include claims linked to the business partner’s subsidiaries. Include Subsidiaries will only be defaulted on claims list if your business partner is an Owner of one or more subsidiaries.
‘Default Claim Ledger View:‘When you select the checkbox Per Accounting Classification, the ‘View Figures Per Accounting Classification’ flag is selected on the claim ledger by default. When this flag is selected, you can view claim bookings per accounting classification.
‘Default Claim Search options:’ The ‘All Claims’, ‘APH’ (asbestos/pollution/health hazard), ‘Claims Only’ and ‘Non APH Claims ‘-options determine the default extract in the Find Claims: window.
Define Default EDI Preferences #
The EDI category in the User Preferences window lets you select default values related to the EDI handling in SICS
‘Bureau and Batch’.
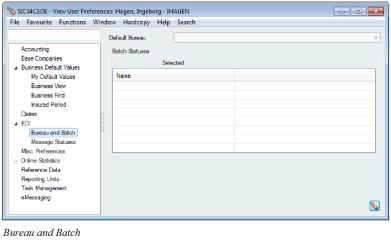 ‘Default Bureau:‘Here you specify the batch type to be displayed as default value in the Find:EDI Batches window.
‘Batch Statuses:‘Batch statuses to be displayed as default values in the Find:EDI Batches window (Statuses tab). ‘Unparseable’ should not be selected as default with any other status.
‘Message Statuses’
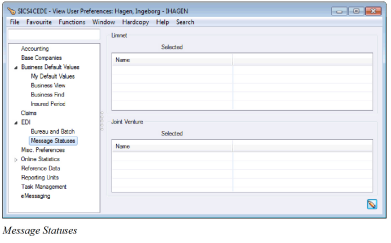 ‘Limnet Statuses:‘Here you can select the default message statuses to be shown in the Find:EDI Limnet Messages window.
‘JV Statuses:‘This option allows you to choose the default message statuses to be shown in the Find:EDI JV Messages window.
Define eMessaging Preferences #
Users can set preferences for the Find message search, and for the default stylesheet used to render messages in View message. The user preferences window opens in view mode. To update the preferences, click on the edit button.
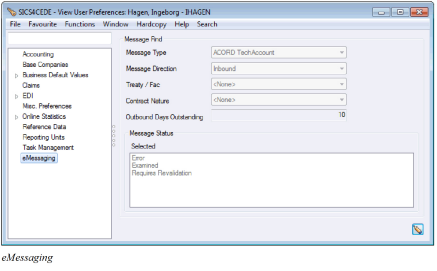
Message Find #
The following search options can be defined for each user:
Message type: Narrows the search to a particular message type.
Values:
- ACORD Tech Account
- ACORD Acknowledgement
- Unknown
- <none.
Selecting <none> will show all message types
Treaty/FAC: This is an ACORD code used to distinguish between different types of business.
Values:
- Treaty
- FAC
- Direct
Contract Nature: This is an ACORD code used to distinguish between
- Non-proportional
- Proportional
Values:
- Excess Cession Treaty
- Non-proportional
- Proportional
Message Status: Determines which life-cycle statuses are returned by the search:
Values:
- Unprocessed
- Validated
- Error
- Discarded
- Examined
- Processed
- Generated
- Sent
Default:
- Error
- Examined
- Processed
Default Stylesheets #
On the view message window there is a tab that shows a rendered view of the message. This view is created using an xsl stylesheet, and shows a formatted version of the message. The stylesheets used to render each message type can be managed as a user preference. In the absence of a user preference, the system default is used instead.
Message Type: Each message type can have its own preferred stylesheet. Select the message type here.
Use Stylesheet: Select this option if you want to specify a user preferred stylesheet. Use the browse button to find the stylesheet required.
Use System default: Select this option if you want to use the standard stylesheet for the message set up in system parameters.
Define Default settings for Online Statistics #
The Online Statistics category in the User Preferences lets you select default settings for the Online Statistics. These settings will be used every time you open the Online Statistics, but can be changed in the Statistics view or in the Criteria Selection window.
Criteria #
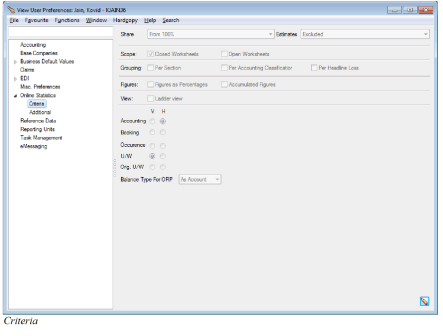
Share: Select which share condition that should be your default when you open the Online Statistics. Default is From 100%. Other options are For 100%, Ceded, Broker’s Order, Net of Gross and Order.
Estimates: Select whether or not Estimates should be included as default when you open the Online Statistics. Default is Excluded. Available options are Estimates to be Included, Excluded or Only to show Estimates
Scope: You can define if open worksheets should be included as default when you open the Online Statistics, or if only closed worksheets should be included. Default is Closed Worksheets selected.
Note! When the Online Statistics is opened from the Worksheet Closing window, the Scope always defaults to both open and closed worksheets, independent on the settings in your User Preferences
Grouping: Select one or both grouping levels if you want a default grouping to be applied when you open the Online Statistics. If both grouping levels are selected, the grouping will first be Per Section and then Per Accounting Classification within each Section. Default is no grouping selected.
Figures: Select Figures as Percentages or Accumulated Figures if you want this to be your default when you open the Online Statistics. Default is none of the options selected.
View: Select Ladder view if you want this to be your default view when you open the Online Statistics. Default is not selected.
Type of years: Select the type of year you want to be shown horizontally when you open the Online Statistics. Default is Accounting year, but you can also select Booking year, Occurrence year, U/W year or Orig. U/W year. If you have selected Ladder view, you can select both which type of year to be shown horizontally and which type of year to be shown vertically.
Balance Type For ORP: #
Select either As Booking or select As Account to be the default view when you open the Online Statistics for business with level of business Outward Retrocessionaire’s Participation (ORP). It is relevant only if you are working with prop treaty ORP business, since these two ledgers contain bookings created by the Retrocession Calculation order (As Booking) and by the Retrocession Account order (As Account), respectively.
For non-prop treaty ORPs and for facultative ORPs the As Booking and As Account ledger represents the same booking and this option is therefore irrelevant. With one exception; If the system parameter Maintain Balances for Fac. Retro. Particpants via TOF Order is activated, then this is also relevant for facultative ORPs.
Additional #
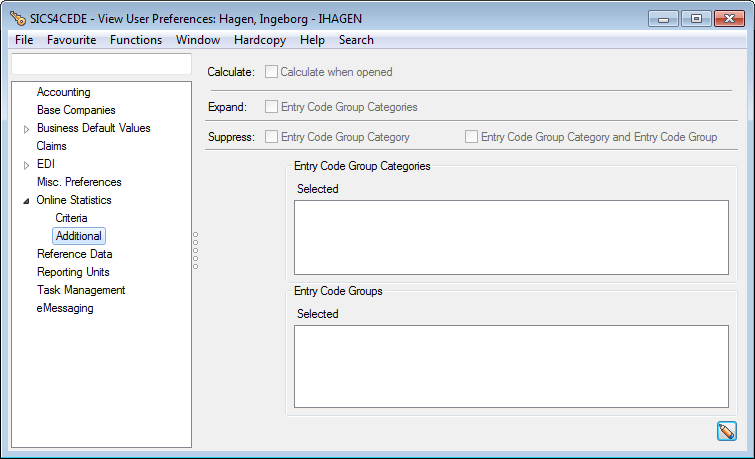
Calculate: Select Calculate when opened if you want the Online Statistics to be automatically calculated when opened. When this option is cleared, you have to press the Recalculate button in the Online Statistics window to calculate the statistics figures. Default is not selected.
Expand: You can select that all Entry Code Group Categories and/or Entry Code Categories should be automatically expanded down to Entry Code level when the Online Statistics is opened. The option to expand Entry Code Categories is only available if your system has been set up to show Entry Code Categories in the Online Statistics. Default is that none are selected.
Suppress: Select Entry Code Group Category or Entry Code Group Category and Entry Code Group if you want these levels to be suppressed by default when you open the Online Statistics. Default is that none are selected.
Entry Code Group Categories: The Entry Code Group Categories defaulted when you open the Online Statistics.
Values: Entry Code Group Categories set up to be included in the Online Statistics. No selection means that all Entry Code Group Categories set up to be included in Online Statistics will be shown.
Validations: Multiple values allowed
Entry Code Groups: The Entry Code Groups defaulted when you open the Online Statistics.
Values: Entry Code Groups included in the selected Entry Code Group Category(ies).
No selection means that all Entry Code Groups included in Entry Code Group Categories defined to be shown in Online Statistics will be shown.
Validations: Multiple values allowed
Define settings for Task management #
The Task Management category in the User Preferences lets you select your preferences relevant for the Task Management module only.

Default Language
When user has selected a default language, a process created from a template will display descriptions and names in the language preferred by the user. This will only happen if the template has name and descriptions in the selected language.
Values: Customized by your company, e.g.:
- English
- French
- German
- Italian
- Norwegian
- Spanish
Default: None
Mandatory: No
Maintain Default Window Size #
After a you have resized a SICS window, you may save this as default initial size.
Set Default Window Size
- On the particular SICS window you have resized, select Window in the menu bar
- If you have the security permissions, you may now select save default window size. This size will be the default window size for this window for you
- If you have the appropriate security permissions, you maybe instead select save system wide default window size. This saves the default window size for this window for all the users of the system.
Remove Default Window Size
If there exists a default size for a window, you may remove it.
- On the particular SICS window you want to remove the default size from, select Window in the menu bar
- If you have the security permissions, you may now select Delete default window size. This removes the default window size for this window for you
- If you have the appropriate security permissions, you maybe instead select Delete system wide default window size. This option removes the default window size for this window for all the users of the system.
Update Default Window Size
If there exists a default size for a window, you may change it.
- Please resize the particular SICS window as you require
- Still on this window, select Window in the menu bar
- If you have the security permissions, you may now select Update default window size. This updates the default window size for this window for you
- If you have the appropriate security permissions, you maybe instead select Update system wide default window size. This option updates the default window size for this window for all the users of the system.
Organise Display Lists #
Sometimes it is difficult to find your business or claim in the display list. SICS provides many ways of searching, sorting, or finding your business partners, businesses or claims.
Several windows in SICS, e.g. Find Business Partners, Find Business and Find Claim, are customisable. You may for example, sort businesses by title or identifier, change the column view or copy of business information from display lists to Excel or other applications.
To open the viewing and sorting pop-up menu:
- Click the ‘Find Now ‘button in the Find: window.
- Point at the one of the column headings in the display list.
- Click the right-mouse button to open the pop-up menu.
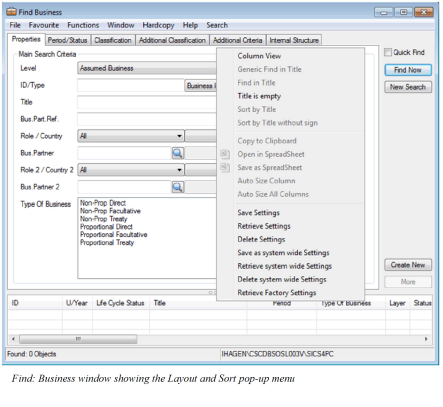
Column View #
The Column View option lets you change your column view, sort your businesses, or make advanced searches in your display list.
The organisation of these columns may be according to the initial settings of the system (factory setting). Your system administrator may however have done changes to these, reflecting the preferences of your organisation (system wide settings). With the right security permission, you may also do changes to these yourself, reflecting your preferences, and applicable only to you.
When you select this option, the Column View, Sorting & Extraction window appears:
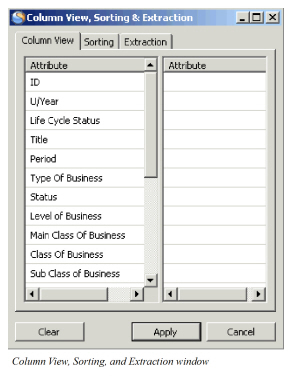
This window is divided into three tabs: Column View, Sorting, and Extraction.
Column View: This tab lets you organise your column view. You can change the order of the columns, or remove columns that you do not want to be shown.
You can find the names of your columns listed in the attribute list to the left.
To change the order of your columns:
- Select the attribute/column you want to move, for example, Life Cycle.
- Hold down the mouse button and drag the attribute to where you want to put it in the list.
- Click ‘Apply’.
The column order in the display list will automatically change.
To remove columns from your display list:
- Select the attribute/column you want to remove.
- Hold down the mouse button and drag it to the right-column in the dialog window.
- Click’ Apply’.
The column you selected will automatically be removed from the display list.
If you want the display list to show all columns (the default display), select Retrieve Factory Settings.
SICS automatically returns to its default settings the next time you open a new Find: window.
Note! If you select the Allow saving of Container Settings(Column Changes) check box on the Misc. Preferences tab in User Preferences, you can save the changes you have made to the display list. These settings will be valid until you clear them.
In addition, depending on your security permissions, you can also save the settings as ‘System Wide Settings’. These settings will apply to all users, unless the user has created and saved his/her own personal settings.
Sorting: You can rearrange entries in the display list by using the Sorting feature in SICS.
To rearrange the entries in your display list:
- Select an attribute/column you want your rows to be sorted by, for example, ID.
- Hold down the mouse button and drag the attribute to the left column.
- If you want to sort the list a descending order, double-click Yes in the Ascending list. The option changes to No.
If you want the display list to show the default list again, click ‘Clear’.
Note! You can sort your row further by adding another attribute to the list. SICS sorts your rows by the first attribute and then by the second.
Extraction: You can make more advanced searches in your list by using the Extraction feature in SICS.
To add a selection criteria:
- Click in the display list and then click your right-mouse button. A pop-up menu appears.
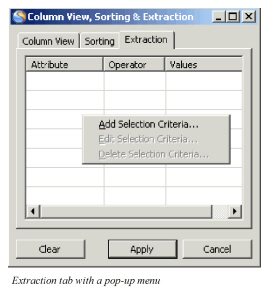
- Select the Add Selection Criteria option.
- The Selection Properties window appears.
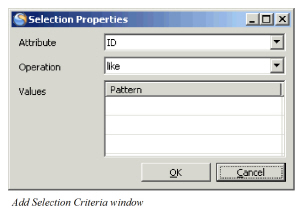
- From the drop-down list, select an attribute/column you want to search for. For example ID or Life Cycle.
- From the drop-down list, select an operation. For example, like or unlike.
- Click in the Values box and type in the value you want to search by and then click ‘OK’ and ‘Apply’. If you, for example, search by ID, the operation value is like and type in ‘11*’ in the Value box, all businesses with an ID starting with ‘11’ will be displayed.
Note! You can enter more then one single search criteria for your search by selecting the Add Search Criteria and entering new attributes and values.
You can also edit and delete selection criteria on the Extraction tab by selecting Edit Selection Criteria or Delete Selection Criteria from the pop-up menu.
Find in …. #
You can use this feature when you want narrow your search to contain a specific title, insured period or ID. For example, if you want to find all businesses with an ID greater than 4444.
To do a search using the Find in… option:
- In the display list, point at the heading of the column you want to use for finding your business.
- Click the right-mouse button and select Find in … from the pop-up menu. The Selection Properties window showing the values appears.
- Select the value you want to use.
- Select an operand, for example ‘=’.
- Click ‘OK’.
In the display list you will now see the businesses that matched criteria you set.
Generic Find in …. #
With this option you can to do a direct search using the values in the column you have selected. For example, if the business you are looking for is a non-facultative business, you type non-facultative in the information field. SICS will display all non-facultative businesses in the display list.
Note! This option only uses the operand ‘=’.
To do a search using the Generic Find in…option:
- In the display list, point at the heading of the column you want to use for finding your business.
- Click the right-mouse button and select Generic Find in… from the pop-up menu. You see the Information Required window.
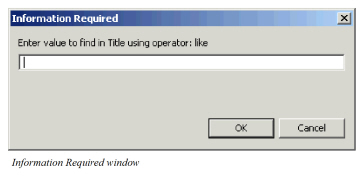
- Type a value for your search. You can use the exact value, for example, ‘DIR 111’. If you do not know the exact value, you can add an asterisk at the end of the value. SICS will then show all businesses starting with DIR 111 in the display list.
- Click ‘OK’.
In the display list you will now see the businesses that matched the criteria you set.
Sort by…… #
This option allows you to quickly sort the entries in a column in an alphabetical or ascending order. When you want to sort your list by a column, point at the one of the column headings in the display list and select Sort by… from the pop-up menu.
Copy #
The Copy facility enables you to copy information to Excel, Word, Lotus 123 or any Windows package. You can, from any display list’s pop-up menu select Copy. The content of the display list is copied to the clipboard, and you can simply paste it straight into an external Windows package.
Open in Spreadsheet #
This function is available from various SICS containers, e.g. Find Business, Find Worksheets, Find Claims, Insurable Object Cessions, Online Statistics.
Selecting “Open in Spreadsheet”, the contents of the table, e.g. Find Business, is opened in a default spreadsheet editor (typically Microsoft Excel). Headings, sorting, column sizing and cell colors are all copied into the spreadsheet.
Note: Changes made in the spreadsheet are not reflected back into the table
Save as Spreadsheet #
Save as Spreadsheet automatically saves the contents of the table without opening the spreadsheet first. User can save the spreadsheet at any wanted location, but depending on how your system is set up, spreadsheets may be directed to a default location.
Save Settings #
Note! This option is only available when you have selected Allow Saving of Container Changes (Columns Changes) check box in your User Preferences.
The initial column layout and sorting of the system (factory settings) can be changed and saved in various selected lists:
- Save Settings - saves a user’s personal settings. This option is available depending User Preferences set up.
- Save as System Wide Settings- settings apply to all users. This option is available depending on User Preferences set up and security permissions
As display lists in SICS vary, you must save settings per list. SICS uses the saved settings every time it opens a list. If both personal and system wide settings exist, the system searches for settings as per the following priority:
- Personal Settings
- System Wide Settings
- Factory Setting
Delete all Display List Settings #
You may have changed container settings in several places, e.g. changed the column order or width. At a later stage you may want to change these adjustments for yourself back to a default layout.
- Start the SICS Desktop
- Select System Administration, or
- Select the File menu
- Select User Preferences
- Select the File menu
- Select Delete All Container Settings for Current User
The system removes the user’s personal settings. This means:
- The system uses the System Wide Settings for all display lists where this is the default setting
- The system uses the Factory Settings for all display lists where this is the default setting