Handle Claim Accounting (Inward)
If you have created claims on your business, SICS allows you to handle the Claim Accounting on Claim Worksheets instead of the general Technical Worksheet. The Claim Worksheet differs from the Technical Worksheet since it is specific to a single Claim, or Claims for a specific business. Worksheet validations will consider the bookings made for each claim. Also, the Claim worksheet may or may not be transferred to the ledger; whereas the Technical Worksheet is always transferred to the ledgers. This enables you to book for example your proportional treaty accounts through the technical worksheet function, but at the same time maintain details about major losses through claims, and claim worksheets using the No Transfer To Ledger option.
All bookings pertaining to a claim, including V.A.T. and Reinstatement bookings can be recorded on the Claim Worksheet, and will then be displayed on the Claim Ledger. The majority of Claim Worksheets are either created manually, or generated from the From Ground Up functionality. In addition Claim worksheets can be generated from the EDI module (refer to the Handling EDI chapter in this user guide).
In the following the specific Inward Claim Accounting processes are described. Most of these processes will also apply for manual Outward Claim Accounting. The general accounting processes (for example Finding Worksheet) are described previously in this chapter.
Create a Claim Worksheet #

Claim Worksheets can be created on all types of claims, regardless of the Transfer to Ledger indicator, or the Claim’s disposition. However, there are certain requirements.
Requirements #
In order to be able to create a claim booking; there are certain requirements that must be fulfilled. They are:
- The Business and Insured Period must be open for booking; the Cease Accounting check box on the Insured Period must be cleared. Refer to Handle Business Life Span chapter in the User Guide
- The Claim must be Active.
- The Claim’s status must be Open.
If the claim is linked to a placement of a Joint Contract, you must furthermore perform all manual accounting (not generated through EDI) from the Administrator’s Claim. From Ground Up claim accounting is not enabled for these claims.
The Business must of course meet the requirements for Claim Creation. Refer to the Handle Claims chapter in this guide for further details.
If the claim is linked to a Headline Loss and you are using the Event IBNR functionality, and the parameter “Mandatory Link When Event IBNR Group on Linked Headline” is not activated, the claim must also be linked to an Event IBNR Group on all sections. If you are using the Event IBNR functionality, and the parameter “Mandatory Link When Event IBNR Group on Linked Headline” is also activated, the claim must also be linked to an Event IBNR Group on all sections, only when the linked Headline has Event Groups defined. If Event IBNR Group is valid for single currency only, the link must be defined for all existing claim ledger currencies.
If claim Bdx functionality is in use, and the claim is linked to more than one business, all of these must have the same Claim Bdx indicator.
Create a (Manual) Claim Worksheet from Business #
- Select the Claim Worksheet button on the Navigation bar.
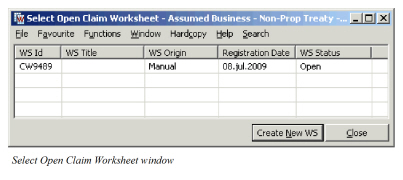
- If open claim worksheets exists for this business, the Select Open Claim Worksheet window is displayed.
- Select Create New WS or select New from the pop-up list.
Create a (Manual) Claim Worksheet from Claim Ledger #
- Select New Adjustment from the Claim Ledger.
- If the Claim is marked as an “Early Claim”, confirm that you want to create a booking. If the claim’s ‘FGU Indicator’ is activated, confirm that you want to create a manual worksheet.
- If open claim worksheets exist for this claim-to-section link, the Select Open Claim Worksheet window listing the open worksheets is displayed.
- Select New or Create New from the pop-up list.
Create a (Manual) Claim Worksheet from Find Worksheet #
- Select New Claim Worksheet from the pop-up list.
- The system opens the Find Claim window. Enter the Claim ID and/or other necessary search criteria in order to find the required claim.
- Double click or select Transfer from the pop-up list.
- If the claim is marked as an “Early Claim” or if the claim’s FGU indicator is activated, confirm that you want to create a booking.
Create From Ground Up Claim Worksheet #
- Open the From Ground Up Recording window of an Individual Claim.
- Select Create Claim Worksheet or Create Worksheet with Zero Adjustment from the menu in the lower right corner. The first option is only enabled if the From Ground Up Advisory has generated Adjustments.
(Refer to the From Ground Up Handling in the Claims chapter for further details about the From Ground Up functionality.) The second option is only enabled if the Incurred amount = > lowest priority of the linked sections, and only when current advisory does not result in any adjustments. 3. If the Claim is marked as an “Early Claim”, confirm that you want to continue with the booking. 4. If the From Ground Up adjustments should be partly transferred to the ledger, and partly not transferred, the system open the Select Open Claim Worksheet window with the two generated worksheets listed. 5. Select the worksheet you want to work with first, and double click to open.
| Field | Description | Location |
|---|---|---|
| WS Id | A unique identification of the Worksheet Values: Worksheet identifier Mandatory: Yes |
Select Open Claim Worksheet window |
| WS Title | A worksheet title given either by the System or by you dependent of the origin of the worksheet Values: Text Mandatory: When your System Administrator has activated this, title is mandatory on claim worksheets created manually, FGU, or through SICS API Server. |
Select Open Claim Worksheet window |
| WS Origin | From where the Worksheet originally was created Values: Manual, From Ground Up etc. Mandatory: Yes |
Select Open Claim Worksheet window |
| Registration Date | The date when the Account is registered in the system the first time. Values: Date (mm/dd/yy) Mandatory: Yes |
Select Open Claim Worksheet window |
| WS Status | The current status of the worksheet Values: Open, Closed, Inactivated, etc. Mandatory: Yes |
Select Open Worksheet window |
Split FGU Worksheet into multiple Accounting Classifications #
Please refer to Handle Claims chapter, From Ground Up for further details about splitting the FGU bookings into multiple Accounting Classifications.
The Basic Claim Booking Process - Steps Involved #
The Claim worksheet normally defaults part of the booking information using the business and the claim information at hand. What is automatically populated depends on from where you initiated the Claim booking process:
From the Business: The Business section of the worksheet is completed, and worksheet title can appear.
From the Claim Ledger or Find: Worksheet: In addition to the Business information, the section is completed
From the From Ground Up window: In addition to the Business and claim information, most of the Booking Properties, currencies, and booking information are also inserted.
The booking process involves the following steps:
- Add the Claim (or Claims) that you want to include in your worksheet, if not already defaulted.
- Select a Ledger Currency or Add a new currency by selecting Add Currency from pop-up list if not already defaulted. If the selected currency has not been defined on the Limit condition a warning appears.
- Register the other basic account information as required, and select your Booking Options
- Select whether bookings should impact FGU distribution. This indicator is not enabled if your System Administrator has activated the use of FGU indicator on claim.
- Add booking details by selecting Add Entry Code from the pop-up list on the Original Bookings section, selecting entry code and the adjustment/new position for that entry code.
- Repeat step 6 for each entry code that shall be included in the worksheet. Note that an entry code can only appear once for the same currency and booking row. If you need to add more than one adjustment to the same entry code in the same worksheet (for the same currency) you must add a new booking row for the same currency.
- Perform any automatic calculations if required.
- Apply or Change Status of the worksheet.
Book on many Businesses within the same Claim Worksheet
As a general rule, it is impossible to Add and Remove businesses to a claim worksheet. The Business from where you initiate the booking will be the one and only business included in the worksheet. The exception is when your claim is linked to more than one business; for example a number of layers within the same program. In this situation you are allowed to book on all the linked businesses within the same Claim Worksheet. (Refer to Assign to Existing Claim and Handle Claim Program in the Claims chapter of this guide.)
Add Business to a Claim Worksheet
When you book a manual claim worksheet on a claim that is linked to a number of businesses, you can add the linked businesses to the worksheet.
- Create Claim Worksheet from Business Properties or Claim Ledger.
- Select at least one Claim in the Claim section.
- Select Add Business from the pop-up list in the Business section of the Claim Worksheet.
- The List Businesses linked to Claim window appears, displaying all business linked to the claim currently being booked on.
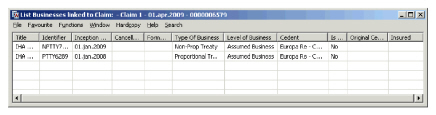
- Select the Business that you want to include in the Claim Worksheet and double click, or select Transfer from pop-up list.
- Repeat the above until you have included all the businesses you want to include in the booking.
Automatically Add Business to a Claim Worksheet
Instead of adding businesses one by one, as described above, the system could be configured so that all linked businesses are always present in the claim worksheet. This means that regardless of other factors, such as claim status, cease accounting, and transfer flag setting, the business is displayed. If a business for some reason does not allow accounting, or cannot be booked in the same worksheet, the registration of booking details is disabled for that business.
Remove Business from a Claim Worksheet
If you added a business in error, there is no option to remove the business from the Claim worksheet. The system will however remove the business from the worksheet automatically, provided there are no balances booked for that business.
- Select the Business that you want to remove.
- The entered booking details for the business are displayed.
- In the Properties section of the worksheet; select the booking row and select Delete from the pop-up list.
- Repeat step 3 for all booking rows relevant for the business that shall be removed.
- When you complete and change the status of the worksheet the business will be removed from the worksheet.
| Field | Description | Location |
|---|---|---|
| Business ID | The unique identification of Business included in the booking. Values: Business Identifier Mandatory: Yes |
Claim Worksheet - Business section |
| Business Title | The title given to a business. Values: Text Mandatory: No |
Claim Worksheet - Business section |
| Direction | The direction of the business(es) included in the booking; equivalent to the Level of Business. Values: Assumed Business, Outwards Cedent’s Contract, Master Agreement, etc. Mandatory: Yes |
Claim Worksheet - Business section |
| Cedent Name | The name of the cedent as registered on the business. Values: Cedent name Mandatory: No |
Claim Worksheet - Business section |
| Inc. | The inception date of the business Values: A date - DD/MM/YYYY Mandatory: Yes |
Claim Worksheet - Business section |
| Canc. | The cancellation date of the business. Values: A date - DD/MM/YYYY Mandatory: No |
Claim Worksheet - Business section |
Book a Multi-Claim Claim Worksheet #
Sometimes the same claim advice is issued for a number of losses, for example for the entire Insured Period and adjustments should be made for all of them. In this situation, you need to add the claims to the claim worksheet.
Add Claims to Claim Worksheet #
- Open the Business Properties.
- Select Claim Worksheet button.
- Select Add Claim from the pop-up list in the Claim Section of the worksheet.
- The system opens the View Claim window; listing all Open and Active claims linked to the Business
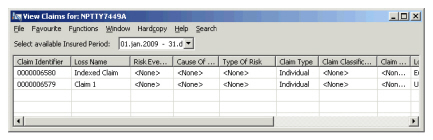
- Reduce the number of claims displayed by selecting the Insured Period in the Select available Insured Period field.
- Select the claim you want to include in the worksheet and double click or select Transfer from pop-up list. If you are selecting a claim for which you are registered as being in conflict, you are not allowed to add the claim to the worksheet.
- If the selected Claim is marked as an Early Claim, or its' FGU Indicator is activated, confirm that you want to create a manual worksheet.
- Repeat the above process for all claims you want to include in the worksheet. Note that all the Claims must have the same settings for their Transfer to Ledger and FGU indicators.
- Transfer to Ledger indicator.
The Add Claim option is only enabled when the Claim Worksheet is created from Business Properties.
Remove Claims from Claim Worksheet #
If you have added a Claim ID in error, you can remove the claim from the worksheet.
- Select the Claim ID that you want to remove, and select Remove Claim from the pop-up list in the Claim Section of the worksheet.
The Remove Claim option is only enabled when the claim worksheet is created from the Business Properties.
Link Claim (Booking) to Amendment #
Opposed to Technical Accounting, amendments cannot be chosen manually, but are determined by the claim itself by applying the same rules that are used when validating the loss dates towards the Insured Period:
- If a Claims Trigger Date is defined, the Claims Trigger Date must be within the effective period.
- If only Date of Loss is defined, and the claim is not interlocking or Claim Basis is not Risks Attaching or Loss Portfolio Condition is not defined; the Date of Loss must be within the effective period.
- If Claim is Interlocking and the date of loss is within the Insured Period; the Date of Loss must be within the Insured Period.
- If Claim is Interlocking and the date of loss is prior to the Insured Period amendment 0 is used.
- If Claim is Interlocking and date of loss is after Insured Period, the last amendment of the Insured Period is used.
- If Claim Basis is Risks Attaching, the Original Policy Period Start date must be within the effective period.
- If Loss Portfolio condition exists, and the Date of Loss is within the Insured Period, the Date of Loss must be within the effective period.
- If Loss Portfolio condition exists, and the Date of Loss is prior to the Insured Period, amendment 0 is used. Note! Sometimes the amendment number is not visible on the worksheet itself. This is the case when ‘Creating From Ground Up’ bookings affecting more than one claim-to-section link, and also when creating bookings for interlocking claims. Selecting View Balance Changes from the worksheet properties section, enables you to inspect the amendment applied to each balance.
| Field | Description | Location |
|---|---|---|
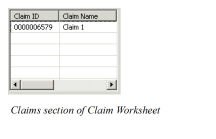
| Claim ID | The unique identification of the Claim included in the booking. Values: Claim Identifier |
Claim Worksheet - Claim section |
| Claim Name | The loss name. Values: String |
Claim Worksheet - Claim section |
| Amendment | Indicator if which version of the contract the claim will be validated against. The indicator consist of a number and a date DD/MM/YYYY, where the number indicates the version of the contract Which effective period Values: Integer + Date, where the integer indicates the contract version. 0 equals the Original Contract, 1 indicate the first amendment, 2 indicate the second amendment, and so on. The Date ( DD/MM/YYYY ) denotes start date of the effective period. Derived from: Date of Loss, Claim Trigger Date as per above. Functional impact: Determines correct set of terms & conditions applied in validations. Mandatory: Yes |
Claim Worksheet - Claim section |
| Date of Loss | The date of loss or claim trigger date. Values: A date DD/MM/YYYY Functional impact: Determines amendment Mandatory: Yes |
Claim Worksheet - Claim section |
Register Basic Account and Worksheet Information #
The Basic Claim Worksheet account and worksheet information contains various information about the account; including booking dates, indicator whether worksheet is transferred to ledger or not, and booking currencies.
The Account Information dates consist of a date for when the Account was received, and when it was actually booked. The Account Received date can be replaced by a Received External, and a Received Internal date, provided your System Administrator has activated this functionality. This enables you to register both when the account was received by your company and also by your department. If booking dates are not allowed in the past, this date defaults to current date - even when you retrieve an unfinished worksheet.
Edit the Transfer to Ledger indicator #
The Transfer to Ledger check box indicates whether the bookings are transferred to the Business and Business Partner Ledgers, in addition to the Claim Ledger. It is not editable on the worksheet level, and must be changed on the claim or the claim program. Refer to Claim Booking Information in the Handle Claims chapter of this guide for further information.
Note! Informational entry codes, such as Paid in Aggregate, are never transferred to the Business or Business Partner Ledgers irrespective of the Transfer to Ledger setting.
Register Account Dates #
- Create a new Claim Worksheet or Open an existing worksheet with status Open.
- Select or add a currency. The Account Information fields are now enabled.
- Enter the Received (alternatively the Received External and Received Internal) and Booked dates.
Handle Currencies in Claim Worksheet #
By default the currencies for which previous bookings (technical and/or claim) exist are displayed when you create a new claim worksheet.
If previous bookings have been made in one currency, this currency is pre-selected when the Claim Worksheet is created. When more than one ledger currency exists, none of the currencies are pre-selected.
Add Currencies to a Claim Worksheet #
When no currencies exist for the business or you want to book in a new currency you select Add Currency from the pop-up menu.
To register a New Claim Worksheet Currency:
- Click in the currency section and select Add Currency from the pop-up menu. The system gives you a full currency listing of all active currencies.
- Select the currency or currencies you want to use in your booking by moving them over to the Selected column. The system returns a warning if the selected currency is not defined on the Limit condition.
A warning is also returned if the Claim is linked to a Headline Loss, and Event IBNR Groups are in use, and the claim is not linked to an event ibnr group valid for the new currency.
Remove a Claim WS Currency #
If you defined a currency in error, this can be removed as long as the currency is not a ledger currency. That is; the remove option is only available for currencies added after the worksheet has been applied to the database, andonly if no previous bookings (technical and/or claim) exist for the currency, and no current booking details have been defined for the currency.When booking details exist (previous and/or current), the currency becomes a ledger currency. A ledger currency can be inactivated to be hidden in the display list.)
To remove a Claim Worksheet Currency:
- Click in the currency section and select Remove Currency from the pop-up menu. The system displays the available/selected overview.
- Select the currency or currencies you want to remove from your worksheet by moving them over to the Available column. The system returns an error if the selected currency cannot be removed from the worksheet.
- Select a ledger currency or select Add Currency from the pop-up menu if the required currency is not included among the ledger currencies. You see the Select Booking Currency dialog box.
- Select one or more booking currencies from the list and move them to the Available list using the arrow buttons.
Inactivate a Ledger Currency #
The purpose of inactivating a Ledger Currency is to prevent further booking on this currency and therefore hide it from the display list.
The precondition is that no Worksheet(s) with status Open, Rejected, Corrected, Authorized and Suspended exists in this Ledger Currency. Furthermore, any defaulted entry codes must be removed prior to inactivating.
To inactivate a ledger currency:
- Click in the display list for the selected Business ID and Currency and select Inactivate Ledger Currency from the pop-up menu. The system now hides this Currency in the currency list on the worksheet, for the selected Business ID.
Re-activate a Ledger Currency #
If you want to add a new booking on a currency that has been inactivated for this ledger, you must first re-activate it.
- Select Display All Ledger Currencies.
- The system displays both active and inactiv.e ledger currencies.
- Select the currency and add booking details
- Apply or Close the worksheet. The currency is now re-activated.
Display Ledger Currency #
You can select to see all existing Ledger Currencies, only the Active Ledger Currencies or only the Inactivated Ledger Currencies.
- Select Display from the pop-up menu in the currency section
- Select between:
- Ledger Currencies, All existing Ledger Currencies are shown in the currency list.
- Active Leger Currencies (default value), Only the Active Ledger Currencies are displayed on the currency list.
- Inactive Ledger Currencies, Only the Inactive Ledger Currencies are displayed on the currency list.
Change the Currency on the Worksheet #
If you realise that you have recorded the booking details in an incorrect currency, you can easily change the currency.
- In the currency section elect Switch Currency from the pop-up list.
- System gives you a drop-down list called Select New Currency for Worksheet. All active currencies are available.
- Select the currency you want to switch to.
- The booking details are attached to the new currency.
| Field | Description | Location |
|---|---|---|
| Currency | The currency in which the Claim is to be booked. If a currency has booking details on the worksheet the currency is marked in another colour (pink). Values: The business' ledger currencies expressed according to ISO, e.g. USD, GBP, CAD, EUR, CHF, etc. Default: If no ledger currencies: Empty If one ledger currency: The one currency is pre-selected If many ledger currencies: None of the currencies are pre-selected. Validations: If a currency has not been defined as Main Currency or as a Booking Currency in the Administration Condition of the business, a warning appears when this currency is added. (Refer to the chapter Handle Administration Conditions.) Functional Impact: Business Ledger, Online Statistics, Business Partner Ledger, Claim Ledger, Worksheet validations Mandatory: Yes |
Claim Worksheet - Currency Section |
| Name | The full name of the Currency Values: Currency name, e.g. US Dollar, Pound Sterling, Canadian Dollar, Euro, Swiss Franc, etc Mandatory: Yes |
Claim Worksheet - Currency Section |
| Received Alt. Received External |
The date the Claim Account was received. Values: A date DD/MM/YYYY Default: Today’s date Validations: Must be less or equal to today’s date. Functional impact: None Mandatory: No |
Claim Worksheet - Account Information section |
| Received Internal | The date the Claim Account was received by your department. Enabled by your System Administrator. Values: A date DD/MM/YYYY Default: Received External Date, or (Order) Run Date on worksheets created through Accounting Orders. Functional impact: None Mandatory: No |
Claim Worksheet - Account Information section |
| Booked | The date the Claim account was booked. Values: A date DD/MM/YYYY Default: Today’s date Validations: Must be within a range defined by your System Administrator from today’s date. Mandatory: Yes |
Claim Worksheet - Account Information section |
| Transfer to Ledger | Indicator whether the Claim worksheet will be transferred to Business and Business Partner Ledgers. The field is an output field only. Values: Check box with true or false. Default: Setting on Claim Program - Treaty Links; or Claim Section Specific Functional impact: Business and Business Partner Ledgers, Online Statistics Mandatory: Yes |
Claim Worksheet - Account Information section |
Add Claim Worksheet Booking Details #
The registration of the actual Claim booking is done in the Claim Worksheet Properties and Original Bookings part.
The Properties section enables you to record information related to the actual booking; that is booking dates, booking periods, and accounting classification. If your worksheet contains more than one business, the system can reflect the information registered for one business on all linked sections included in the same worksheet, provided your system administrator has activated this functionaltity.
The Original Bookings section allows you to register the actual entry codes and adjustments as well as a comment. The Claim Worksheet also offers flexibility how to enter the actual figures. Contrary to the Technical Worksheet, there are no separate Estimates tab; these must be recorded either using specific informational entry codes designated to this purpose, or through a technical worksheet.
Enter Claim Worksheet Title #
You can record a title for the claim worksheet that can later be used to identify the worksheet on the Business Partner Ledg er and in the Find Worksheet window. Your System Administrator may have made the Title mandatory when the worksheet is created manually, or from FGU. The Claim Worksheet title is relevant for all balances within the worksheet.
- Open a claim worksheet.
- Select or add a currency. Enter the worksheet title, or change the title that is generated automatically.
If the worksheet title is optional, but you forgot to enter in the actual worksheet, you can capture it in the closing window.
Book Actual Claim Figures #
Depending on the Transfer to Ledger indicator, the majority of the transactions (details and balances) entered on a Claim Worksheet can be reflected on Business Ledger, Business Partner Ledger, Online Statistics, etc. Informational entry codes, for example Annual Aggregate Deductible bookings, are not transferred to the Business Partner Ledger. All transactions are displayed on the Claim Ledger regardless of both the entry code type and the Transfer to Ledger indicator setting.
Book a Single New Adjustment #
- Create a new Claim Worksheet, and ensure that Business and Claim information is available.
- Select a ledger currency or add a new currency by selecting Add Currency from the pop-up menu in the Currency display list.
- Register basic accounting information and a worksheet title.
- Select the Booking options
- If required select to base the Accounting Period on Calendar Year. If your system is configured to set the accounting information based on the as of date, the Calendar Year is automatically selected, and cannot be modified.
- Record the booking information, or edit, if required, the booking information given automatically.
- The system populates the worksheet detail section if any previous bookings exist, or if this is the first initial booking on a claim and currency, entry codes which are defined as default. The figures represent the selected currency and claim-to-section or the selected currency, claim-to-section, and accounting classification combination, if your System Administrator has activated this display functionality.
- Add required entry codes to the worksheet, and make the necessary adjustments to either adjustment or new figures.
- Repeat step 8 for all required entry codes.
Book Multiple Adjustments in same Worksheet #
The registration of an additional booking rows, allows you to enter many Claim Accounts in the same worksheet. This could be relevant when you receive two updates for the same claim at the same time. The additional booking rows can of course have different Booking information, for example a different “As of Date”, or “Accounting Classification”.
- In your open claim worksheet select Add New Booking in the Properties section.
- A new booking row is added, defaulting the information from the first booking row. Change the defaulted information as required.
- Complete the new booking row by following the steps for single adjustment.
Note! You do not need to add a new booking row if you want to create a booking in another currency. In this case you just add the new currency to the worksheet, and use the same existing row. Refer to Handle Currencies in Claim worksheet, described earlier in this chapter.
Occurrence Year Allocation #
If you have defined Occurrence Year Split basis for both Premium and Loss on the Administration condition, you can perform an Occurrence Year Split of the Claim Adjustments. The system splits adjustments for entry codes subject to the split into Occurrence Years. The Occurrence Year is set to the Accounting Years applied for premium bookings. For each new Occurrence Year, the system adds an additional row to the worksheet. The row ID is the same as the original row ID, and does not result in a new balance being created. The original occurrence year, if any, is overwritten with the years derived from the calculation. The calculation is applied to the entire worksheet.
- Add at least one booking detail to the claim worksheet
- Select Occurrence Year allocation from the pop-up menu
- The system adds one or more booking rows to the worksheet, one per Occurrence Year.
Example
Insured Period 2013
| Accounting Year | Booked Premium |
|---|---|
| 2013 | 100,000 |
| 2014 | 100,000 |
Claim Worksheet booking Paid Loss 20,000
After Occurrence Year allocation:
| Occurrence Year | Paid Loss |
|---|---|
| 2013 | 10,000 |
| 2014 | 10,000 |
Delete a Booking or Booking Detail #
If you have added a booking row or an entry code in error you can easily remove this from the worksheet.
- On your open worksheet, select either the Row, or the Entry Code that you want to delete.
- Select Delete from the pop-up list.
- The row (with all the details), or the single entry code is removed from the worksheet.
Note! When the Government Tax Framework is in use and the line to be deleted from the worksheet includes a booking detail linked to one or more other booking details, system automatically removes the Government Tax link for all details included in the linkage.
| Field | Description | Location |
|---|---|---|
| Row | Indicator of the booking line. Values: Integer Default: First booking added defaults row number 1. Subsequent booking rows default same row ID as the one immediately preceding if your System Administrator has activated the “Display Bookings and Entry Codes Per Accounting Classification” functionality. Otherwise subsequent bookings default to the preceding booking’s row ID + 1. If you have performed an Occurrence Year allocation, the row ID is the same for all Occurrence Years for the same claim Validations: None Mandatory: Yes Functional impact: Each booking row ID creates a separate balance |
Claim Worksheet - Properties section |
| Booking Yr /Period | The Base Company’s Year and Period in which the account is booked Values: All open booking years and periods are open for selection. Year, Period (e.g. Month, Half Year or Quarter) Default: The Booking year/period defined as default by your System Administrator. Validations: Against the Closing Booking Terms defined by your System Administrator. Mandatory: Yes |
Claim Worksheet - Properties section |
| Booking Yr /Period (Legal Entity) | The Period and Year in which the account is booked. Values: Year, Period (Month, Half Year or Quarter) Default: The Booking year/period defined in the Booking Terms defined by your System Administrator. Validations: Against the Closing Booking Terms defined by your System Administrator. Mandatory: No |
Claim Worksheet - Properties section |
| Booking Yr /Period (Global Entity) | The Period and Year in which the account is booked. . Values: Year, Period (Month, Half Year or Quarter) Default: The Booking year/period defined in the Booking Terms defined by your System Administrator. Validations: Against the Closing Booking Terms defined by your System Administrator. Mandatory: No |
Claim Worksheet - Properties section |
| AccYR | The Accounting Year of the Account to be booked into the Claim Worksheet Values: Year (YYYY) Default: The Acc Year default value depends on how your System Administrator has configured the system: Default value is the Year of the worksheet as of date, if System Parameter “Accounting Information default from As of Date” is activated. Default value is Year of first open account, if Business has accounts defined, System Parameter “Accounting Information default from As of Date” is not activated, and Base Company Specific parameter _Set Due Date/As of Date to Current Date for Claim Worksheets_ is cleared. Otherwise default value is current calendar year. If system parameter **"_Same Accounting Information for all linked Claim Sections_** has been activated by your system administrator, manual changes to the Accounting Year for one claim section, is reflected on all linked claim sections within the same worksheet provided the businesses have the same insured period start and end dates. _Validations:_ The Accounting Year cannot be higher than the Booking Year. The Accounting Year cannot be smaller than the year in the Insured Period from date. br/>_Mandatory:_ Yes<br/ Functional impact:_ Reinstatement Calculation Per Insured Period, if parameter _Reinstatement Calculation Per Insured Period based on Accounting Period to date_ is activated |
Claim Worksheet - Properties section |
| AccPeriod | The Accounting Period within the Accounting Year for which the Account applies. Values: 1st of 12, 2nd of 12, 1st of 2, 2ndof 4, Yearly, None, etc. Default: The Acc Period default value depends on how your System Administrator has configured the system: Default value is the Period or Month of the worksheet as of date, if System Parameter “Accounting Information default from As of Date” is activated. The Period is determined by the frequency in which accounts (if any) have been defined on the business; for example Quarterly. If no accounts have been defined the Period is set to the Month in which the as of date falls. In both situations, the system uses a Calendar Year calculation. Default value is Period of first open account, if Business has accounts defined, System Parameter “Accounting Information default from As of Date” is not activated, and Base Company Specific parameter “Set Due Date/As of Date to Current Date for Claim Worksheets” is cleared. Otherwise default value is the value defined as default value in reference table, or <None>. If function “Same Accounting Information for all linked Claim Sections” has been activated by your system administrator, manual changes to the Accounting Period for one claim section, is reflected on all linked claim sections within the same worksheet provided the businesses have the same insured period start and end dates. Mandatory: Yes Functional impact: Reinstatement Calculation Per Insured Period, if parameter Reinstatement Calculation Per Insured Period based on Accounting Period to date is activated, Retrocession Accounting |
Claim Worksheet - Properties section |
| Description of Account | Indicates the Type of Account Values: Customised by your System Administrator; for example Regular Account, Cash Call, None Default: Customised by your System Administrator If function “Same Accounting Information for all linked Claim Sections” has been activated by your system administrator, manual changes to the Description of Account for one claim section, is reflected on all linked claim sections within the same worksheet. Mandatory: Yes |
Claim Worksheet - Properties section |
| Due Date | The date when the account is due to be settled. Values: Date (DD/MM/YYYY) Derived from: The calculated accounts in the Administration conditions of the selected Insured Period Default: No default, or default to current date, or default as per calculated accounts in Administration condition, or defaulted as defined number of days after received date, depending upon how your System Administrator has defined the system. If function “Same Accounting Information for all linked Claim Sections” has been activated by your system administrator, manual changes to the Due Date for one claim section, is reflected on all linked claim sections within the same worksheet. Validations: Must be greater or equal to the as of date. Can be a future date. Functional impact: Determines when balance becomes due for settlement. Mandatory: Yes |
Claim Worksheet - Properties section |
| As Of Date | The date with which your bookings will be associated, which date the advised claim figures are composed at. Values: Date (DD/MM/YYYY) Default: For “From Ground Up” worksheets the as of date defaults to the one defined on the Advisory and cannot be changed on the worksheet. For “Manual” worksheets the “As of Date” defaults as per the calculated accounts on Administration condition or the current date according to your System Administrator’s definition, and can be changed on the worksheet. If function “Same Accounting Information for all linked Claim Sections” has been activated by your system administrator, manual changes to As of Date for one claim section, is reflected on all linked claim sections within the same worksheet. Validations: The As of Date must be less or equal to the Due Date. Must be greater or equal to the Date of Loss From. Future dates are not allowed. Functional impact: Sorting in Claim Ledger, Non-Proportional Recovery calculations, Reinstatement Calculations. If Claim Accounting parameter “Accounting information defaulted from as of date” is activated, the date also determines the setting of Acc Year, Acc Period, and Acc Period From and To within the Claim worksheet. Mandatory: Yes |
Claim Worksheet - Properties section |
| Insured Period | The period to which the claim is attached and for which you want to create a booking. Values: Date From -To (DD/MM/YYYY- DD/MM/YYYY) Derived from: The Insured Period or Insured Periods the Claim is linked to. Mandatory: Yes |
Claim Worksheet - Properties section |
| Original Underwriting Year | The original underwriting year of the policy which the claim affects. Values: Year (YYYY) Default: If your System Administrator has activated default of this field, or if the Cession Basis is Underwriting Year, the Original Underwriting Year defaults to the Claim’s Original Policy Period From year, if defined, otherwise Insured Period start year. Otherwise the default value is blank. Mandatory: When cession basis is Underwriting Year and the “Validate Orig. UW Year / Occ. Year” is selected on the administration condition. Validations: When cession basis is Underwriting Year and if “Validate Orig. UW Year / OCC Year” is either not available or selected on the Administration condition, the Original Underwriting Year must be equal or greater than the Portfolio From Year if defined on Administration condition, and equal or less than the Original Policy Period From Year, or the Insured Period year. For all other situations, the Original Underwriting Year may be any year. Functional impact: Retrocession Accounting |
Claim Worksheet - Properties section |
| OccYR | The year of the loss occurrence. Values: Year (YYYY) Default: When your System Administrator has enabled default of this field, or if cession basis is “Occurrence Year”, the Occurrence Year defaults to the Date of Loss Year, or the Claim Trigger Year. If you have performed an Occurrence Year allocation, the Occurrence Year is set to the Accounting Year for the relevant Premium Booking. Mandatory: When your System Administrator has defined the Occurrence Year as mandatory, or when cession basis is “Occurrence Year” and “Validate Orig. UW Year / OCC Year” is either not available, or activated on the administration condition. Validations: When Cession basis is “Occurrence Year”, and business option “Validate Occ. Year /Orig. UWY” is selected: The year entered must be greater or equal to the “Portfolio from Year” and less or equal to the Date of Loss/Claim Trigger Year. Otherwise there are no validations. Functional impact: Retrocession Accounting |
Claim Worksheet - Properties section |
| Accounting Period From - To | The period within the Accounting Year for which the account applies. Values: Dates (DD/MM/YYYY - DD/MM/YYYY) Derived from: The selected Accounting Year, Accounting Period, Insured Period, and selection of “Accounting Period based on Calendar” check box. If function “Same Accounting Information for all linked Claim Sections” has been activated by your system administrator, manual changes to Accounting Period From - To for one claim section, is reflected on all linked claim sections within the same worksheet provided the businesses have the same insured period start and end dates. Mandatory: Yes Validations: None Functional impact: Multi GAAP |
Claim Worksheet - Properties section |
| Section | The agreement may be split into different components according to the agreement’s classifications. Each “component” constitutes a section, with specific terms and conditions. Values: Section names given on the agreement Derived from: The Structure of the agreement Default: Main section if only one section. If more than one section, the field is empty and the user has to select from drop-down list. Mandatory: Yes |
Claim Worksheet - Properties section |
| Legal Area | The Country(ies)/Country Group(s) defined in the selected Accounting Classification. Values: System defined names Derived from: The selected Accounting Classification. Mandatory: Yes |
Claim Worksheet - Properties section |
| Accounting Classification | A unique combination of the different components in the agreement’s classifications. Values: A system defined or user defined name for each classification Derived from: The Accounting Classification conditions and the selected Section. Default: For the first initial booking only, depending on the Claim Classification, if your System Administrator has activated this function. Otherwise if only one Accounting Classification has been defined on the section, this will default. If more than one has been defined, but one has been defined as being default, this will be defaulted, if none has been defined as default, there is no default of the Accounting Classification. For subsequent bookings the Accounting Classification defaults to the Accounting Classification applied in the last booking Mandatory: Yes Functional impact: Display of previous booking entries if your System Administrator has activated the display of bookings and entry codes per Accounting Classification. Validation of positive reserves can be made on this level, if activated by your System Administrator. Display of Claim Bookings on Claim Ledger, Non-Proportional Recovery calculation. |
Claim Worksheet - Properties section |
| London Market Reference | For CLASS bookings (including Claim signing reversals) it is a concatenation of Stamp number, our sequence number and Unique claim reference. For Claim signing paid bookings it is a concatenation of Stamp number and signing reference. The field is only available if your System Administrator has activated the EDI Limnet functionality. Values: String Derived from: EDI Message Default: None Mandatory: No (automatically set on EDI bookings) Functional impact: Key indicator used in London Market pairing process, and used in the referencing process between the EDI message and business. |
Claim Worksheet - Properties section |
| London Bulk Reference | A concatenation of Stamp number, our sequence number and Bulk claim reference. The field is only available if your System Administrator has activated the EDI Limnet functionality. Values: A string. Derived from: EDI message Default: None Functional impact: Used when matching Claim Signing with the CLASS bookings. Mandatory: No. Automatically set on EDI bulk claim bookings |
Claim Worksheet - Properties section |
| Our Sequence Number | The number indicating sequence of the claim adjustments. It can vary from the Broker’s Sequence Number if the Unique Claim Reference has been changed. The column is available when your System Administrator has activated EDI Limnet functionality. Values: An integer - output field only. Derived from: EDI message and SICS Claim adjustments. Default: From the sequence number in the message Functional impact: Control sequence of claim adjustments. Mandatory: No. Automatically set on EDI claim bookings |
Claim Worksheet - Properties section |
| Broker Sequence Number | The number indicating sequence of the claim adjustments as recorded by the Broker. It can vary from Our Sequence Number if the Unique Claim Reference has been changed. The column is available when your System Administrator has activated EDI Limnet functionality. Values: An integer - output field only. Derived from: EDI message and SICS Claim adjustments. Default: From the sequence number in the message Functional impact: Control sequence of claim adjustments. (Adjustments must be processed in correct sequence.) Mandatory: No. Automatically set on EDI claim bookings |
Claim Worksheet - Properties section |
| Start Date | The date for which the “Disability” period started. The column is available when your System Administrator has activated Life functionality, and extended booking records. Values: A date (DD/MM/YYYY) Validations: None Functional impact: None Mandatory: No |
Claim Worksheet - Properties section |
| End Date | The date when the “Disability” period ends. The column is available when your System Administrator has activated Life functionality, and extended booking records. Values: A date (DD/MM/YYYY) Validations: None Functional impact: None Mandatory: No |
Claim Worksheet - Properties section |
| Disability % | The percent of the Disability. The column is available when your System Administrator has activated Life functionality, and extended booking records. Values: A percentage Validations: Between 0 and 999.99 Functional impact: None Mandatory: No |
Claim Worksheet - Properties section |
| Title | The title that is associated with all balances included in the worksheet. Values: A string Default: To the name of Insured and Main Class of Business on Direct and Facultative Business when your System Administrator has activated this. Functional impact: None Mandatory. No |
Claim Worksheet |
| Policy ID | The identifier of the primary Insurance Policy. The field is enabled when your System Administrator has activated the Life and Health Module, and extended booking records. Derived from: Policy ID on Claim Properties. If more than one claim is included in the worksheet, the Policy ID is taken from the first claim. Functional impact: None Mandatory: No |
Claim Worksheet |
| Accounting Period Based on Calendar | The calculation of the Accounting Period From and To dates will be based on Calendar Year rather than Insured Period. Values: Selected, Cleared. If Claim Accounting parameter “Accounting Information based on As of Date” is activated, the Accounting Period is always based on Calendar Year, and cannot be modified within the Claim Worksheet. Functional impact: Accounting Period From and To are based on the Calendar Year, and selected Accounting Year and Period, rather than Insured Period start date, and selected Accounting Year and Period. For example; an Insured Period 12 Months @ April 1st, 2006, the monthly account for June 2006 is “2006 - 3 of 12”. With this option selected the June Account should be registered as “2006 - 6 of 12”. |
Claim Worksheet |
| Adjustments affect FGU | Indicator whether the bookings on the worksheet will impact the From Ground Up distribution. Only available on manual claim worksheets Values: Selected/Cleared. If the FGU indicator functionality is in use, the worksheet flag is an output field only. Default: Selected. If FGU indicator functionality is in use, the default is as per the Claim’s indicator setting. Functional impact: The claim amounts booked will be included in the Previous figures on FGU. |
Claim Worksheet |
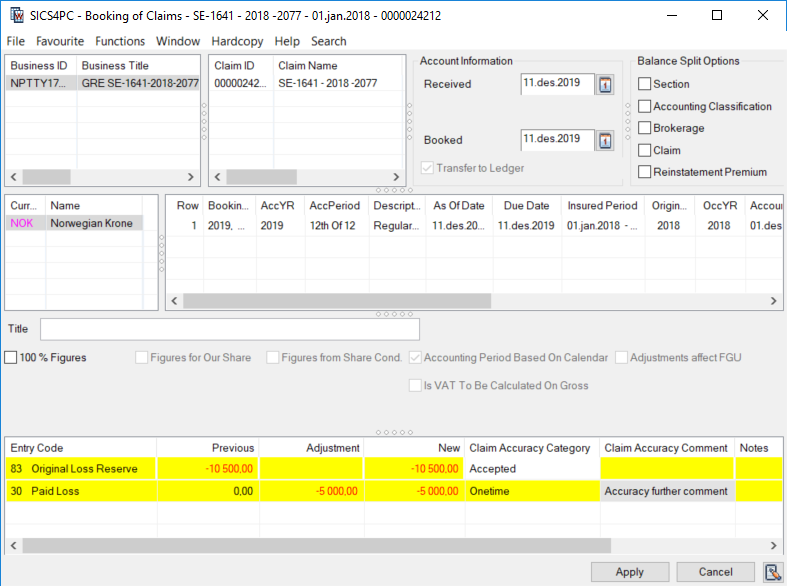
| Entry Code | A code determining the nature of the booking. Values: A combination of code and name, for example “30 Paid Loss”, “83 Reserve Loss”. Only entry codes available for Claim Accounting are available. The entry code must also be valid for the Base Company of the selected Insured Period. If Entry Code restrictions are defined in your User Preferences, the available entry codes are limited. Validation: Basis for system validations against the conditions of the Insured Period, and automatic calculations like Reinstatement Premium. Mandatory: Yes |
Claim Worksheet - Original Bookings section |
| Previous | The accumulated amount previously booked for the selected entry code for the selected business, claim, and currency combination. If your System Administrator has activated the display of bookings and entry codes per accounting classification the figures represent the selected accounting classification only. Values: Amount, maximum 20 digits |
Claim Worksheet - Original Bookings section |
| Adjustment | The accumulated amount to be booked for the selected entry code for the selected business, claim, and currency combination. If your System Administrator has activated the display of bookings and entry codes per accounting classification the figures represent the selected accounting classification only. Values: Amount, maximum 20 digits Mandatory: No |
Claim Worksheet - Original Bookings section |
| New | The sum of columns Previous and Adjustment. This figure represents the current amount for the selected entry code and is used when booking replacement figures /accumulated position. Values: Amount, maximum 20 digits. |
Claim Worksheet - Original Bookings section |
| Claim Accuracy Category | When Claim booking is is not according to business/claim limits, an Acceptance Category for this breach may be required. The column is only enabled when discerpancy between booking and limit is more than defined tolerance. Values: Customised by your System administrator. Mandatory: Yes (when column is enabled). |
Claim Worksheet - Original Bookings section |
| Claim Accuracy Comment | A further description why you accept claim booking not according to contract terms. Column is only enabled when discrepancy is more than defined tolerance. Values: Free text input. Mandatory: When selected Acceptance Category requires additional comment. |
Claim worksheet - Original Bookings section |
| Government Tax Category | When an error message is issued on a Claim Worksheet due to booking is not according to the respective Rule defined in the Government Tax Table or the field ‘Always Stop if Trigger/Target EC is booked’ is selected in the Government Tax Table or the corresponding Validation Indicator is defined on the business insured period, a Government Tax Category for this breach may be required. The column is only enabled when an error message is issued due to the Government Tax validation Values: Customised by your System administrator. Mandatory: Yes (when column is enabled). |
Claim Worksheet - Original Bookings section |
| Government Tax Comment | A further description why you accept claim booking not according to Rule defined in the Government Tax Table/Validation Indicator on the Assumed Business. Column is only enabled when an error message is issued due to the Government Tax validation. Values: Free text input. Mandatory: When selected Acceptance Category requires additional comment. |
Claim worksheet - Original Bookings section |
| Tax Country | The country for which the Government Tax applies. Values: Any country defined in the system. Derived from: Government Tax Table when detail is automatically booked, but can be edited. Mandatory: No. |
Claim worksheet - Original Bookings section |
| Tax % | A Government Tax percentage used to calculate the Government Tax amount Values: Percentage. Derived from: Government Tax Table when detail is automatically booked, but can be edited. Mandatory: No. |
Claim Worksheet - Original Bookings section |
| Tax Type | Description of the Government Tax. Values: Available options are according to the list of reference data Tax Type. Derived from: Government Tax Table when automatically booked, but can be edited. Mandatory: No. |
Claim worksheet - Original Bookings section |
| Government Tax Rule Ref | A reference number referring to a specific rule in the Government Tax Table. Can not be manually updated Values: A reference number automatically updated for the booking detail. Derived from: Government Tax Table when detail is automatically booked or validated based on the Government Tax Table. Mandatory: No. |
Claim worksheet - Original Bookings section |
| Notes | A note applying to the booking detail can be entered Values: Free-text Mandatory: If your System Administrator has activated mandatory comment for the selected entry code. |
Claim Worksheet - Original Bookings section |
Booking Options #
The Claim Account is normally registered by booking the adjustments for your share. SICS allows you however to register the account in different ways.
Book ReplacementValues on the Claim Worksheet #
In some Claim Advices the figures displayed reflect the current status and not the adjustments. In SICS you can choose whether to book adjustment or accumulated position, by making your changes in either the Adjustment column or the New column.
If the Allow Entry of Replacement Values is allowed in the Entry Code Maintenance, your system administrator can also select the parameter ‘Calculate Based On As of Date’. Normally, claim bookings in the claim ledger are conducted in a time order according to the As of Date of the claim accountings. However, for certain reason, you may miss a few claim accountings and receive them at a later time. Then, you will have to insert a claim account between two accounts or revise/update an account between two accounts.
To ensure the claim bookings are correct, the system will calculate the previous amount based on claim as of date. And previous amount will be calculated based on already closed worksheets with as of date prior to this worksheet plus adjustment on balance with as of date prior to this balance on this worksheet. The system will trigger adjustment to later closed worksheet when a previous worksheet is booked out of sequence.
Example: Reserve accounts
| As of date | Claim Account | Previous Amount | Amount | New Amount |
| 1 Jan 2019 | 100.000 | 0 | 100.000 | 100.000 |
| 1 May 2019 | 40.000 | 100.000 | -60.000 | 40.000 |
| 1 Apr 2019 | 80.000 | 100.000 | -20.000 | 80.000 |
| 1 May 2019 | 40.000 | 20.000 | 20.000 | 40.000 |
The claim accounting on 1 Apr 2019 comes late, the previous amount of it will be calculated according to the booking on 1 Jan 2019. And at the same time, the system will generate an adjustment booking for 1 May 2019 to ensure reserve amounts are correct.
Register a Claim Account Using Different Share #
Accounts are sometimes presented using a share condition not reflecting your signed share. This could for example be the 100% Figure, or the Broker’s Share Figure, etc. The Claim Worksheet allows you to register the account in the same manner as it is presented.
To register Claim Figures for 100%:
- Create a Claim Worksheet.
- Select or Add New Currency.
- Select 100 % Share Figures check box.
- Complete and/or change the defaulted booking row information.
- The system displays the previous bookings made for that claim in your share.
- Select “100% Figures” check box.
- The system converts the previous bookings, if any to 100% Figures.
- Book the adjustments to existing or new entry codes as required, using the Adjustment column.
Note! The share option is not editable after details are present on the worksheet - at that point you can only toggle between “100% Figures”
To register Claim Account for a given Percentage:
This option allows you to enter any percentage, thus indicating that the entered bookings reflect that percentage.
- Create a Claim Worksheet.
- Select or Add New Currency.
- Complete and/or change the defaulted booking row information.
- The system displays the previous bookings made for that claim in your share.
- Select “Figures for Our Share” check box.
- The system display the previous booking for your share (or 100% of your share)
- Enter the share that you want to use as basis in your booking, for example 10%. (This means the account is expressed for a 10% share, and all figures are displayed for this amount.)
- The system converts the previous booking using the entered share.
Note! The share option is not editable after details are present on the worksheet. Once you have applied the worksheet bookings are converted to “our share”. At this point you can only toggle between “100% Figures” and “Our share” figures.
To register Claim Account for a Defined Share Condition:
When this option is enabled by your System Administrator, it allows you to select another of the shares defined on share condition than your share, e.g. “Broker’s Order”. All bookings (previous and adjustments) represent the selected share.
- Create a Claim Worksheet.
- Select or Add New Currency.
- Complete and/or change the defaulted booking row information.
- The system displays the previous bookings made for that claim in your share.
- Select “Figures from Share Condition” check box and select the Share condition you want to use, e.g. “Broker’s Order”. System displays your share of the selected order.
The system displays the previous booking and the new amounts grossed up to represent the chosen order for example Broker’s Order. 6. Book the adjustments to existing or new entry codes as required, using the Adjustment column. The figures should represent the chosen Share Condition, e.g. “Broker’s Order” rather than your share.
Note! The share option is not editable after details are present on the worksheet. Once you have applied the worksheet bookings are converted to “our share”. At this point you can only toggle between “100% Figures” and “Our share” figures.
| Field | Description | Location |
|---|---|---|
| 100% Figures | A check-box indicating that the figures about to be booked represent 100% of the reinsurance agreement, rather than your signed share. Values: Selected (100%) / Cleared (your share) Default: On manual claim worksheet: Your share (cleared), on FGU worksheet: Depending on Display option in FGU Derived from: Display selection on From Ground Up when worksheet “From Ground Up”. Mandatory: No Functional impact: When “100%” is selected, all other share options are disabled. |
Claim Worksheet |
| Figures for Our Share | A check-box indicating that the figures about to be booked represent a given percentage of the reinsurance agreement, rather than your signed share. Values: Selected, Cleared Mandatory: No Functional impact: When “Figures for Our Share” is selected, the “Share %” is enabled. All other share options are disabled |
Claim Worksheet |
| Share % | The percentage that the booked figure represent. Values: A percentage; between 0 and 100% Default: 100 % - meaning 100% of your share. Mandatory: Yes, when “Figures for Our Share” check box is selected. Functional impact: No |
Claim Worksheet |
| Figures from Share Condition | A check-box indicating that the figures about to be booked are not based on the share “your share of 100%” but one of the other “Shares” defined on “Share Condition”. Values: Selected /cleared Mandatory: No Functional impact: When selected, the “Share Condition” field is enabled and Our Share Of Placement field is displayed. All other share options are disabled. |
Claim Worksheet |
| Share Condition | The selected share condition that the figures about to booked represent.. Values: None, Net Of Gross, Order of 100%, Broker’s Order, Ceded Default: None Derived from: Share condition Mandatory: Yes when “Figures from Share Condition” has been selected. Functional impact: No |
Claim Worksheet |
| Our Share of Placement | An output field displaying your share of the selected Order/“ShareCondition”. Values: Percentage field, not editable Derived from: Share Condition Mandatory: No. Functional impact: No |
Claim Worksheet |
Automatic Bookings within Claim Worksheet #
Within the Claim worksheet there are various automatic or half-automatic calculations. They are:
- Reinstatement Premium Booking
- V.A.T. Booking
- Annuity Bookings
- Automatic Booking of Government Taxes
- Automatic Generation of an Additional Entry Code; for example Automatic Reduction of Reserves when booking payments
These are described in detail below.
Reinstatement Calculation for Assumed Business #
For non-proportional assumed business, a reinstatement provision can be agreed between the Reinsurer and the Cedent. The Automatic Reinstatement Calculation is based upon the Reinstatement Condition, Premiums, Deductions and Claims. In order to calculate the assumed reinstatement premium automatically, SICS requires the following:
- Reinstatement Condition defined.
- Reinstatement currency is defined.
- Reinstatement Calculation Rule is either Per Loss or Per Insured Period.
- Reinstatement Calculation Method has been defined as Pro Rata Amount, Pro Rata Time, or Pro Rata Time and Amount.
- Premium has been booked, or your System Administrator has activated calculation based on Deposit Premium.
- Cover is not unlimited.
- Entry Codes defined for Reinstatement Premium for Assumed Business in System Parameters. If you want to calculate the reinstatement premium reserve, Client IBNR, ACR you must define entry codes for these also.
- Entry Code for Reinstatement Premium is included in the Entry Code Group that is the basis for the Deductions. For example if Deductions are based on Gross Net Premium, the Reinstatement Premium must be part of the equivalent Entry Code Group.
- If you want to book deductions for the calculated Reinstatement Premium Reserves, Client IBNR, and ACR, corresponding Entry Codes and Entry Code Groups have been defined in the System Parameters for the Reinstatement Premium Calculation.
- The Entry Codes for Reinstatement Premium Reserve which form the basis for the Reinstatement Premium Reserve Deductions have been included in the Entry Code Group that is the basis for the Deductions, in Entry Code Group Category “Subject Premium Income, Non-Proportional”.
Below is described the various calculations, and the effect of the different conditions will have on the Reinstatement. For more details about Claims Handling, Premiums, Claim Condition, Deduction Condition and Reinstatement Conditions, refer to these chapters.
The assumed business reinstatement calculation is available from the Assumed Business Claim List, the Claim worksheet, and the Business Ledger, depending on the Reinstatement Calculation Rule, described below.
Reinstatement Condition #
Reinstatement Currency #
The system performs two different calculations depending on the chosen Reinstatement Currency in the Reinstatement Condition.
Currency of Loss: Reinstatement Premium is calculated in the same currency and with the same currency split as the loss. This means that the Claim amounts booked are the basis for the currency of the reinstatement premium. If the loss is booked in only one currency, and the premium is booked in several currencies, the reinstatement premium is calculated by converting the premium to the loss currency using the exchange rate defined under the Reinstatement Premium Conditions (see Handle Reinstatement Conditions).
Note! If the currency of loss is not defined on the business, SICS will convert the loss currency to the Main Currency of the business, using the latest daily rate of exchange. The reinstatement premium will therefore be calculated in the Main currency only.
Currency of Premium: Reinstatement Premium is calculated in the same currency as the premium. The premium up-front decides the currency of the Reinstatement Premium. The Reinstatement Premium (either in one currency or in several) is the same as the premium up-front (before taking into the calculation the Reinstatement Premium percent and the loss' percent of the cover).
Note! If Premium is booked in a currency that is not defined on the business, SICS will convert the currency into the Main Currency, using the latest daily rate of exchange.
Reinstatement Payment Rule #
The Reinstatement Payment Rule defines whether Reinstatements are to be calculated Pro Rata Amount, Pro Rata Time and Pro Rata Time and Amount. SICS performs calculations for all.
Pro Rata Amount Calculation:
Claim Amount / Cover * Amount % * Premium
Pro Rata Time
Claim Amount Cover * Time % * (Remaining Days of Insured Period / Number of Days in Insured Period) * Premium
The time element is calculated according to the following rules:
- If Claim Trigger Date is recorded, the remaining day calculation will use this date
- If Date of Loss From, the remaining days will use this date
- If Date of Loss Period, the remaining days will use the To date
- If Date of Loss is outside the Insured Period, for example on a Risks Attaching, the time element will be zero, and no calculation will take place. Pro Rata Time and Amount
(Claim Amount/Cover) * Amount % * (Remaining Days of Insured Period/Number of Days in Insured Period) * Time % * Premium
The Calculation Rule determines whether the Reinstatement should be calculated automatically, and at which level the booking is done. Possible options are <None>, No Calculation, Per Insured Period and Per Loss.
- <None> means that no Calculation Ruleis defined - and that no automatic Reinstatement Premium calculation is done.
- No Calculation means that no automatic Reinstatement Premium calculation is done.
- Per Insured Period calculates the Reinstatement Premium per Insured Period, with no reference to the claim that triggered this Reinstatement Premium. The booking is made only on the Business Ledger.
- Per Loss calculates the Reinstatement Premium per loss, with a booking made directly on the Claim Ledger, connected to the claim that triggered the Reinstatement Premium
Deductions #
Brokerage: If there is a broker involved, the reinstatement calculation will apply the brokerage defined on the Reinstatement Condition, and not the brokerage defined on the Deduction Condition.
Note that “Brokerage” must be defined as a percentage in order to be calculated.
Other Deductions: Apart from the brokerage all other deduction provisions will be taken from the Deduction Condition.
Note that all “other Deductions” must be defined as a percentage in order to be calculated.
Claim Condition #
Claim Amounts - Expense Clause #
The calculation of Reinstatement Premium is based upon the claim amounts booked on the Assumed Business. Note that the Assumed Reinstatement Calculation only considers paid losses, and in some cases paid expenses - when these are part of liability, or defined as none. Loss Reserves and/or Expense Reserves will not generate any reinstatement calculation, nor will they be considered in such a calculation.
Settlement Sequence #
The Settlement sequence determines the sequence in which the reinstatements shall be allocated.
Date of Loss Order: The losses are sorted chronologically, and the reinstatements are allocated in the same fashion. Date of Settlement Order: The losses are sorted by the date they are booked and reinstatements are allocated in this fashion. The date of loss will have no impact. Not Defined or None: When the settlement sequence is defined as None, or not defined at all, SICS will interpret this as being Date of Settlement Order.
Premium Condition #
The Premium Conditions must be registered and premiums must be booked on the Assumed Business. It is not a requirement that the Premium has been received. The basis for calculating reinstatements is Adjusted Premium. If Adjusted Premium is not booked, the Deposit Premium is the basis and if Deposit Premium is not booked, the Minimum Premium is basis for the calculation. _Refer to the Handle Business Conditions chapter; Handle Limit and Premium Conditions section for more information about premium on non-proportional business.
Create Reinstatement Calculation Per Loss #
When the Calculation Rule is “Per Loss”, the Reinstatement booking is generally made on a Claim worksheet, and will as such be displayed on the Claim Ledger. Depending on the Settlement Sequence, the calculation option is available from the Business Claim List, from within a Claim Worksheet, and from the Business Ledger.
Create Reinstatement Calculation Per Loss when Claim is Indexed #
When the assumed claim is marked as Indexed, reinstatement premium due will consider the indexed cover when calculating reinstatement premium. The calculation is applied when the reinstatement is calculated Per Loss, Standard indexation is selected and the claim is handled via Claim FGU booking.
Automatic Reinstatement Calculation from FGU will perform the following calculation:
Paid reinstatement: Paid Adjustment/Paid Index Ratio)/Nominal Cover*Premium *xx %
Reserve reinstatement: Reserve/Paid Index Ratio)/Nominal Cover*Premium *xx%
ACR reinstatement: ACR/Paid Index Ratio)/Nominal Cover*Premium *xx%
Create Reinstatement as Part of Claim Booking #
Manually select to calculate reinstatement premium
The Reinstatement calculation is available from within the claim worksheet when the Calculation is Per Loss. SICS only calculates and includes the reinstatement premium for the claims included in the worksheet.
- Create a claim worksheet, book claim payments and/or reserves.
Select Automatic Booking from the pop-up menu. If more than one business and/or claim are included in the worksheet, select the business-claim you want to perform the reinstatement calculation for.
- The system generates the Reinstatement booking. Additional entry codes are added to the worksheet.
- Close the booking, or make the necessary changes to the Reinstatement calculation. If you change the Paid Reinstatement Premium only, note that SICS will not automatically change the booked deductions. If the Balance Split option flag for “Reinstatement Premium” is selected, a separate reinstatement balance is created. (The Reinstatement Premium Balance Split option may be selected by default on claim worksheets if your System Administrator has activated this functionality.) Otherwise, clear this flag to combine the reinstatement premium and claim balance.
If you apply or select to Change the worksheet status without calculating the reinstatement premium, and the reinstatement premium option is enabled, and the worksheet is not validated by Claim Accuracy rules, SICS will present you with a confirmation message.
**Reinstatement Premium is automatically calculated
** Your system is set up to automatically create reinstatement premium bookings (and associated deductions) when due.
- Create a claim worksheet, book claim payments and/or reserves. Your worksheet may include one or more businesses.
- Select to Apply worksheet. The system generates reinstatement booking for all businesses where reinstatement premiums are due. Additional entry codes are added to the worksheet. Alternatively, select to change status without applying the worksheet first. System returns an message informing user that reinstatement calculation has been executed.
- Close the booking, or make the necessary changes to the Reinstatement calculation. If you change the Paid Reinstatement Premium only, note that SICS will not automatically change the booked deductions. If the Balance Split option flag for “Reinstatement Premium” is selected, a separate reinstatement balance is created. (The Reinstatement Premium Balance Split option may be selected by default on claim worksheets if your System Administrator has activated this functionality.) Otherwise, clear this flag to combine the reinstatement premium and claim balance.
Note! DXC recommends that you always initiate a reinstatement calculation from the business claim list, so that any reallocations of premium between claims not included in your worksheet can be calculated and booked.
Calculation of Reinstatement when Combined Aggregate Limit on Main section #
If your System Administrator has activated this functionality, and the Annual Aggregate Limit is defined as being a Combined Aggregate Limit, the calculation considers the reinstatement condition on the Main section. In the calculation the cover from the section to which the claim is linked is used. Maximum reinstateable per child section is that section’s cover amount * (Main Section’s number of reinstatements-1) , and maximum reinstateable for all sections of the business is the Main Section’s Cover amount (Main Section’s number of reinstatements-1).
Create Reinstatement after Claim Booking #
If you select not to book the reinstatement premium simultaneously as the claim amount, the calculation can be performed later, from the Business Claim List, or from the Business Ledger.
To calculate Reinstatement from the Business Claim List:
- Open the Business Claim List, select any claim and select Automatic Reinstatement Calculation from the pop-up menu.
- SICS opens a Claim worksheet containing all claims for which a reinstatement is due, with the associated reinstatement bookings. Be aware that the claim not necessarily is the same as the one you selected on the Business Claim List. Also note that only reinstatement bookings are displayed on the worksheet.
- Close the booking. One balance is created per claim.
To create Reinstatement Calculation Order from the Business Claim List:
- Open the Business Claim List, select a claim and select Create Reinstatement Order from the pop-up menu. SICS opens the New Reinstatement Premium Assumed Business Order window.
- Enter Order information as required, and click OK.
- Select Run Now from the menu.
- If Reinstatement is due, SICS produces bookings on a Claim worksheet with reference to the claims triggering the reinstatement calculation. Set the worksheet status as required, and click Save.
- If no reinstatement is due, a warning message to this effect is presented, and no worksheets are created.
Calculate Reinstatement Premium Adjustment #
When you have received premium adjustment, the booked reinstatement should also be adjusted based on the new revised premium. Although the Calculation Method is Per Loss, the reinstatement premium adjustment is made for the entire Insured Period.
- Open the Business Claim List.
- Select Create Reinstatement Calculation Order.
- Enter the order information.
- Select Run Now from the menu.
- Set the Order worksheet status as required.
- Click Save.
Note! The Reinstatement Adjustment booking is made on a Technical worksheet without reference to any specific claim.
Create Reinstatement Calculation Per Insured Period #
When the Calculation Rule is “Per Insured Period”, the Reinstatement bookings are always made on a Technical worksheet without any direct reference to specific claims. The calculation is available from the Business Claim List, and from the Business Ledger. Also note that when booking a claim you will not be informed that Reinstatement is due.
Create Reinstatement Calculation Per Insured Period based on Accounting Period To Date #
If your System Administrator has activated this functionality, the Reinstatement Calculation can be initiated from a Technical Worksheet. The calculation is based on section, and accounting year and period, so this must be selected before option is enabled.
- Create a technical worksheet
- Select business (if not already defined), and currency
- In the details section, add booking, and define Insured Period, Accounting Year, and Accounting Period.
- Select section (if not already defined)
- Make sure that entry code is either not defined, or not reinstatement premium related (this includes any deduction codes.)
- From pop-up menu, select Automatic Reinstatement Premium Calculation. (Note that option is only enabled for the latest Accounting Period present in the worksheet for the Insured Period/Section.
The system calculates reinstatements and deductions:
- Premiums for section is considered; including any bookings on current worksheet
- Loss amounts with an Accounting Period To date prior or equal to the Technical Worksheet’s Accounting Period To date
- Deductions are calculated based on bookings in the worksheet
Premiums considered in Reinstatetement Calculation #
The calculation considers all premium booked on same section as the claim. If this section does not have any premium, the system will check the child sections premium, and aggregate these. If the child sections do not have any premium, the system will check the parent section’s premium, and use this.
If your System Administrator has activated “Use Deposit Premium as Basis for Reinstatement Calculation”, also premium deposits which has not yet been booked is considered. When all deposits have been booked (and premium condition is displaying this), the system reads the Business Ledger.
Calculate Reinstatement from the Business Claim List #
- Open the Business Claim List, select any claim and select Create Reinstatement Order from the pop-up menu. SICS opens the Reinstatement Order window.
- Enter the order information, and click OK.
- Select Run Now from the menu. A technical worksheet is produced with the reinstatement premium due.
OR
- Open the Business Claim List, select any claim and select Automatic Reinstatement Calculation from the pop-up menu.
- SICS opens a Technical Worksheet containing a single balance for the reinstatement premium due, considering all the losses affecting the layer, as well as previous bookings. No link to the specific claims exists.
- Close the worksheet.
Calculate Reinstatement from the Business Ledger: #
- Open the Business Ledger - Account Balances Tab.
- Select the claim balance.
- Select the Booking detail, and then select Automatic Reinstatement Premium Calculation from the pop-up menu.
- A technical worksheet is created with the reinstatement booking due. No link between claim and reinstatement is created.
- Close the worksheet.
Calculate and Book Value Added Tax (VAT) #
For an assumed business that is subject to Value Added Tax (VAT), SICS calculates VAT automatically on technical bookings. The calculation is part of the validation and closing process.
- Make your bookings on the Claim Worksheet.
- Set the VAT Calculation method (Gross or Net).
- Select Apply or Change Status from the Edit menu button.
- SICS calculates VAT for the technical bookings that are subject to VAT calculation and adds the result to the worksheet.
- If VAT entry codes already exist on the worksheet, no further VAT calculation is done.
- Select Change Status again in order to close the worksheet.
- Gross basis: VAT is calculated by splitting the booked gross figures into net amount and VAT amount using the VAT percentage.
- Net basis: VAT is calculated by multiplying the booked net figures with the VAT percentage. Example:
A Claim worksheet contains following booking details:
Paid Claim -150 VAT % is 10%
Calculation on Gross basis:
The system uses following formulas to calculate the VAT amounts:
Net Amount = (Gross Amount * 100) /(100+VAT%)
VAT Amount = Gross Amount - Net Amount
Net Amount: (150 * 100)/(100 + 10) = 136.36
VAT Amount: 150 - 136.36 = 13.64
Calculation on Net basis:
The system uses following formula to calculate the VAT amounts:
Net Amount * VAT% = VAT Amount
The VAT calculation results in following booking details:
Paid Claims -150.00
VAT Paid Claims -15.00
| Field | Description |
|---|---|
| Is VAT To Be Calculated on Gross | Selection of whether VAT should be based on Gross or Net. Values: Selected, cleared Default: Gross (selected) Functional impact: When Business is subject to VAT and Business Partner with Payment task |
Calculate and Book Value Added Tax Based on Entry Code Groups Automatically #
When the Automatic VAT calculation is activated; and system parameter VAT Calculation based on EC Groups is selected; SICS calculates VAT automatically for all business (inward and outward) as long as they are subject to Value Added Tax (VAT).
The bookings will be automatically done; and will always be on Net Basis (see example above).
The result of the Automatic Booking of VAT are booked with Entry Codes defined in the System Parameter Accounting/Entry Codes/Accounting Function (refer to the Accounting Functions listed below).
The Accounting Function used for the calculation of VAT depends on the type of VAT calculations you are using, i.e. VAT based on EC Sub Category or VAT based on EC Groups (the latter is the case if the system parameter VAT Calculation based on EC Groups is selected):
- VAT based on EC Sub Category (Accounting Function: Vat Calculation)
- VAT based on EC Group (Accounting Function: VAT Calculation based on EC Groups)
Automatic Booking of Government Taxes #
To ensure that the Government Tax is calculated and booked correctly and according to the Government Tax Table, SICS can calculate this entry automatically.
- Make your bookings on the Claim Worksheet
- Select a ledger currency or select Add Currency from the pop-up menu in the Currency display list
- Make your Trigger detail booking(s) (e.g. Claim Paid etc.) on the Claim Worksheet
- Right mouse click and select Automatic Bookings and then Automatic Booking of Government Taxes from the pop-up menu.
- You can select between the following calculations;
- For Selected Business, Currency and All Details
- For Selected Business, Currencies and All Details
Note: The Automatic Booking of Government Taxes can only be calculated for Assumed Business and is dependent on the system parameter ‘Government Tax Framework in use’ being active and that the system parameter ‘Government Tax Table’ is defined.
SICS calculates the Government Tax details in accordance with the Validation Indicator of the Business Insured Period (i.e. Government Tax Validation Indicator is ‘None’ or ‘TA WS only - Always Stop if Trigger/Target EC is booked’ or ‘TA WS only excluded from Validation’) and the definition of the Government Tax Table for the respective Rule Ref number.
If system finds (according to the Government Tax Validation Indicator) that automatic booking of Government Tax can be performed for the Business Insured Period/Section, system is checking whether the entered detail on the worksheet is a Trigger Entry Code or not.
A Trigger Entry Code is an Entry Code defined within one of the Entry Code Groups within the Entry Code Category ‘VAT/Government Tax Calculation Basis. If the Entry Code on the worksheet is a Trigger Entry Code, the Entry Code is a candidate for Automatic Booking of Government Tax.
The classification made with the Trigger Entry Code and the information on the Business Insured Period/Section is used to search in the Government Tax Table to find the respective Government Tax Rule and thereof the Target Entry Code and Tax Percentage to be used for the automatic Government Tax Booking.
Details from the table to be checked against the business are; Tax Country, Base Company Affected, Base Company/Cedent/Producer/Broker within Tax Country, Cedent/Producer within EU, Cedent/Broker in State, Cover Area, Class of Business, Special Taxes for Business Partners.
If one or more matching active Government Tax Rule is found, system is checking whether Government Tax is applicable or not (refer to field Tax Applicable and Tax % Applicable valid From-To Dates in Government Tax Table). If applicable, the automatic booking of the Government Tax can be performed using the Government Tax percentage found in the table.
Depending on the definition of the respective Government Tax Rule, the Government Tax detail is calculated on Gross or on Net basis.
Example when field Calculate Tax on Gross = selected (means is on Gross);
Government Tax = 6% Trigger Claim Paid detail (basis) present on worksheet = -1.000 System calculates Government Tax (X + (X*6/100) = -1.000. Automatically booked by SICS = Trigger Claim Paid detail -943,40 (replaces the Claim Paid -1000 entered by user Government Tax -943,60 * 6% = -56,60 Total Claim Paid + Government Tax = -1.000
Example when field Calculate Tax on Gross = deselected (means is on Net, default value); Government Tax = 6% Trigger Claim Paid detail (basis) present on worksheet = -1.000 System calculates Government Tax -1.000*6/100 = -60. Total Claim Paid + Government Tax = -1.060
Furthermore, SICS is checking for more Target Entry Code details to be booked for the same Trigger Entry Code. This will be the case when more than one Government Tax Rule with the same information/classification is defined for one Trigger Entry Code. This procedure is repeated for all Trigger Entry Codes within the worksheet.
- The Entry Code assigned to the Target detail is the Entry Code defined for the respective Government Tax Rule.
- The fields Government Tax Rule Ref, Tax Country, Tax % and Tax Type are automatically updated from the Government Tax Table for the respective Government Tax Rule.
- Government Tax Trigger Entry Code(s) and Target Entry Code(s) are automatically linked during the Automatic Booking process
Note: If the field ‘Automatic Booking’ in the Government Tax Table is selected, automatic booking of Government Tax will be performed when user press the ‘Apply’ button or select ‘Change Status’ on the Claim Worksheet - it will not be necessary to select the ‘Automatic Booking’ option from the pop-up menu.
Government Tax Validation #
To verify that the Government Tax detail is in accordance with the definition of the respective Rule in the Government Tax Table, system performs a validation. The validation is triggered when user press the ‘Apply’ button or select ‘Change Status’.
Check if Government Tax Validation is to be performed for Business Insured Period #
To check if a validation is to be performed or not for the details, the system first checks if the flag Government Tax Validation Active on the business Insured Period is selected or not. If this flag is not selected, no validation is performed. It this flag is selected, an automatic validation of the Government Tax detail may be performed
Entry Codes to be checked on Claim Worksheet #
System checks Trigger and/or Target Entry Codes on Claim Worksheet;
- Trigger Entry Code is an Entry Code defined within one of the Entry Code Groups within the Entry Code Category ‘VAT/Government Tax Calculation Basis.
- Target Entry Code is an Entry Code defined within one of the Entry Code Groups within the Entry Code Category ‘Government Tax Target’.
If system finds either a Trigger Entry Code and/or Target Entry Code on the Claim Worksheet, the booking line is checked against the respective rule in the Government Tax Table. If a respective, active and applicable rule is found, the validation is performed. System gives an error message in the following scenarios;
- If a Trigger Entry Code is found, but the Target Entry Code is missing for the same granularity (*)
- If a Target Entry Code is found, but the Trigger Entry Code is missing for the same granularity (*)
- If both a Trigger and a Target Entry Code is found, but the Government Tax detail is above the tolerance limit given for the respective Government Tax Rule
- A respective Government Tax Rule for the current Insured Period is defined in the Government Tax Table and the value in the column ‘Always Stop if Trigger/Target EC is booked’ is true and the current Claim Worksheet contains a Trigger and/or Target Entry Code
- A Target Entry Code is found, but no respective Government Tax Rule is found for the current Insured Period in the Government Tax Table
- The Government Tax Validation Indicator on the current Insured Period/Section is ‘TA WS only - Always Stop if Trigger/Target EC is booked’ and the current Claim Worksheet includes a Trigger and/or Target Entry Code
- No validation is performed when neither a Trigger Entry Code nor a Target Entry Code is found.
Note! Same granularity is same values for currency, booking year/period, accounting year, accounting period, accounting period from-to, business, insured period, underwriting year, occurrence year, original underwriting year, section, accounting classification..
The Government Tax Validation is repeated for all Trigger/Target Entry Codes included in the Claim Worksheet. To be able to ‘Apply’ or ‘Change Status’ the Claim Worksheet, user must either correct the error(s) found or override on Claim Worksheet by selecting a Government Tax Category and giving a Government Tax Comment. Another possibility is to mark a booking line and to select the option Government Tax Validation Error details from the pop-up menu. The Government Tax Validation Error Details window appears from which the user can select a Government Tax Category and to give a Government Tax Comment to override the error.
Check if Trigger/Target Entry Codes are linked when ‘Change Status’ on Claim Worksheet #
If a Target Entry Code is booked on the Claim Worksheet, system checks if this Entry Code is linked to a corresponding Trigger Entry Code. If the Trigger/Target Entry Codes are not linked, or a corresponding Trigger Entry Code is not booked on the Claim Worksheet, system issues an error message. Depending on what is missing, the user must either link the Trigger/Target Entry Codes or create a corresponding Trigger Entry Code to be able to ‘Change Status’. Refer to chapter Link Government Tax Trigger/Target Entry Codes on an Assumed Business from the Claim Worksheet for more information regarding linking.
Book Annuity #
If your claim bookings should be split into ordinary Loss payments and reserves, and Annuity payments and reserves, SICS offers a very simplified functionality for the calculation and booking of these on From Ground Up Claim worksheets.
- Create the From Ground Up advisory. Refer to Record Advisory in the Claims chapter of this guide.
- Select to Create Claim worksheet from the menu.
- On the generated Claim Worksheet the entire Paid booking (that is Loss and Annuity Paid) is booked to the entry code for Paid Loss. The entire Reserve booking (that is Loss Reserve and Annuity Reserve) is booked to the entry code defined for Loss Reserves, regardless of FGU entries for Annuities. The “Fixed Loss and Annuity” check box has been selected.
- Enter the Annuity Adjustments (for both Paid Annuity and Reserve Annuity) in the respective adjustment columns for the entry codes defined for Annuity.
- The system automatically adjusts the amounts booked to the ordinary loss entry codes.
| Field | Description |
|---|---|
| Fixed Loss and Annuity | Indicator of whether the amount booked in respect of Loss and Annuity are Fixed or not. Option is only available on From ground Up Claim worksheet when your System Administrator has enabled this functionality. Values: Selected / Cleared Default: Selected Functional impact: When selected, the loss entry code adjustment booking is adjusted with the amount manually entered for the Annuity entry code. When cleared, the booking to the loss entry code is not impacted by the manual booking on the annuity entry code. |
Automatic Generation of Entry Code #
As part of the validation and closing process SICS can generate an additional entry code, or an adjustment to one that is already existing on the worksheet, automatically. This is particularly useful if you want to reduce your reserves automatically with the same amount as the payments you book.
- Create Claim Worksheet, with all relevant details, and book the adjustment to the first entry code e.g. Paid Loss.
- Select Apply or Change Status from the menu.
- Confirm that you want to generate automatic bookings.
- The system generates an adjustment for the linked entry code; for example the Loss Reserves.
This functionality must be enabled by your System Administrator, and is only relevant for Manual Claim worksheets.
Balance Split Options in Claim WS #
The Balance Split options in the upper right hand corner of the claim worksheet are used to create balances on the same level as in the accounting document received from the Broker or the Cedent. The ability to split balances in the same way greatly facilitates the identification of balances when a statement or account is received.
The Balance Split Option can be set before or after the booking details have been entered.
Setting a Balance Split:
- Create a new Claim Worksheet or Open an existing worksheet with status Open.
- Select or add a currency. The Balance Split option fields are now enabled.
- Select or clear the required Balance Split options check boxes.
- Complete the booking as required.
OR alternative steps 3 and 4
- Add booking details.
- Select or clear the Balance Split options as required.
- Select to Change Status of the worksheet from the menu or select View Balance Changes from the pop-up list in the worksheet Properties section.
- Balances are created based upon the Balance Split option settings as well as other entered information.
| Field | Description | Location |
|---|---|---|
| Section | Indicator of whether or not a separate balance is created per Section. Values: Selected / Cleared Default: Selected Functional impact: A separate balance is created per section. Mandatory: Yes |
Claim Worksheet - Balance Split Options section |
| Accounting Classification | Indicator of whether or not balances shall be created on the Accounting Classification level. Values: Selected / Cleared Default: Selected when your System Administrator has configured your system so that bookings and entry codes are displayed per currency and Claim-to-Section link. When your System Administrator has configured your system so that claim bookings are displayed per currency and Accounting Classification, the option is disabled. Functional impact: A separate balance is created per Accounting Classification included in the worksheet. Mandatory: Yes |
Claim Worksheet - Balance Split Options section |
| Brokerage | Indicator of whether or not balances shall be created on Brokerage level. Values: Selected / Cleared Default: Selected if the Brokerage Payment task has been assigned to a specific partner; otherwise cleared. Functional impact: Separate balance is created for entry codes that are included in the Entry Code Group Business Partner Ledger Balance Split - Brokerage Payment; provided the Brokerage Payment task is assigned to a different partner than the one with the ‘normal’ payment task. Mandatory: Yes |
Claim Worksheet - Balance Split Options section |
| Claim | Indicator of whether or not a separate balance shall be created on the Claim level. Values: Selected / Cleared Default: Selected if the Claim Payment task has been assigned to a specific partner; otherwise cleared. Functional impact: Separate balance is created for entry codes that are included in the Entry Code Group Business Partner Ledger Balance Split - Claim Payment; provided the Claim Payment task has been assigned to a different partner than the one with the ‘normal’ payment task. Mandatory: Yes |
Claim Worksheet - Balance Split Options section |
| Reinstatement Premium | Indicator of whether or not a separate balance shall be created for the Reinstatement Premium bookings on the worksheet. Values: Selected / Cleared Default: Selected when this balance split option has been selected in Claim parameters, or when Reinstatement Premium condition has been defined on the business; other-wise cleared. Functional impact: A separate balance is created for reinstatement bookings.If Accounting Parameter Included VAT codes in Reinstatement balance is activated, the VAT related codes are included as part of this balance. Mandatory: Yes |
Claim Worksheet - Balance Split Options section |
| Government Taxes | Indicator of whether or not a separate balance shall be created for the Government Tax bookings on the worksheet. Values: Selected / Cleared Default: Selected when Government Tax Accounting task has been assigned to a partner on the Assumed Business; other-wise cleared. Functional impact: A separate balance is created for Government Tax bookings, means all Entry Codes included in the Government Tax Entry Code Group within the Entry Code Group Category _Business Partner Ledger Balance Split’. Note that the Government Tax Entry Code Group must be defined with code = GOVTAX (to be identified as Government Tax Entry Code Group). Mandatory: Yes |
Claim Worksheet - Balance Split Options section |
Create and Select Accounting Classifications from a Claim Worksheet #
While making your bookings in a Claim Worksheet you may discover that you need to view and maintain existing Accounting Classifications, or even create new ones.
- In your Claim worksheet, select a ledger currency or select Add Currency from the pop-up menu in the Currency display list to add a currency.
-
If Accounting Classifications are defined, you have to select an accounting classification from the drop-down list or via the menu option Select Accounting Classification.
-
If no Accounting Classifications are defined, or you do not find an appropriate Accounting Classification among the defined ones, you can create a new by selecting Accounting Classification from the menu.
You see the Accounting Classification window in edit mode. Define the required classification items by removing values until each classification type only has one value selected.
- When you save the Accounting Classification window it is allocated to the booking that you selected in the Claim Worksheet.
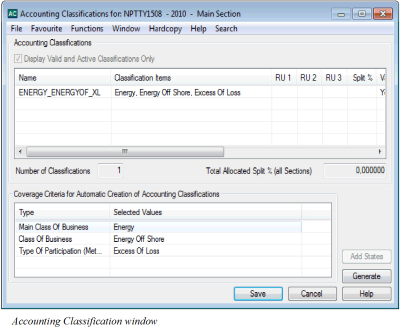
Closing of Claim Worksheet #
When you have completed your claim worksheet, you must allocate a worksheet ID so that the bookings can be committed, and also set the worksheet status. Which status you want to give your worksheet depends on whether the worksheet is complete, or whether you want to go back to the worksheet at a later stage.
Change the Worksheet to Closed #
When you are satisfied with the bookings, and no further changes are required, you must change the worksheet’s status to “Closed”.
- Create the Claim worksheet with details as described previously.
- Select the Edit Menu button.
- Select Change Status. The system now validates that all mandatory inputs have been entered and controls the bookings against the limits of the business/claim. The system further validates whether any automatic bookings should take place. (Refer “Automatic Bookings Within Claim Worksheet” section earlier in this chapter.) If the Insured Period is marked as To be Commuted, system will give a warning.
- Respond to the confirmation messages, and/or error messages as required.
- If your system administrator has activated Claim Accuracy Validation rules, and a template has been identified for the Insured Period you are booking on; the tolerance limits of the rules within the template determines whether a booking which is not according to contract terms, shall trigger a validation. Reinstatement bookings are compared with the calculation result of the automatic reinstatement calculation.
* If the booking is within limits/expected reinstatement; no error is raised, and no Accuracy log is created.
* If the booking is exceeding limits, or for reinstatements different than expected reinstatement; but within tolerance limits; no error is raised; but a Claim Accuracy log is created, and may be inspected by selecting an entry code.
* If the booking is exceeding limits, or for reinstatements different than expected reinstatement; and not within tolerance limits; the booking detail is highlighted, and you are required to provide a category and possibly a comment, before you can continue with the closing. A Claim Accuracy log is created. - In the worksheet closing window, select the “Change Status” check box.
- The system enables the “Change To” field, with default status “Closed”. In case your company have decided to review all Claim Worksheets the status “Closed” is not available. Instead you must select the “In Review” check box. If you later are allowed to change the status to “Closed” or if you are allowed to deselect the “In Review” check box, is defined in the security part of the system ( see your system administrator for more information). When a Claim worksheet is Closed or Inactivated the In Review check box is deselected.
- Note that the In Review functionality is not relevant for claim worksheets on Supporting Assumed Business.
- Click OK. The system now performs the domain restriction controls.
- If your System Administrator has activated this functionality, you may be required to define Claim Signature Notes. Refer to Handle Claims chapter for more information.
Depending on system parameter settings, the system defaults the due date to current date for all balance groupings which only contain non-liquid details and for which the due date has not been defined.
If the worksheet is that of a Joint Contract’s Administrator, the system automatically creates the corresponding worksheets on the corresponding claims for their respective shares.

Apply and Create Duplicate Technical Worksheet #
If your System Administrator has activated this functionality, you can create a duplicate Technical Worksheet from an open claim worksheet.
- Create the Claim worksheet with all details as described above, or retrieve an existing open Claim Worksheet.
- Select the Edit Menu button
- Select Apply and Create Duplicate TW. The system validates all entries in the worksheet, and when passing all validations, and all messages have been addressed, the duplicate Technical Worksheet is created, and a message appears with the worksheet ID.
Note: The option is not enabled if the Transfer to Ledger flag on the claim section is “No”, nor is it enabled if a duplicate technical worksheet has already been created for this worksheet.
When a duplicate Technical Worksheet is created, the Claim worksheet is locked for further modifications. Only the Booking Year and Period is open for entry.
Close or Inactivate Claim Worksheet with a duplicate Technical Worksheet #
When you select to change the status of a claim worksheet which has a duplicate Technical Worksheet linked to Inactivated or Closed; the system automatically creates a reversal of the Technical Worksheet. This worksheet is created with status Closed. The reversal worksheet is automatically paired with the original technical worksheet, unless that is not already included in a Balance Pairing.
Save the Claim Worksheet as Unfinished (UNFI) #
SICS allows you to save the bookings of the Claim Worksheet as ‘unfinished’. This status allows you to return to the worksheet at a later stage and complete the bookings then.
- Create the Claim worksheet with details as described previously.
- Select the Edit Menu button.
- Select UNFI. The UNFI option is enabled once a booking detail is added to the worksheet.
SICS assigns an ID to the Claim worksheet and closes the worksheet window. The worksheet is stored with less validation than if you had selected the Apply or Change Status option.. The worksheet status is “Open” and you can continue your work with the worksheet later.
Note! If your System Administrator has enabled the creation of “Discrepancy worksheets” for manual worksheets the status of the worksheet will be “Unfinished” when you select UNFI.
Inactivate a Claim Worksheet #
The Inactivate option enables you to inactivate and exit the worksheet without opening the Close Worksheet window.
- When booking your Claim worksheet you realise that the worksheet should not have been created, select the Inactivate option from the Edit Menu button.
- The system stores the worksheet and its’ ID with status Inactivated and can only be retrieved from the Find Worksheet window.
The Inactivate option is only available on the Edit menu when a booking detail is added to the worksheet.
You can also inactivate a worksheet from the Worksheet Closing window:
- In the closing process of your Claim Worksheet you realise that worksheet should not have been created, select the Change Status check box.
- The system enables the field Change Status, and default status Closed. Select “Inactivated” from the dropdown menu.
- Click OK.
- You only need to inactivate the worksheet if it has a worksheet ID, (it has been applied to the database). If the worksheet does not have an ID you can just cancel the worksheet by clicking Cancel on the worksheet.
- Inactivated worksheets can be only be retrieved from Find Worksheet window.
Manipulate the Worksheet Closing Window #
When you have completed your bookings in the Claim Worksheet window, you want to continue with the next step of the booking process. This enables you to, e.g. view balances, change expected payment partner, and/or expected settlement currency, add notes/references to the balances, mark a worksheet as ‘special’, change the status of the worksheet, and generate a paid remittance.
- Select the Change Status option from the Edit menu button of the Claim Worksheet window.
- The system validates the entries on the worksheet.
Make the required changes if you receive an error message and select Change Status again. 3. The Worksheet Closing window opens and a worksheet identifier is applied to the worksheet.
| Field | Description | Location |
|---|---|---|
| Business ID | The identifier of the business for which the balance has been created Values: Business Identifier Derived from: The Claim Worksheet Mandatory: Yes |
Closing worksheet window |
| Claim ID | The claim identifier for which the balance has been created. Values: Claim Identifier Derived from: The Claim worksheet Mandatory: Yes |
Closing worksheet window |
| Claim Name | The claim name for which the balance has been created. Values: String Derived from: The Claim Worksheet Mandatory: Yes |
Closing worksheet window |
| As of Date | The date on which the claim figures were composed. Values: DD/MM/YYYY Derived from: The Claim Worksheet Mandatory: Yes |
Closing worksheet window |
| Currency | The currencies of the account being booked Values: The ISO alpha definition, e.g. NOK, USD, GBP, etc. Derived from: The Claim Worksheet Mandatory: Yes |
Closing worksheet window |
| Balance | The Balance of the account split according to system-and user settings Values: Amount Derived from: The Claim Worksheet Mandatory: Yes |
Closing worksheet window |
| Due Date | The date when the balance is due for settlement Values: Date Derived from: The Claim Worksheet Mandatory: Yes |
Closing worksheet window |
| Booking Year/Period | The Year and Period when the balance was booked Values: Year and Period (Month 1, Month 2, etc.) Derived from: The Claim Worksheet Mandatory: Yes |
Closing worksheet window |
| Accounting Year | The Year of the account balance Values: Year Derived from: The Claim Worksheet Mandatory: Yes |
Closing worksheet window |
| Insured Period | The period when the agreement is in force for which the account balances applies. If the balance covers more than one period the field is empty, but you can inspect the values by selecting the field. Values: Date From -To (mm/dd/yy - mm/dd/yy) Derived from: The Claim Worksheet Mandatory: Yes |
Closing worksheet window |
| Underwriting Year | The year against which the result of a reinsurance agreement is measured. Normally this is the year when it was incepted or renewed. If the balance covers more than one year you can inspect the values by selecting the field. Values: Year Derived from: The Claim Worksheet Mandatory: Yes |
Closing worksheet window |
| Amendment | A change of business conditions in effect from a specific date. If the balance covers more than one amendment the field is empty, but you can inspect the values by selecting the field. Values: Amendment no. + effective from date (x(mm/dd/yy)) Derived from: The Claim Worksheet Mandatory: Yes |
Closing worksheet window |
| Section | The agreement may be split into different components according to the agreement’s classification. If the balance covers more than one section the field is empty, but you can inspect the values by selecting the field. Values: The name of the section Derived from: The Claim Worksheet Mandatory. Yes |
Closing worksheet window |
| Accounting Classification | A unique combination of the agreement’s classification components. If the balance covers more than one classification the field is empty, but you can inspect the values by selecting the field. Values: The name of the accounting classification Derived from: The Claim Worksheet Mandatory: Yes |
Closing worksheet window |
| Payment Partner | The Payment Partner of the balance. Values: The name of the Payment Partner Derived from: The Business Partners of the agreement and default value is the partner with a payment task Mandatory: Yes |
Closing worksheet window |
| Responsible BP | The Legal responsible Business Partner of the business. Which Business Partner depends on the Level-and Type of business. Values: Business Partner name Derived from: The Business Partners of the agreement. Depending on whether the system parameter Responsible Business Partner from Last Insured Period has been selected or not, the Business Partner name is taken from the last Insured Period of the Agreement or from the Insured Period equal to the Insured Period of the booking Mandatory: Yes |
Closing worksheet window |
| BP Reference | A Business Partner reference helping you to identify/verify balances in the Business Partner Ledger and/or Business Ledger. (Refer to the Field Descriptions - Balance Details View). Values: Free-text, maximum 40 characters Mandatory: No Functional Impact: None |
Closing worksheet window |
| LM Reference | A London Market Reference helping you to identify/verify balances in the Business Partner Ledger and/or the Business Ledger. Values: Free-text, maximum 30 characters Mandatory: No |
Closing worksheet window |
| Bulk Reference | A concatenation of Stamp number, our sequence number and Bulk claim reference. The field is only available if your System Administrator has activated the EDI Limnet functionality. Values: String Derived from: The Claim Worksheet Mandatory: No |
Closing worksheet window |
| TA Process ID |
A reference that helps you identify the balance. Please refer to the Process ID chapter of the Handle Reference Items chapter in the System Administration Guide for more details about the Process ID. Values: Free-text, maximum 30 characters Mandatory: No Functional Impact : if the System Parameter Enable Accounting Worksheet Process ID Validation is activated, the Process ID must exist in the Process ID table and the Status must be either Open or Re-Open when Worksheet has Status ‘Closed’. |
More Information view |
| CL Process ID |
A reference that helps you identify the balance. Please refer to the Process ID chapter of the Handle Reference Items chapter in the System Administration Guide for more details about the Process ID. Values: Free-text, maximum 30 characters Mandatory: No Functional Impact : if the System Parameter Enable Accounting Worksheet Process ID Validation is activated, the Process ID must exist in the Process ID table and the Status must be either Open or Re-Open when Worksheet has Status ‘Closed’. |
More Information view |
| Hash Amount | A summary amount updated by an EDI transfer. Values: Amount Mandatory: No |
Closing worksheet window |
| Control Amount | The balance of the account Values: Amount, maximum 20 characters Mandatory: No |
Closing worksheet window |
| Control Settlement Amount | An amount updated by an EDI transfer. Values: Amount Mandatory: No |
Closing worksheet window |
| Letter of Credit | An indicator whether the EDI balance is drawn from Letter of Credit. Derived from: EDI message Mandatory: No |
Closing worksheet window |
| Movement Reference | A reference identifying the movement. Values: String Derived from: EDI message Mandatory: No |
Closing worksheet window |
| Risk Code | The risk code for the claim balance. Values: String Derived from: EDI message Mandatory: No |
Closing worksheet window |
| Fil Market | .Fil Market code Values: String Derived from: EDI message Mandatory: No |
Closing worksheet window |
| FilCode 1 | Fil Code 1 Values: String Derived from: EDI message Mandatory: No |
Closing worksheet window |
| Fil Code 2 | Fil Code 2 Values: String Derived from: EDI message Mandatory: No |
Closing worksheet window |
| DTI Audit | The DTI Audit reference Values: String Derived from: EDI message Mandatory: No |
Closing worksheet window |
| Trust Fund | The Trust Fund which will be drawn. Values: String Derived from: EDI message Mandatory: No |
Closing worksheet window |
| Referred eMessage UUID | A reference for the Bordereaux. Values: String Derived from: EDI message Mandatory: No |
Closing worksheet window |
| eMessage UUID | A reference identifying the RETACC Values: String Derived from: EDI message Mandatory: No |
Closing worksheet window |
| Received | The date when the account of the booked balance was received. Values: Date (mm/dd/yy) Derived from: Date entered in the Received field of the Claim Worksheet Mandatory: Yes Functional Impact: None |
Closing worksheet window |
| Invoice No |
Unique identification number allocated to set of transactions in order to pay GST to the authorities. Values: Free-text, maximum 100 characters Mandatory: No |
Closing worksheet window |
| Government Invoice Ref No |
Unique identification number, post implementation of e-invoices as per GST notification. Values: Free-text, maximum 100 characters Mandatory: No |
Closing worksheet window |
| Invoice Date | The date of the Invoice. Values: Date (mm/dd/yy) Mandatory: No Functional Impact: None |
Closing worksheet window |
| Notes | Enter a reference making it easier for you to locate/identify the balance in the Business Ledger and Business Partner Ledger Values: Free-text Mandatory: No |
Closing worksheet window |
Change Expected Settlement Currency and Payment Partner #
Refer to Open and Manipulate the (Technical) worksheet Closing window earlier in this chapter.
View Balance Details #
Refer to Open and Manipulate the (Technical) worksheet Closing window earlier in this chapter.
View Online Statistics from the Worksheet Closing Window #
Refer to Open and Manipulate the (Technical) worksheet Closing window earlier in this chapter.
View Balance Information #
Refer to Open and Manipulate the (Technical) worksheet Closing window earlier in this chapter.
Create Account Balance Group #
Refer to Open and Manipulate the (Technical) worksheet Closing window earlier in this chapter.
Government Tax Log Messages #
Refer to Open and Manipulate the (Technical) worksheet Closing window earlier in this chapter.
Mark a Worksheet as Special for the Document Production in Retrocession Accounting #
Refer to Mark a Worksheet Special for the Document Production in Retrocession Accounting.
Generate Paid Remittance #
When you Claim Balance is transferred to the ledger and is in your debit, SICS allows you to generate a paid remittance as part of your Claim Worksheet Closing process.
- Create your Claim Worksheet with a balance in your debit.
- Select Change Status from Edit menu.
- In worksheet closing window, select the Change Status check box.
- The system enables the Change to field, with default status Closed.
- The system further enables the Generate Paid Remittance check box. Select this.
- The system opens the Remittance Worksheet.
- Enter the required information and click OK.
The remittance worksheet is created with an identifier. (For further details about remittance handling, refer to Remittance Booking later in this chapter,
Note! If the remittance is generated from a worksheet closing for a Joint Contract placement, the remittance is only generated for the administrator’s bookings, and not any of the siblings.
Note! Whether or not this remittance generation actually creates a link between your claim worksheet and a remittance worksheet with an “open” status (In Progress or Authorized), depends on how your System Administrator has set up the system. If your remittance has status “Final” the system creates a pairing link between the two balances. If your System Administrator has allowed pairing with open remittances, the system also creates a pairing between an open remittance worksheet and claim worksheet. If pairing on open remittances is not allowed, then your System Administrator must activate the link between Claim Worksheet and Remittance Worksheets in order to maintain the link.
Navigate to the Claim Properties from an open Claim Worksheet #
When you access an open Claim Worksheet from, for example, a Task, a Notifier or an Accounting order, and not from the Claim itself, you may want to view the Claim Properties before you close the Claim Worksheet.
- In the Claim Section of the worksheet, select the Claim Identifier and then select Claim Properties from the pop-up list.
- The system opens the Claim Properties, and you can navigate between the different sections of the Claim.
- To return to the open Claim Worksheet, close the Claim Properties window by clicking the ‘X’ in the upper right corner of the window.
View Accuracy Validation Log Messages #
The Accuracy Validation Log may be inspected from closed worksheets, when selecting a balance which contains one or more details which triggered the validation.
- Select the balance, and select View Accuracy Validation Log Messages from pop-up menu.
- The system opens the Accuracy Validation Log messages window.
| Field | Description |
|---|---|
| User Name | User who created the worksheet |
| Worksheet Creation Date | The date the worksheet was created. |
| Worksheet ID | The worksheet identifier |
| Claim ID | The claim identifier |
| Worksheet Status | The status of the worksheet |
| Business Id | The Business identifier |
| Insured Period | The insured period |
| Section | The section name |
| Accounting Classification | The accounting classification |
| Validation Rule | The accuracy validation rule which was triggered |
| Currency | The booking currency |
| Entry Code | The entry code |
| Booked amount | The amount booked for entry code in current worksheet |
| Computed amount | The calculated amount; e.g. limit, reinstatement, brokerage. |
| Discrepancy Amount | The difference between the computed amount and the amount being validated. Note: The amounts validated in a claim worksheet are often an aggregated amount, and may also depend on other claims, so a rule may be triggered although booked amount is less than computed amount. |
| Worksheet validation Date and Time | The timestamp when the accuracy rules were triggered |
| Validation Error Message | The Accuracy error rule details. |
View Government Tax Linkage from the Claim Worksheet #
This feature is only enabled when you make manual bookings on an Assumed Business and accounting system parameter Government Tax Framework in use is activated. It may be used when you want to check if Government Tax Trigger/Target details are linked or not.
- Open an existing Claim Worksheet from an Assumed Business.
- Select a currency in the Currency display list.
- Select the option Government Tax Linkage from the pop-up menu. The Government Tax Linkage window opens for the selected currency on the worksheet.
- From the Government Tax Linkage window select the currency you want to inspect.
- You will see if details are linked or not for the selected currency.
- Select another currency in the drop-down list of currencies if you want to inspect the linked details for another currency.
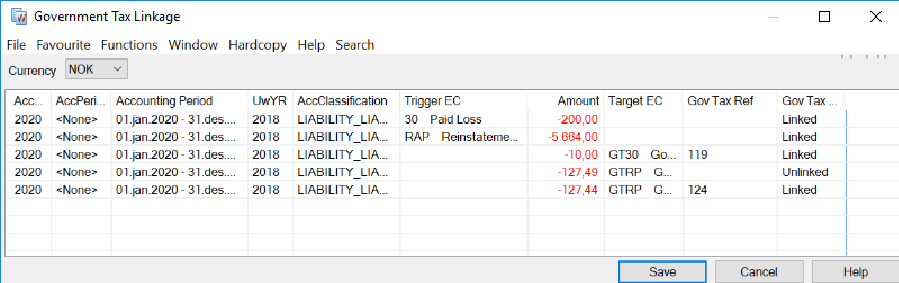
Link Government Tax Trigger/Target Entry Codes on an Assumed Business from the Claim Worksheet #
This feature is only enabled when you make manual bookings on an Assumed Business and accounting system parameter Government Tax Framework in use is activated. It may be used to establish a link between the Government Tax Trigger detail and the Government Tax Target detail(s) when not automatically linked.
- Open a Claim Worksheet from an Assumed Business.
- Select a currency in the Currency display list.
- Add your bookings on the Claim Worksheet i.e. a Trigger Entry Code detail(s) and Target Entry Code detail(s).
- Select the option Government Tax Linkage from the pop-up menu. The Government Tax Linkage window opens presenting the Trigger Entry Code detail(s) and the Target Entry Code detail(s) from the Claim Worksheet.
- Select the Trigger Entry Code detail and the Target Entry Code detail(s) you want to link, both a Trigger and a Target must be selected. All details must have the same granularity, i.e. the same values for Currency, BYR/BPeriod, AccYR/AccPeriod, Accounting Period, Business Id, Insured Period, UwYR, OccYR, Original UwYR, Section and AccClassification.
- Select the option Create Government Tax Link from the pop-up menu.
- The Government Tax Trigger detail(s) and the Target Entry Code detail(s) are now linked. Status is changed from Unlinked to Linked.
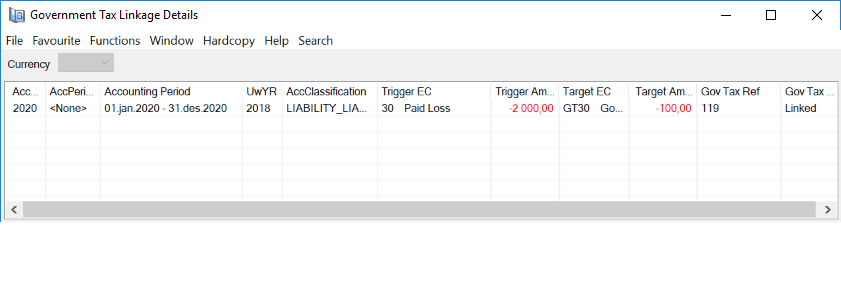
View Government Tax Link #
When you want to view the linked Government Tax details you can view the details from the Government Tax Linkage
- From the Government Tax Linkage window, select a Currency.
- Select a Trigger Entry Code detail or a Target Entry Code detail.
- Select View Government Tax Link from the pop-up menu. The Government Tax Linkage Details window opens presenting the selected Entry Code detail and the linked Entry Code detail(s).
Edit Government Tax Link from Government Tax Linkage #
When you want to remove a Government Tax Link you can edit the linkage from the Government Tax Linkage
- From the Government Tax Linkage window, select a Currency.
- Select a Trigger Entry Code detail or a Target Entry Code detail.
- Select Edit Government Tax Link from the pop-up menu. The Government Tax Linkage Details window opens in Edit mode presenting the selected Entry Code detail and the linked Entry Code detail(s).
- Select one or more linkage(s) and select the option Remove Government Tax Link from the pop-up menu. Select the Save button. Depending on your selection one or more linkages is(are) removed.
Automatic Linkage of Government Tax Trigger detail and Government Tax Target detail #
SICS allows you to have the Government Tax Target detail(s) automatically calculated when the flag ‘Automatic Booking’ is selected for the Government Tax Rule matching your business insured period and classification, or when selecting the option ‘Automatic Booking of Government Taxes’ from the Claim Worksheet or you can manually book the Government Tax Trigger/Target details on the worksheet. For the automatic booking of Government Taxes, the system automatically links the Trigger Entry Code and the Target Entry Code during the booking process. When a Trigger Entry Code and a Target Entry Code are manually booked/booked through TechAccount, Claim Signing message, the details are automatically linked when selecting the ‘Apply’ button or when ‘Change Status’. The automatic linkage is based on the Government Tax Table. For the system to be able to link the Trigger/Target Entry Codes automatically, some preconditions must be fulfilled:
- The system parameter ‘Government Tax Framework in use’ must be active
- The booking takes place on an Assumed Business
- Both a Trigger Entry Code and a respective Target Entry Code must be present on the open worksheet.
- Trigger Entry Code is an Entry Code included in one of the Entry Code Groups within the Entry Code Group Category ‘VAT/Government Tax Calculation Basis’ e.g. Premium, Commission Entry Codes
- Target Entry Code is an Entry Code included in one of the Entry Code Groups within the Entry Code Group Category ‘Government Tax Target’ e.g. Gov Tax on Premium, Gov Tax on Commission Entry Codes
- The Trigger Entry Code and the Target Entry Codes must have the same granularity (i.e. the following fields must be the same; Currency, Booking Year/Period, Accounting Year, Accounting Period, Accounting Period From-To, Business Insured Period, Underwriting Year, Occurrence Year, Original Underwriting Year, Section and Accounting Classification)
- One or more Government Tax Rule(s) in the ‘Government Tax Table’ matching the business classification and the booking details made on the worksheet must be present.
- The bookings may include one Trigger Entry Code and one Target Entry Code, one Trigger Entry Code and multiple Target Entry Codes, multiple Trigger Entry Code and one Target Entry Code and multiple Trigger Entry Codes and multiple Target Entry Codes.
When the preconditions are fulfilled, the system creates a link between the Trigger/Target Entry Code details and the Gov Tax Link Status is updated to Linked for the details included in the linkage.
Note! If, for some reason, the automatic linkage of Government Tax Trigger/Target cannot be performed, the user must manually create the linkage. Refer to chapter View Government Tax Linkage from the Claim Worksheet for more information. The linked details may be inspected/edited, refer to chapters View Government Tax Link and Edit Government Tax Link from Government Tax Linkage for more information.