Manual Bookings on a Worksheet
When Reinsurance Company participates in a treaty or facultative protection, the company receives accounts from the ceding company including their share of premium, claims and other figures that their agreement includes. The figures of these accounts are manually entered onto Technical Worksheets in order to update the Ledger and Online Statistics of the Business to which the accounts apply. The Business Partner Ledger is also updated accordingly.
Open a Technical Worksheet for a Business #
|

Technical Worksheet button on the Navigation bar. | Whenever you receive an account from one of your business partners, the details and figures of the account have to be booked in a Technical Worksheet. |
You can open and book figures into a Technical Worksheet from different Levels of Business (Assumed Business, Outward Cedent’s Contract and Retrocessionaire’s Participation).
Sometimes it is necessary to leave the Technical Worksheet unfinished. The status of the worksheet is then open and it is possible to re-open and finish the worksheet later on.
Note! You can set SICS to automatically search list and open worksheets in the Select Open Worksheet window every time you click the Technical Worksheet button on the Navigation bar. To set this feature you need to select the ‘Automatically check for Open Worksheets when selecting “Technical Worksheet” in your User Preferences (on the Accounting tab).
If you do not set this feature, SICS will not make a search for open worksheets when you click the Technical Worksheet button on the Navigation bar. To search for open worksheet, you need to click the List Open WS button in the Select Open Worksheet window. (The List Open Worksheet button only appears on the Select Open Worksheet window when you have not selected the Automatically check for Open Worksheets when selecting “Technical Worksheet”.
You need to set theAutomatically check for Open Worksheets when selecting. “Technical Worksheet” check box in your User Preferences to follow the below procedure.
- Open the business to which the account originates.
- Click the Technical Worksheet button on the Navigation bar.
- If Unfinished worksheets exist for this business, SICS opens the Select Open Worksheet window with all worksheets listed. Select the worksheet that you want to open, or click the Create New WS button to create a new worksheet.

- If business is a Proportional Facultative Outward Cedent’s Contract, and the worksheet has be generated from another source, a summary of the source business booking information will be displayed.

- If no Unfinished Worksheets exist, SICS automatically opens a new technical worksheet.

Field description 1. Select Open Worksheet
| Field | Description | Location |
|---|---|---|
| WS Id | A unique identification of the Worksheet Values: WS Id Mandatory: Yes |
Select Open Worksheet window |
| WS Title | A worksheet title given either by the System or by you dependent of the origin of the worksheet Values: Text Mandatory: No |
Select Open Worksheet window |
| WS Origin | From where the Worksheet originally was created Values: Manual, Automatic, Migrated, REAC Preliminary, REAC Temporary, REAC Account, etc. Mandatory: Yes |
Select Open Worksheet window |
| Registration Date | The date when the Account is registered in the system the first time. Values: Date (mm/dd/yy) Mandatory: Yes |
Select Open Worksheet window |
| WS Status | The current status of the worksheet Values: Open, Closed, Inactivated, etc. Mandatory: Yes |
Select Open Worksheet window |
| Source Booking Information | Source Business Summary Information Values: Source Business Id, Section/Declaration Name, Section/Declaration Currency, Date of Booking Mandatory: No |
Select Open Worksheet window |
You can also open the Technical Worksheet from other parts of SICS:
- Select the Worksheet icon in the Accounting folder on the SICS desktop. You can search for and open a worksheet by selecting it from the display list. Or, you can open a new Technical Worksheet.
- Select Make New Bookings from the pop-up menu of a Business Ledger. (Refer to the chapter Make New Bookings from Business Ledger.)
- Open a Business Partner Ledger, select a technical balance and select Make Technical Booking from the pop-up menu.
Enter Details on a Technical Worksheet #
The Technical Worksheet consists of two windows. In the first window, the Open window, you enter all the details of the account. In the second, the Closed window, you verify the balances and close the worksheet when all details have been entered correctly.
Add Businesses to the Technical Worksheet #
Each account you receive belongs to a business. The business should already have been recorded in SICS when the account is due to be booked in a technical worksheet. You can book details from several businesses on the same worksheet.
- Open a Technical Worksheet. You can open it from, for example a business or from the desktop. Refer to Open a Technical Worksheet for a Businesson page 11-12for more information about how to open a worksheet.
- The Business ID and Business Title are already listed in the display when the worksheet is created.
- In the Business display list, select Add Business from the pop-up menu if you want to book an account for another business. You see the Find Business window.
- Search for the Business and transfer the business to the technical worksheet by double-clicking it.
- The Business is added to the Business display list if required, continue to add businesses for accounts to be booked.
Add/Remove Currencies on the Technical Worksheet #
Before you can book any account details, you need to add an account currency to the worksheet.
- Open a Technical Worksheet. You can open it from, for example, a business, or from the desktop. Refer to Open a Technical Worksheet for a Businesson page 11-12 for more information. .
- Add a business or select a business from the Business display list. The existing ledger currencies (if any) of the business are displayed in the currency display list.
- Select a ledger currency or select Add Currency from the pop-up menu if the required currency is not included among the ledger currencies. You see the Select Booking Currency dialog box.
- Select one or more booking currencies from the list and move them to the Available list using the arrow buttons.
- Click Save.
If you have added a currency by mistake, or the currency is not needed in the display list, select the currency and select Remove Currency from pop-up menu in the Currency display list. You can only do this for currencies added after the worksheet has been applied to the database. The currency will then become a ledger currency. A ledger currency can be inactivated to be hidden in the display list. Refer to section ‘Inactivate a Currency on the Worksheet’.
- Select a currency from the display list in order to book the accounting details.
Inactivate a Currency on the Worksheet #
The purpose of inactivating a Ledger Currency is to prevent further booking on this currency and therefore hide it from the display list.
The precondition is that no Worksheet(s) with status Open, Rejected, Corrected, Authorized and Suspended exists in this Ledger Currency. Also, the current worksheet cannot have an entry code present for the currency
To inactivate a ledger currency:
- Click in the display list for the selected Business ID and Currency and select Inactivate Ledger Currency from the pop-up menu.The system now hides this Currency in the currency list on the worksheet, for the selected Business ID.
- If you want to book on an Inactivated Currency, select Display All Ledger Currencies and select the Currency and add booking details. Click Apply or_Close Worksheet_. The Inactivated Currency will now become an active currency again.
Refer to Add/Remove Currencies on the Technical Worksheet on page 11-16.
To display the ledger currency:
You can select to see all existing Ledger Currencies, only the Active Ledger Currencies or only the Inactivated Ledger Currencies.
- Click in the display list and select Display from the pop-up menu.
- On the Display option you have three sub options that you can select:
- Ledger Currencies, All existing Ledger Currencies are shown in the currency list.
- Active Leger Currencies (default value), Only the Active Ledger Currencies are displayed on the currency list.
- Inactive Ledger Currencies, Only the Inactive Ledger Currencies are displayed on the currency list.
Refer to Add/Remove Currencies on the Technical Worksheet on page 11-16
Change the Currency on the Worksheet #
If you realise that you have recorded the booking details on a worksheet in the incorrect currency, SICS allows you to easily change the currency.
To change the currency:
You are editing a manually created worksheet. For all booking details on the worksheet for the selected Business ID and Currency you want to change the currency.
- Refer to Add/Remove Currencies on the Technical Worksheet.
- For selected Business ID and Currency you have one or more booking details.
- On the currency display list you right click and select Switch Currency on all Details
- System gives you a drop-down list called Select New Currency for Worksheet.
- Here you can select on a list with all existing active Currencies. You can select either an existing Ledger Currency or any other active Currency.
- The Currency you have selected will be the new Currency for all the booking detail(s).
Register Basic Accounting Information on the Technical Worksheet #
The basic accounting information that you enter on the technical worksheet updates different parts of SICS and is important to have when you want to, for example, search for and identifies accounts.
- Open a Technical Worksheet. You can open it from, for example, a business or from the desktop. Refer to Open a Technical Worksheet for a Businesson page 11-12 for more information about how to open a worksheet.
- Select or add a currency. The fields on the Accounting tab get enabled.
- Enter the required basic accounting information in the fields.
Enter Accounting Year and Period #
You can enter an Accounting Year and Period in the AccYr/Period fields in the Balance Control Information box. When this is done before you add any bookings to the selected currency, this Accounting Year and Period will be the default Accounting Year and Period on added bookings. When you have several ledger currencies, any values entered in AccYr/Period on the first currency you select will be copied to all other currencies. If you add a new currency, any values in AccYr/Period on the existing currency will be copied to the new currency. If you later change the AccYr/Period on one of the currencies, this will not update any of the other currencies.
Indicate Balance Split Options on the Technical Worksheet #
In order to create and book balances on the same level as in the accounting document received from the Cedent or Broker, you can select different split options. If for instance, a broker is assigned to the business and you want to see the brokerage as separate balances in the Business Ledger, you select the split option Brokerage.
You may select one or more of the following options:
- Insured Period
- Section
- Accounting Classification
- Brokerage
- Claim
- Fire Brigade Charges
- Government Taxes
- Open a Technical Worksheet. You can open it from, for example, a business or from the desktop. Refer to Open a Technical Worksheet for a Businesson page 11-12 for more information about how to open a worksheet.
- Select or add a currency. The Balance Split options get enabled.
- Enter the Balance Split Options tab and select the appropriate check box(es) to indicate the level of balances.
- Make your bookings in the Technical Worksheet.
- Select Change Status from the Menu button, or select View Balance Changes from the pop-up menu in order to open the Worksheet Closing window. (Refer to the chapters ‘Change the Status of the Technical Worksheet’ or View Balance Changes of the Technical Worksheet’).
- Inspect the balances that are split according to your selection in the Balance Split Option tab.
- If you want another split, select the Worksheet button to return to the Technical Worksheet. Make your changes to Balance Split Options and inspect your balances in the Worksheet Closing window again.
You may enter your bookings into the Technical Worksheet before or after you define your Balance Split Options.
For Insured Period, Section and Accounting Classification a default Balance Split Option may already be defined in the Base Company Specific settings of the System Parameters. Different options may be defined for different Types of Business. The predefined selections may be overruled in the Technical Worksheet as described above. (Refer to Base Company Specific settings in the System Administrator’s Guide).
The main principle in SICS is that the legal Responsible Business Partner of a Business is assigned as Responsible Business Partner of all balances booked on the Business (both Account balances and Brokerage balances). However, you may set up your system to always assign the Broker as Responsible Business Partner of the Brokerage Balance on inward business. This is done by selecting the System Parameter Assign Broker as Responsible Business Partner on Brokerage Balance. The system will then split out the Brokerage as a separate balance, independent on what is selected in the split options.
Balance Split Options in Technical Worksheet when Brokerage Payment Task or Claims Payment Task is assigned to different partners on the business. Whenever the Brokerage Payment Task or Claims Payment Task is assigned to a different partner in a given Business the Balance Split Option fields Brokerage and Claim respectively, will be selected by default on the worksheet when a currency is selected, otherwise cleared.
Functional impact of the Balance Split Option Brokerage: Separate balance is created for entry codes that are included in the Entry Code Group Category Business Partner Ledger Balance Split - Brokerage Payment; provided the Brokerage Payment task is assigned to a different partner than the one with the ‘normal’ payment task.
Functional impact of the Balance Split Option Claim: Separate balance is created for entry codes that are included in the Entry Code Group Category Business Partner Ledger Balance Split - Claim Payment; provided the Claim Payment task has been assigned to a different partner than the one with the ‘normal’ payment task.
Balance Split Options in Technical Worksheet when Government Tax Accounting Task is assigned to a partner on the business. Whenever the Government Tax Accounting Task is assigned to a partner in an Assumed Business, the Balance Split Option field Government Taxes will be selected by default on the worksheet when a currency is selected, otherwise cleared. Functional impact of the Balance Split Option Government Taxes: Separate balance is created for Entry Codes included in the Entry Code Group Government Tax within the Entry Code Group Category Business Partner Ledger Balance Split. Note that the Government Tax Entry Code Group must be defined with code GOVTAX to be identified as Government Tax Entry Code Group. The Notes field of the balances including Government Tax Entry Codes are updated with the text Government Tax.
Note! The Brokerage, Claim and Government Taxes split are based on Entry Code Groups defined for the Entry Code Group Category Business Partner Ledger Balance Split. If the above groups are not defined or inactivated, then the Entry Code Sub Category Brokerage and Entry Code Sub Category Loss used as basis for the split. The Fire Brigade Charges is based on Entry Code Sub Category Fire Brigade Charges. The Government Taxes balance split is based on an Entry Code Group which must have the code GOVTAX. If this group is not defined or inactivated, then no split of Government Taxes is performed. (For further information about Entry Code Groups, refer to the chapter View Entry Code Groups in the System Administrator’s Guide).
Enter a Technical Worksheet Title #
You can enter a title for the whole worksheet. This title can later be used to identify the worksheet on the Business Partner Ledger and in the Find Worksheet window.
- Open a Technical Worksheet. You can open it from, for example, a business or from the desktop. Refer to Open a Technical Worksheet for a Businesson page 11-12 for more information about how to open a worksheet.
- Select or add a currency.
- Enter a worksheet title. The title can be set automatically for Facultative and Direct business, refer to the System Parameter Automatic Produced Worksheet Title in the System Administrator’s Guide for more information.
Calculate the Accounting Period From - To based on the Calendar Period #
If you register an account for a business with divergent insured period, for example, a facultative business you can choose if you want to have the accounting period ‘From - To’ calculated based on the calendar period or the insured period.
- Open a technical worksheet. You can open it from, for example, a business or from the desktop. Refer to Open a Technical Worksheet for a Businesson page 11-12for more information about how to open a worksheet.
- Select or add a currency.
- Add your bookings and enter an accounting year and period if necessary, and enter the mandatory account information
- Select the Accounting Period Based On Calendar check box in the Worksheet section.
SICS calculates the accounting period ‘From - To’ based on the calendar period instead of the insured period.
Book a Technical Worksheet in Post Mode #
If you receive an account and you want to register the account in SICS without having to enter all the figures of the account, you can book a Technical Worksheet in Post Mode.
- Open a Technical Worksheet. You can open it from, for example, a business or from the desktop. Refer to Open a Technical Worksheet for a Businesson page 11-12 for more information about how to open a worksheet.
- Select or add a currency.
- Select the Post Balance check box in the Balance Control Information box
- Enter the Balance of the account in the Control Amount and the Accounting Year/Period of the account in the AccYR/Period.
- Select UNFI(unfinished) from the Menu button.
SICS now stores the worksheet as an open worksheet and the worksheet Origin is shown as Post Balance on the Business Partner Ledger.
An alternative way to book a technical worksheet in post mode is to create a post balance. The result will be the same. For more information about how to create a post balance, refer to the chapter Create a Post Balance from Business Partner Ledger on page 11-566.
Book Post Mode Details on a Technical Worksheet #
You can create and store a worksheet in Post Mode and later re-open it and finish the bookings of the account.
- Open the Business to which the Account originates.
- Select the Technical Worksheet button on the Navigation bar.
- When there is worksheet in Post Mode registered, SICS opens the Select Open Worksheet window. The WS Origin column in the display list shows Post Balance for all worksheets in Post Mode.
- Select the appropriate worksheet in the list.
- Clear the Post Balance check box. You are now allowed to add booking lines to the worksheet. Note that if the AccYR/Period field is filled in when new detail rows are added in the worksheet, the AccYR and the AccPeriod columns automatically are populated with these values.
- Enter your booking details into the Worksheet. (Refer to the chapter ‘Book the Actual Account and Estimates in the Technical Worksheet’).
- Select Apply or Change Status.
SICS validates the Worksheet Balance against the Control Amount entered in the worksheet. For more information about Post Mode Bookings, refer to Book a Technical Worksheet in Post Mode on page 11-22.
If there is a discrepancy between the total balance of the booking and the control amount, a SICS message appears proposing a Minor Adjustment booking of the difference. If you click Yes to make the adjustment, a new line is automatically created on the worksheet and is booked with the minor adjustment entry code. If you click No, you go back to the worksheet with no changes.
You can also make a manual Minor Adjustment from the Worksheet Closing window. (Refer to the chapter ‘Make Minor Adjustment from the Worksheet Closing window’).
Enter Replacement Values on the Technical Worksheet #
- Replacement Values
In some accounts the current status and not the adjustments of, for instance Premium-/Loss Reserves and Premium-/Loss Deposits, are presented. In SICS, you can book the current status and let the SICS calculate the adjustments. By doing this, you avoid incorrect adjustment to be calculated and booked manually.
- Open a Technical Worksheet. You can open it from, for example, a business or from the desktop. Refer to Open a Technical Worksheet for a Businesson page 11-12 for more information about how to open a worksheet.
- Select or add a currency.
- Select the ‘Replacement Values’check box in the Balance Control Information box. Two new amount columns appear in the W_orksheets Actual Account tab_. (Previous amount, New amount)
- Add a booking line to the worksheet. (Refer to the chapter Book the Actual Account and Estimates on the Technical Worksheet ).
- Enter the booking details including the entry code for which the replacement value is to be calculated. The Previous amount booked to the recorded entry code is displayed.
- Enter the New Amount (the Current Status from the Account).
The Previous Amount is calculated based on previous bookings on the ledger. The system calculates the difference between the New- and Previous amount and displays the difference (the adjustment) in the Amount column.
If more than one accounting classification exists and you for a booking line select an entry code without selecting an accounting classification, the previous amount for all accounting classifications is displayed. Whenever an accounting classification is selected in conjunction with the entry code, thePrevious amount displayed will only be for that accounting classification and entry code combination.
For each entry code, you must define whether a replacement value is allowed or not in the Entry Code Maintenance. Only entry codes allowed as replacement values will get the Previous Amount calculated and will affect the New Amount when you enter a value.
Additionally, a replacement rule must be defined on the entry code to decide how the Previous value shall be calculated. The cession basis on your business decides what rule to be used. If the replacement rule for your cession basis is, for example, “Per IP, Occ Year, Section, AC” then the previous amount calculation is based on all closed details having same insured period, occurrence year, section and accounting classification (and of course the same currency, entry code and estimateindicator) as the detail entered on the worksheet.
The following Replacement Rules exist:
- Per IP, AC
- Per IP, AC HLL
- Per IP, Occ Year, AC
- Per IP, Occ Year, AC, HLL
- Per IP, Occ Year, Section, AC
- Per IP, Occ Year, Section, AC, HLL
- Per IP, Orig UW Year, AC
- Per IP, Orig UW Year, AC, HLL
- Per IP, Orig UW Year, Section, AC
- Per IP, Orig UW Year, Section, AC, HLL
- Per IP, Section, AC
- Per IP, Section, AC, HLL
- Per Occ Year, AC (only mandatory elements within the AC)
- Per Orig UW Year, AC (only mandatory elements within the AC)
(IP = Insured Period, AC = Accounting Classification, HLL = Headline Loss Link, Occ Year = Occurrence Year,
Orig UW Year = Original Underwriting Year)
The Cession Basis on the Business decides what replacement rule to be used. These rules also take the Currency, Entry Code and Estimate Indicator into consideration. If no rules can be found then the default system defined rule (Per IP, Section, AC) is used.
Refer to the 11.5 “Entry Code Maintenance” on page 11-21 in the System Administrator’s Guide for more information.
- Calculate Based on As of Date
Normally the booking accounts on technical worksheets come in a sequential order according to the as of date (Accounting Period To Date). However, for certain reason you may miss a few accounts and receive them at a later time. You will have to insert an account between two accounts or revise/update an account between two accounts.
To ensure the replacement values are correct, your system administrator need to also define ‘Calculate based on As of Date’ in the Entry Code Maintenance. Only entry code allowed to calculate based on as of date, then the system will capture the “As of Date” (default to be the Accounting Period To date) of each technical worksheet and will use this “As of date” sequence to perform the calculation on the ‘Previous Amount’ and ‘New Amount’ of the accumulated figures. The system will trigger adjustment to later account when an account is booked out of sequence.
Example: Reserve Accounts
| As Of Date | Account Quarter | Previous Amount | Amount | New Amount |
| 31/03/2019 | 1st Account | 0 | -1.000 | -1.000 |
| 30/06/2019 | 2nd Account | -1.000 | 200 | -800 |
| 31/12/2019 | 4th Account | -800 | 300 | -500 |
| 30/09/2019 | 3rd Account | -800 | 100 | -700 |
| 31/12/2019 | 4th Account | -400 | -100 | -500 |
The loss reserves for 1st account, 2nd account and 4th account come first, and the loss reserve for 3rd account receives late. The system will insert 3rd account between 2nd account and 4th account. The previous amount of the 3rd account has been calculated based on 2nd account. And at the same time, the system will generate an adjustment booking for 4th account to ensure the loss reserve amounts are correct.
Show All Bookings
To avoid leaving out some Reserve adjustment bookings, you can let the system automatically show all Reserve Entry Codes allowed for Replacement Values (refer to chapter Enter Replacement Values on Technical Worksheet for more information).
- Open a Technical Worksheet. You can open it from, for example, a business or from the desktop. Refer to Open a Technical Worksheet for a Business on page 12-3 for more information about how to open a worksheet.
- Select or add a currency.
- Select the Show All Bookings check box in the Balance Control Information box. System displays all Entry Codes allowed for Replacement Values within the Entry Code Category Reserves. Only Entry Codes with a total amount different from zero are shown. System shows the status per Entry Code allowed for Replacement Values in the columns Previous Amount and New Amount. (Aggregation level is according to the rule defined for the Entry Code/Cession Basis)
- Enter the booking details in the column Amount and the system will automatically update the New Amount or enter the New Amount (the Current Status) and the system will calculate the difference between the New- and Previous amount and displays the difference (the adjustment) in the Amount column.
- System shows all reserve entry codes allowed for Replacement Values for the selected currency. When accessing another currency on the Technical Worksheet, system shows all reserve bookings also for this currency.
If you enter a manual booking with an Entry Code allowed for Replacement Value beforeyou select Show All Bookings, this will be taken into consideration when system displays all bookings.
- When selecting one of the options ‘Change Status’, ‘UNFI’ or ‘Apply and UNFI’ from the menu on Technical Worksheet, you have to confirm if you want/not want the system to generate bookings for the Entry Codes with no Adjustments. If you select ‘Yes’, the system makes zero bookings for all booking lines displayed by the system. If you select ‘No’, the s ystem deletes all lines without any adjustments.
The following Replacement Rules are supported when selecting Show All Bookings:
- Per IP, AC
- Per IP, Occ Year, AC
- Per IP, Occ Year, Section, AC
- Per IP, Occ Year, Section, AC, HLL
- Per IP, Orig UW Year, AC
- Per IP, Orig UW Year, Section, AC
- Per IP, Orig UW Year, Section, AC, HLL
- Per IP, Section, AC
- Per IP, Section, AC, HLL
- Per IP, AC, HLL
- Per IP, OCC Year, AC, HLL
- Per IP, Orig UW Year, AC, HLL
(IP = Insured Period, AC = Accounting Classification, Occ Year = Occurrence Year, Orig UW Year = Original Underwriting Year, HLL = Headline Loss)
The Cession Basis on the Business decides what replacement rule to be used. These rules also take the Currency, Entry Code and Estimate Indicator into consideration.
If no rules can be found then the default system defined rule (Per IP, Section, AC) is used.
Refer to the Handle Reference Items chapter, Entry Code Maintenance in the System Administrator’s Guide for more information.
Note! For Entry Codes having a rule notincluding Section, the system displays the Target Scope of Cover (SOC) of the Accounting Classification (AC). (Target SOC is the SOC where an AC is created).
Inspect the Rolling Total Balances of the Technical Worksheet #
SICS lets you define up to five running balances on the Technical Worksheet. These fields are defined in the Base Company Specific settings of the System Parameters and Entry Code Maintenance. For each detail row you enter on the worksheet, the amount can be included in one or more of the running balances. This depends upon whether or not the Entry
Codes are included in the running balance. In case you would like to have the rolling totals calculated when all details have been registered on the worksheet you can deselect the box Automatic Calculation Of Rolling Total. This could be a smart move in case many details are to be registered on the worksheet to avoid that the system need to recalculate the rolling totals for each detail added to the worksheet.
Your System Administrator can, for instance, label one of the running totals ‘Account Bal’ and include all liquid Entry Codes in this running total. In this case the ‘Account Bal’ can be used to check against the account received from the Cedent or Broker after the details have been entered in the worksheet. For more information, refer to Base Company Specific Settings and Entry Code Maintenance in the System Administrator’s Guide.
Enter Life and Health Details on Technical Worksheet #
If you use the Life and Health functionality, you can on Technical Worksheet enter life and heath related information originating from the prime insurance policy level. The identifier of the prime insurance policy is entered in the Policy ID field placed in the Worksheet section of the worksheet. The attributes Start Date, End Date and Disability % are entered on accounting detail level.
View Details on a Technical Worksheet #
When you have finished your bookings for every business, you click each business in the Business display list to see their individual booking details. If there are no bookings details for one of the businesses in the list, SICS removed the business from the list when the worksheet is closed.
| Field | Description | Location |
|---|---|---|
| Currency | The currency in which the technical account is to be booked. If a currency has booking details on the worksheet the currency is marked in another colour (pink). Values: The business’ ledger currencies expressed according to ISO, e.g. USD, GBP, CAD, EUR, CHF, etc. Default: If no ledger currencies: Empty If one ledger currency: The one currency is pre-selected If many ledger currencies: None of the currencies are pre-selected. Validations: If a currency has not been defined as Main Currency or as a Booking Currency in the Administration Condition of the business, A warning will appear when this currency is added. (Refer to the chapter Handle Administration Conditions.) Functional Impact: Business Ledger, Online Statistics, Business Partner Ledger Mandatory: Yes |
Technical Worksheet |
| Name | The full name of the Currency Values: Currency name, e.g. US Dollar, Pound Sterling, Canadian Dollar, Euro, Swiss Franc, etc Mandatory: Yes |
|
| Received External | The date when your company receives the account.This field gets changed to ‘Received External’ if the system parameter ‘Is Received Internal Date On Worksheet In Use’ has been activated for the base company you book on. If you book on more than one business on the worksheet it is possible to have different Received External dates per business. But all balances on the same business will get the same Received External date. Values: Date (mm/dd/yyyy) Default: Today’s date Validation: The date cannot be in the future. The field is validated when you select Apply or Change Status from the menu. Functional Impact: The Received field in the Accounts tab of the Administration Conditions for the related Business. When the Received External date is changed the same date will also be set in the Received Internal field. Mandatory: Yes |
Technical Worksheet/ Accounting Information tab |
| Received Internal | The date when the account was received at your company’s technical account department. This field is available if the system parameter ‘Is Received Internal Date On Worksheet In Use’ has been activated for the base company you book on. This Received Internal date is common for the whole worksheet, i.e. if you have bookings on different businesses on the worksheet and change the date on one of the businesses this change will affect all balances on all businesses on the worksheet. Values: Date (mm/dd/yyyy) Default: Today’s date. In case the Received External date is changed this new date will also be set as default in the Received Internal field. Validation: The date cannot be in the future and must be equal to or larger than the ‘External Received’ date. Functional Impact: None Mandatory: Yes |
Technical Worksheet/Accounting Information tab |
| Booked | The date when the account is booked. Values: Date (mm/dd/yyyy) Default: Today’s date Validation: If the Booking Date is not within the timeframe determined by an Accounting System Parameter, a validation message is given upon selection of Apply or Change Status. Mandatory: Yes |
Technical Worksheet/Accounting Information tab |
| Registered/-by | The date when and by whom the worksheet was initially created. Values: Date (mm/dd/yyyy) and Name Default: Today’s date and the name of the person creating the worksheet Mandatory: Yes Functional Impact: The Registration Date field of the Open Worksheet window |
Technical Worksheet/Accounting Information tab |
| Last Complete Accounting Year | The last year that all accounts are received from the client and booked (the Accounting Year is completed). Values: Year Functional Impact: Business Ledger, Online Statistics and Administration Conditions Mandatory: No |
Technical Worksheet/Accounting Information tab |
| Last Complete Booking Year | This year indicates that bookings are completed for this Booking Year. Values: Year Functional Impact: Business Ledger and Online Statistics Mandatory: No |
Technical Worksheet/Accounting Information tab |
| Title | You can enter a title for the worksheet. This title can later be used to identify the worksheet on the Business Partner Ledger and in the Find Worksheet window. Value: Free text field. The title can be set automatically for Facultative and Direct business, refer to the System Parameter Automatic Produced Worksheet Title in the System Administrator’s Guide for more information. Functional Impact: The text is shown on Business Partner Ledger and can be used as search criteria in the Find Worksheet function. Mandatory: No |
|
| Is VAT To Be Calculated On Gross | In case the VAT calulation is in use, refer to the System Parameter Is Automatic VAT Calculation in Use, this option is available on the worksheet. Either the VAT is calculated based on the entered amount (on net) or is included in the entered amount, and therefore is to be calculated based on gross. Value: Inactive, Active Default: Active Functional Impact: If the business is subject for VAT calculation, refer to the Insurance Period tab on the business, the system will calculate VAT amounts based on the entered detail amounts when the worksheet is saved to the database. When this field is inactive the system will calculate VAT as if the entered amount is net. When this field is active (the box is selected) the system will calculate VAT as if the entered amount is gross, meaning the VAT is part of the entered amount. Mandatory: Yes, if the System Parameter is Automatic VAT Calculation in Use is active. NOTE: When the VAT calculation is in use; and in addition the VAT Calculation based on EC Groups is activated; the ‘Is VAT to Be Calculated On Gross’ field will always be inactive. This means that the VAT will always be calculated based on net; i.e. on the entered amount. |
When this field is inactive the system will calculate VAT as if the entered |
| Accounting Period Based on Calendar | Defines if the Accounting Period From - To should be based on the Calendar Period instead of the Insured Period. This field is available when the system parameter ‘Prevent User Update of Accounting Period From - To on TW For’ is not activated for the Type of Business you book on. Values: Inactive, Active Default: Inactive Functional Impact: Calculation of the Accounting Period From - To on Technical Worksheet Mandatory: No |
|
| Post Balance | You select this check box if you want to book an account balance instead of all the details of the account. Values: Inactive, Active Default: Inactive Mandatory: No |
Technical Worksheet/ Balance Control Information |
| Control Amount | The balance of the account. Values: Amount, maximum 20 characters Validation: The amount entered is validated against the Balance of the Technical Worksheet when the details of the account have been booked Mandatory: No |
Technical Worksheet/ Balance Control Information |
| Accounting Year/Period | The Accounting Year and Period of the Account to be booked in Post Mode. Values: Year (yyyy) and Period, i.e. 1stof 12, 2nd of 2, 3rd of 4,etc) Default: If accounts are calculated in Administration Conditions: The first account not having a closed date registered. If no accounts are calculated: Current Accounting Year and Accounting Period = None Mandatory: No |
Technical Worksheet/ Balance Control Information |
| Replacement Value | You select this check box if you want the system to calculate an adjustment amount for specific entry codes. Values: Inactive, Active Default: Inactive Functional Impact: Two new amount columns appear in the W_orksheets_. _Mandatory:_ No |
Technical Worksheet/Balance Control Information |
| Show All Bookings | You select this check box if you want the system to show all Reserve bookings allowed for Replacement Value. (Reserve booking is a booking with an entry code within one of the Entry Code Sub Categories in Category Reserves). Values: Inactive, Active Default: Inactive Functional Impact: Two additional amount columns appear in the Technical Worksheet. All Reserve bookings in the selected currency, with total amount different from zero are displayed by the system. Automatically selects and disables the check box Replacement Values. Mandatory: No |
Technical Worksheet/Balance Control Information |
| Previous Amount | The column presenting the amount of previous bookings for a specific entry code. Values: Amount Calculation: The amount is calculated based on previous bookings of an entry code. The amount is only displayed to help calculating the adjustment value of the entry code. Mandatory: Yes |
Actual Account tab/Estimates tab |
| New Amount | The current status of the booking details. Values: Amount, maximum 20 characters Calculation: The amount is entered in order to calculate the difference between previous bookings and the current status of for instance the Loss Reserve. Validation: The system checks if the Replacement value is allowed for the Entry Code. If not allowed, the manual input is ignored. Functional Impact: Amount Column Mandatory: Yes |
Actual Account tab/Estimates tab |
| Policy ID | The identifier of the prime insurance policy Values: Free-text field Location: Technical Worksheet / Worksheet Information |
|
| Start Date | The Insured’s disability start date Values: Complete date (dd/mm/yyyy) Mandatory: No Location: Actual Account tab/Estimates tab |
|
| End Date | The Insured’s disability end date Values: Complete date (dd/mm/yyyy) Validations: Must be equal to or later than the Start Date Mandatory: No Location: Actual Account tab/Estimates tab |
|
| Disability % | The Insured’s disability percentage Values: Numeric Validations: Must be a value between and including 0,00 and 999,99 Mandatory: No Location: Actual Account tab/Estimates tab |
Book the Actual Account and Estimates on the Technical Worksheet #
SICS allows you to book both actual figures and estimated figures on the same Technical Worksheet. The actual figures are booked on the Actual Account tab and the Estimated figures on the Estimates tab. You are able to distinguish between the actual bookings and the estimates when you look at the balance changes in the Worksheet Closing window.
Estimates may be received from the Cedent or calculated internally. The estimates may be used for instance in the Accrual accounting. All transactions (details and balances) entered on a Technical Worksheet are reflected on Business Ledger, Business Partner Ledger, Online Statistics, etc. All estimates are shown separately in the Business Ledger and Online Statistics. Estimates do not influence the Liquid Balance and do not appear as balances on the Business Partner Ledger.
When the estimates are booked they become Unsettled as the Actuals. It is not possible to do Balance Pairing with Estimate balances so it is necessary to Reverse the Estimate balances to mark them as Settled, refer to the chapter Reverse Estimates from a Technical Worksheet on page 11-81and Reverse Estimates with Corrections from a Technical Worksheet on page 11-81.
It is possible to define entry codes to be used only as estimates. This is defined in Entry Code Maintenance. If an entry code is defined as ‘Estimate Only’, this code appears only on the Estimates tab. (For further reference, see the Entry Code Maintenance chapter in the System Administrator’s Guide).
- Open your Technical Worksheet. Refer to Open a Technical Worksheet for a Business on page 11-12 for more information about how to open a worksheet.
- Select a business in the business display list or add a new business by selecting Add Business from the pop-up menu Business display list.
- Select a ledger currency or add by selecting Add Currency from the pop-up menu in the Currency display list.
- Register basic accounting information on the Accounting tab and then a worksheet title.
- Click the Add Bookings button below the Actual Account tab or select Add New Booking from the pop-up menu on the Actual Account or Estimates tab.
The system adds a new row to the Actual Account/Estimates tab. 6. Edit, if required, the booking information given automatically. Book the figures from the Technical Account and/or book the estimates. This includes the Entry Code, detail Booking Amount and E_ntry Comment_ (if any). 7. Click _Add Bookings_ button or select _Add New Booking_ from the menu in order to get another booking line. The details from the first booking line are copied to the next except from the Entry Code, Amount and comments. 8. Continue to make the bookings until you have entered all the details from the received account/estimated figures on the worksheet.
The Actual Account-/Estimates tab contains several columns. In some columns information is added automatically. In some columns the information has to be entered manually.
Note! Some of the columns only appear if they are set to appear in System Parameter Maintenance (by your SICS System Administrator).
Booking Year and Period (Legal Entity and Global Entity) must be set on the System Parameter Accounting/Booking Periods tab, and Override must be “on” for both.
Financial Year is only shown if the System Parameter Deferred Business is set.
| Field | Description | Location |
|---|---|---|
| Insured Period | The Insured Period refers to the period within which the agreement is in force and the Cedent is covered. Values: The From- and To date of the Insured Period(s). Default: Empty if more than one Insured Period is selectable. Validations: System may be set up to validate that the Insured Period Start Date is not later than current booking period. Mandatory: Yes |
Actual Account tab/Estimates tab |
| Booking Yr/Period | The Base Company’s Year and Period in which the account is booked. (Refer to Base Company Specific Settings of the System Administrator’s Guide). Values: Year, Period (e.g. Month, Half Year or Quarter) Default: The Booking year/period defined in the Booking Terms of the System Parameters Validations: Against the Closing Booking Terms of the System Parameters. The system may also be set up to validate that the Booking Year and Period is not prior to the start date of the Insured Period. Mandatory: Yes Functional Impact: The proportional treaty outward Business Ledgers (OCC ‘as Original’ and ‘as Booking’and ORP ‘as Booking’and ‘as Account’) are updated with values from this field when system parameter ‘Keep Booking Year/Period from Source Business’ is active. The booking year and booking period are shown in the fields Orig Book Year and Orig Book Per on the outward ledgers. |
Actual Account tab/Estimates tab |
| Booking Yr/Period (Legal Entity) | The Period and Year in which the account is booked. (Refer to Base Company Specific Settings of the System Administrator’s Guide). Values: Year, Period (Month, Half Year or Quarter) Default: The Booking year/period defined in the Booking Terms of the System Parameters Validations: Against the Closing Booking Terms of the System Parameters. Mandatory: No |
Actual Account tab/Estimates tab |
| Booking Yr/Period (Global Entity) | The Period and Year in which the account is booked. (Refer to Base Company Specific Settings of the System Administrator’s Guide). Values: Year, Period (Month, Half Year or Quarter) Default: The Booking year/period defined in the Booking Terms of the System Parameters Validations: Against the Closing Booking Terms of the System Parameters. Mandatory: No |
Actual Account tab/Estimates tab |
| AccYr | The Accounting Year of the Account to be booked into the Technical Worksheet Values: Year Default: If accounts are calculated in the Administration conditions, the default value is the year in the first account not having a closed date.If no accounts are calculated, the default value is the Current Calendar Year. Note that if the AccYR/Period field is entered in the Balance Control Information area, then the AccYR column is defaulted with this value. Can only be overwritten manually. This is independent of the calculated accounts in the Administration conditions. Validations: The Accounting Year cannot be higher than the Booking Year. The Accounting Year cannot be smaller than the year in the Insured Period from date. Mandatory: Yes |
Actual Account tab/Estimates tab |
| AccPeriod | The Accounting Period within the Accounting Year for which the Account applies. Values: If single accounts are defined on the Administration Conditions then the values will reflect these accounts, e.g. if quarterly accounts are defined then only the values for quarters plus Yearly and None are available. But if no single accounts are defined then ALL values from table 177 Accounting Period are available, 1st of 4, 2nd of 4, 1st of 2, 1st of 12, etc. plus Yearly, None. For manual bookings on a Prop Treaty ORP the accounts matching the account frequency on the actual Insured Period are available in the Acc Period drop down down list. If the accounts are calculated Half-yearly, than only 1st of 2, 2nd of 2 should be available. For Quarterly, 1st of 4, 2nd of 4, 3rd of 4 & 4th of 4. Default: If accounts are calculated in the administration conditions, the default value is the first account not having a closed date. If no accounts are calculated, the default value is None. Note that if the AccYR/Period field is entered in the Balance Control Information area, then the AccPeriod column is defaulted with this value. Can only be overwritten manually. This is independent of the calculated accounts in the administration conditions. If all accounts are booked in the administration conditions for the actual insured period, the default value is the the last account in the last accounting year, even if it is booked. Mandatory: Yes |
Actual Account tab/Estimates tab |
| Orig AccYR | The Original Accounting Year of the inward booking. The Original Accounting Year is only available for input on worksheets created on Level of Business Retrocessionaire Participation, and if the global system parameter Convert Figures to Account Currency According to Orig Acc Year and Period is selected. Values: Year Default: If accounts are calculated in the Administration Condition, the default value is the same as the year in the first account not having a closed date. If no accounts are calculated, the default value is set to the Current Calendar Year. Validations: The Original Accounting Year must be inside the minimum and maximum year defined in System Parameter. Mandatory: No |
Actual Account tab/Estimates tab |
| Orig AccPeriod | The Original Accounting Period of the inward booking. The Original Accounting Period is only available for input on worksheets created on Level of Business Retrocessionaire Participation, and if the global system parameter Convert Figures to Account Currency According to Orig Acc Year and Period is selected. Values: 1st of 12, 2nd of 12, 1st of 2, 2nd of 4, Yearly, None, etc. Default: If accounts are calculated in the Administration Condition, the default value is the same as the first account not having a closed date. If no accounts are calculated, the default value is set to None. Validations: Valid values are determined by the values defined in Reference Data. Mandatory: No |
Actual Account tab/Estimates tab |
| Description of Account | Indicates the Type of Account Values: Additional, Cash Claim Account, First Additional Account, Initial Account, Regular Account, Regular Claim Account, Regular Claim Reserve Account, Regular Premium Account, Second Additional Account, Supplementary Account, Supplementary Claim Account, Supplementary Claim Reserve Account, Supplementary Premium Account, None Default: Regular Account Mandatory: Yes |
Actual Account tab/Estimates tab |
| UwYR | A year against which results of a Reinsurance agreement is measured. Normally this is the year when it was incepted or renewed. Values: Year Derived from: The Insured Period selected in same booking line. An Underwriting Year is defined for each Insured Period in the business’ Insured Period tab. This Underwriting year is displayed in the booking line. Mandatory: Yes |
Actual Account tab/Estimates tab |
| Original UwYR | The underwriting year(s) of the policies covered by a reinsurance agreement based on underwriting years. Values: Year (yyyy) Default: UwYR if Accounting System Parameter Always default orig.uw.yr and occ.yr is activated. If system parameter is inactive, UwYR is the default value only if the agreement’s cession basis is defined as Underwriting Year. Otherwise the default value is blank. (Regarding ‘Cession Basis’ refer to Administration Conditions.) For businesses defined as ‘Multi Year Contracts’, the year derived from the Sub Period Start Date is defaulted, independent on cession basis and the above system parameter. The defaulted value cannot be changed. Mandatory: Only if the agreement’s cession basis is defined as Underwriting Year. (When the system parameter Original Underwriting and Occurrence Year NOT mandatory is selected, the field is validated but not mandatory.) Validations: Only when Cession basis = Underwriting Year: For Proportional treaties: Validated against ‘Portfolio from Year’ and the UwYR field of the booking line. (Regarding ‘Portfolio from Year’ refer to Administration Conditions). Otherwise validated against the Uw YR field of the booking line. |
Actual Account tab/Estimates tab |
| OccYR | The underwriting year(s) of the policies covered by a reinsurance agreement based on occurrence years. Values: Year (yyyy) Default: UwYR if Accounting System Parameter Always default orig.uw. yr and occ.yr is activated. If system parameter is inactive, UwYR is the default value only if the Cession Basis of the agreement is defined as Occurrence Year. Otherwise the default value is blank. (Regarding ‘Cession Basis’ refers to Administration Conditions.)(When the system parameter ‘Original Underwriting and Occurrence Year NOT mandatory’ is selected, the field is validated but not mandatory.). When the system parameter ‘Occurrence Year always mandatory’ is active, the Occurrence Year is mandatory independent of the Agreement’s Cession Basis. Validations: Only when Cession basis = Occurrence Year; Headline Loss Year if system parameter Use FX Headline for Technical Worksheet Details linked to Headline is activated, and the detail is linked to a Headline Loss and the entry code is “loss related” (also enabled for Claim worksheet) and the business is an Assumed Proportional Treaty business. The OccYR is an output only, and cannot be modified for such detail. Mandatory: Only if the Agreement’s Cession Basis is defined as Occurrence Year. Validations: Only when Cession basis = Occurrence Year; Validated against ‘Portfolio from Year’ as defined on Administration condition and the Insured Period To Year |
Actual Account tab/Estimates tab |
| Accounting Period From-To | The period within the Accounting Year for which the account applies. Values: From- and To date (mm/dd/yy - mm/dd/yy) Derived from: The AccYR, AccPeriod and the Insured Period. If the AccPeriod is None the day and month from the Insured Period from and -to is combined with current Accounting Year. If the AccPeriod has an other value, e.g.1stof 4 the from and to date is calculated as e.g. the three first months of the Insured Period in combination with current Accounting Year. If the Accounting Period Based on Calendar field on the worksheet is selected: >br/> Derived from: The AccYR, AccPeriod and the Calendar Period. If the AccPeriod is None, the day and month from the Calendar Period from and - to is combined with current Accounting Year. If the Insured Period is 01.04.2005 - 31.03.2006, AccYr is 2006 and AccPeriod has another value, e.g. 1st of 4, the from and to date is calculated as e.g. the three first months of the Calendar Year; 01.01.2006 - 31.03.2006.<br/br>Mandatory: Yes |
Actual Account tab/Estimates tab |
| Due Date | The date when the account is due to be settled. Values: Date (mm/dd/yy) Derived from: The calculated accounts in the Administration conditions of the selected Insured Period Default: The date defined in the Payment Cedent column of the calculated account in Administration Conditions. If no accounts are calculated, today’s date is suggested. If the Due Date Not Defaulted on Technical Worksheet system parameter is selected, the due date remains empty if no administration condidtion has been defined on the business. Mandatory: Yes. |
Actual Account tab/Estimates tab |
| Amendment | A change of the business conditions, in effect from a specific date. Values: Amendment no. + effective from date (x(mm/dd/yy)) Derived from: The Amendment conditions of the Insured Period Default: The newest amendment number and the effective from date of this amendment Mandatory: Yes |
Actual Account tab/Estimates tab |
| To Be Split | A value indicating whether or not the booking is to be split into Accounting Classification in accordance with a predefined percentage split on the agreement. (Refer to the chapter Split Selected Booking per Accounting Classification). Values: Yes and No Derived from: A Base Company Specific Settings System Parameter and the percentages defined in the Accounting Classification conditions. Validations: The value Yes is only valid if the total accounting Classification split percentage on the agreement is exactly 100%. Functional Impact: The Split Per AC field on Business Ledger is updated with value Yes when booking automatically split per Accounting Classification Mandatory: Yes |
Actual Account tab/Estimates tab |
| Section | The agreement may be split into different components according to the agreement’s classifications. Values: Section names given on the agreement Derived from: The Structure of the agreement Default: Main section if only one section. If more than one section, the field is empty and the user has to select from drop-down list. Mandatory: Yes |
Actual Account tab/Estimates tab |
| Legal Area | The Country(ies)/Country Group(s) defined in the agreement’s classifications. Values: System defined names Derived from: The selected section Mandatory: Yes |
Actual Account tab/Estimates tab |
| Acc.Classification | A unique combination of the different components in the agreement’s classifications. Values: A system defined or user defined name for each classification Derived from: The Accounting Classification conditions and the selected Section. Mandatory: Yes |
Actual Account tab/Estimates tab |
| Orig Class of Bus | An additional classification defined in the reference data. Values: An Original Class of Business. Derived from: Reference data, data type ‘Accounting Original Class of Business’ Mandatory: No |
Actual Account tab/Estimates tab |
| Original Cession | The Insured Object Cessions of the business to which you are making your bookings. Only in Life Values: The Cession name Derived from: The selected Section Mandatory: No |
Actual Account tab/Estimates tab |
| Entry Code | A code determining the nature of the booking. Values: A combination of code and name, i.e. 10 Premium, 30 Paid Losses. Note that only entry codes valid for the Base Company and/or Main Class of Business and/or Type of Participation for the selected Insured Period and Section are available. If Entry Code restrictions are defined in your User Preferences, the available entry codes are limited. Also the Entry Code property itself decides if an Entry Code appears in the drop-down list or not. Moreover, your system adminitrator may have separately set up Entry Code Restrictions for Technical and Claim Worksheets based on whether the business is inward or outward, and this setup can be done per base company. Be aware of that this restriction is not valid for Automatic Bookings. However if you later try to modify the automatic generated Entry Code manually on an open worksheet, only the restricted Entry Codes will be available for selection. Validation: The Entry Code may be basis for system validations against the conditions of the Insured Period, i.e. brokerage, portfolio, etc. Mandatory: Yes |
Actual Account tab/Estimates tab |
| Amount | The amount that applies for the entered booking details, i.e. Insured Period, Accounting Period, Entry Code etc. Values: Amount, maximum 20 characters Mandatory: No |
Actual Account tab/Estimates tab |
| New Amount | Actual Account tab/Estimates tab | |
| Headline Loss | The Identification of a linked Headline Loss (Refer to the chapter ‘Link Bookings to a Headline Loss from a Technical Worksheet’) Values: A user-defined id. Derived from: Headline Loss Mandatory: No |
Actual Account tab/Estimates tab |
| Government Tax Category | When an error message is issued on a Technical Worksheet due to booking is not according to the respective Rule defined in the Government Tax Table or the field ‘Always Stop if Trigger/Target EC is booked’ is selected in the Government Tax Table or the corresponding Validation Indicator is defined on the business insured period, a Government Tax Category for this breach may be required. The column is only enabled when an error message is issued due to the Government Tax validation Values: Customised by your System administrator. Mandatory: Yes (when column is enabled). |
Actual Account tab/Estimates tab |
| Government Tax Comment | A further description why you accept technical booking not according to Rule defined in the Government Tax Table/Validation Indicator on the Assumed Business. Column is only enabled when an error message is issued due to the Government Tax validation. Values: Free text input. Mandatory: When selected Acceptance Category requires additional comment. |
Actual Account tab/Estimates tab |
| Tax Country | The country for which the Government Tax applies. Values: Any country defined in the system. Derived from: Government Tax Table when detail is automatically booked, but can be edited. Mandatory: No. |
Actual Account tab/Estimates tab |
| Tax % | A Government Tax percentage used to calculate the Government Tax amount Values: Percentage. Derived from: Government Tax Table when detail is automatically booked, but can be edited. Mandatory: No. |
Actual Account tab/Estimates tab |
| Tax Type | Description of the Government Tax. Values: Available options are according to the list of reference data Tax Type. Derived from: Government Tax Table when automatically booked, but can be edited. Mandatory: No. |
Actual Account tab/Estimates tab |
| Government Tax Rule Ref | A reference number referring to a specific rule in the Government Tax Table. Can not be manually updated Values: A reference number automatically updated for the booking detail. Derived from: Government Tax Table when detail is automatically booked or validated based on the Government Tax Table. Mandatory: No. |
Actual Account tab/Estimates tab |
| Notes | A note applying to the booking detail can be entered Values: Free-text Validations: Against the Comments Required check box located on the Flags tab of the View Entry Code window. (Refer to the Maintain Entry Code section in the System Administrator’s Guide). Mandatory: Only if the check box mentioned for Validations is activated. |
Actual Account tab/Estimates tab |
| Delete | By switching the value to Yes you can indicate that the row is to be deleted. By selecting the popup menu option Delete Selected Details you are able to delete multiple rows in one go. By selecting the tick box Quick delete below the booking rows you can navigate between the booking rows in the Delete column by use of the Tab button on the keyboard. Use the Space button on the keyboard or double click to switch between Yes/No Values: Yes and No Mandatory: No |
Actual Account tab/Estimates tab |
| Original Responsible Partner | The partner originally responsible; e.g the Insured; enabled for Proportional Treaty Business when System parameter Use FX Headline for Technical Worksheet Details linked to Headline is activated. Values: Any Business Partner of type or types defined by your System Administrator. Mandatory: If System Parameter Original Responsible Partner is activated, the partner must be defined on Loss related details linked to a Headline Loss on Proportional Assumed Treaty Business. If worksheet is applied/closed without a partner defined, the default partner is assigned. |
Actual Account tab/Estimates tab |
Calculate and Book Value Added Tax Automatically #
For an assumed business that is subject to Value Added Tax (VAT), SICS calculates VAT automatically on technical bookings.
- Make your bookings on the Technical Worksheet.
- Select Change Status from the Edit menu button.
- SICS calculates VAT for the technical bookings that are subject to VAT calculation and adds the result to the worksheet.
- If VAT entry codes already exist on the worksheet, no further VAT calculation is done.
- Select Change Status again in order to close the worksheet.
Based on your selection of the check box Is Vat To Be Calculated On Gross, VAT is calculated on either gross or net basis.
- Gross basis: VAT is calculated by splitting the booked gross figures into net amount and VAT amount using the VAT percentage.
- Net basis: VAT is calculated by multiplying the booked net figures with the VAT percentage.
Example:
A technical worksheet contains following booking details:
| Written Premium | 1.000,00 |
| Commission | -50,00 |
| Paid Claims | -500,00 |
| VAT % | 10% |
All entries are subject to VAT calculation.
Calculation on Gross basis:
The system uses following formulas to calculate the VAT amounts:
| Gross Amount * 100 | = | Net Amount |
| (100 + VAT%) | ||
| Gross Amount - Net Amount | = | VAT Amount |
The VAT calculation results in following booking details:
| Written Premium | 909,09 |
| VAT Premium | 90,91 |
| Commission | -45,45 |
| VAT Commission | -4,55 |
| Paid Claims | -454,55 |
| VAT Paid Claims | -45,45 |
Calculation on Net basis:
The system uses following formula to calculate the VAT amounts:
| Net Amount * VAT% | = | VAT Amount |
The VAT calculation results in following booking details:
| Written Premium | 1.000,00 |
| VAT Premium | 100,00 |
| Commission | -50,00 |
| VAT Commission | -5,00 |
| Paid Claims | -500,00 |
| VAT Paid Claims | -50,00 |
Calculate and Book Value Added Tax Based on Entry Code Groups Automatically #
When the Automatic VAT calculation is activated; and additionally the system parameter VAT Calculation based on EC Groups is selected; SICS calculates VAT automatically for all businesses (inward and outward) as long as they are subject to Value Added Tax (VAT).
The bookings will be automatically done when the worksheet is saved to the database and will always be on Net Basis (see examples above).
The result of the Automatic Booking of VAT are booked with Entry Codes defined in the System Parameter Accounting/Entry Codes/Accounting Function (refer to the Accounting Functions listed below).
The Accounting Function used for the calculation of VAT depends on the type of VAT calculations you are using, i.e. VAT based on EC Sub Category or VAT based on EC Groups (the latter is the case if the system parameter VAT Calculation based on EC Groups is selected):
- VAT based on EC Sub Category (Accounting Function: Vat Calculation)
- VAT based on EC Group (Accounting Function: VAT Calculation based on EC Groups)
Additional VAT and WVAT calculation #
System Parameter Additional VAT Calculation will be available when Is Automatic VAT Calculation in Use and VAT Calculation based on EC Groups are selected. When Additional VAT Calculation is selected some addition functionality will be available for VAT(Value Added Tax) and WVAT (Withhold Value Added Tax).
Define WVAT flag on a Country #
On Locations–> Countries, WVAT flag will be available. This flag will NOT be selected by default
Where the broker on an Assumed Business or the Retrocessionaire on the ORP are from a country where the WVAT flag is selected, then the WVAT bookings as described in the sections below will be calculated
Define Surcharge on WVAT #
It will be possible to assign a surcharge % to the defined VAT % on the country. And VAT% and Surcharge% can be overwritten on Business, Insured Period tab, Individual Options.
This surcharge % will be applied to the WVAT calculations that will be calculated where applicable.
A new column on the Administration Conditions for all proportional business will be available labelled ‘Surcharge on VAT%
A new column on the Instalment for all non proportional business will be available labelled ‘Surcharge on VAT%
Where the percentage has been defined here, for all Surcharge on WVAT bookings made for the accounting period where the surcharge% is defined on the business level, the surcharge on WVAT will be calculated based on this value and not the value defined on Business, Insured Period tab, Individual Options.
Automatically calculate VAT, WVAT and Surcharge on WVAT #
- When the WVAT flag is ticked on the broker’s home country, then the VAT on brokerage will be calculated using the VAT percentage defined on Business, Insured Period tab, Individual Options.
- Where the WVAT flag is ticked on the Retrocessionaire’s home country on an Outward Business, then the VAT on premium will be calculated using the VAT percentage defined on Business, Insured Period tab, Individual Options.
- Where the Additional VAT Calculation system parameter is selected, four new VAT calculation rules will be available
WVAT on Premium
WVAT on Brokerage
Surcharge on WVAT on Premium
Surcharge on WVAT on Brokerage - Where VAT bookings are made and the WVAT flag is selected on the home country broker on an Assumed Business or the Retrocessionaire of an Outward Business-
a. A WVAT on Brokerage will be automatically calculated when the VAT on Brokerage is calculated. This will always be the reversal booking of the VAT on Brokerage. This calculation will only be done on an Assumed Business
b. A WVAT on Premium will be automatically calculated when the VAT on Premium is calculated. This will always be the reversal booking of the VAT on Premium. This calculation will only be done on an Outward Business
c. A surcharge on WVAT on Brokerage and WVAT on Premium will be calculated when WVAT on Brokerage is calculated using the Surcharge % defined on Business, Insured Period, Individual Options from which the VAT% has been taken from or the Surcharge % that is defined on the Administration conditions of the business for the corresponding accounting period for Proportional Business and from the Surcharge % defined on the instalment on the Non Proportional Business.
Define a VAT Exemption flag on the Business #
A new flag “VAT Exemption” will be available on the business, Insure Period tab. This will be enabled only when the flag ‘Use VAT Calculation’ is selected. When this flag is selected, VAT on Premium will not be calculated, but VAT on Brokerage will be calculated as per existing rules and where applicable, as per the rules specified in the previous section.
Maintain Bookings on a Technical Worksheet #
When you make bookings of an actual account and/or estimates in the technical worksheet you may need to, for example, navigate to other parts of the system, start an automatic function or add/delete a booking line. The pop-up menu in the Actual Account/Estimates tabs gives you several possibilities to maintain the bookings of a Technical Worksheet. (In the following only Actual Account will be used as reference. All functionality does however also apply for the Estimates tab.)
- Open your Technical Worksheet. Refer to Open a Technical Worksheet for a Business on page 11-12 for more information about how to open a worksheet.
- Select a ledger currency or select Add Currency from the pop-up menu in the Currency display list to add a currency.
- Click in the display list on the Actual Account tab and then click the right-mouse button to open the pop-up menu. Alternatively, click the Add Bookings button to make your bookings and open the pop-up menu afterwards.
Some of the options on the pop-up menu are enabled only when bookings exist.

Add a New Booking on a Technical Worksheet #
When you select Add New Booking from the pop-up menu on the Technical Worksheet, a new row is created. In the first row of the Actual Account, most of the columns are defaulted with values taken from the System Parameters and the Business. If booking lines already exist, the last of these rows is copied.
- Open your Technical Worksheet. Refer to Open a Technical Worksheet for a Business on page 11-12 for more information about how to open a worksheet.
- Select a ledger currency or select Add Currency from the pop-up menu in the Currency display list to add a currency.
- Select Add New Booking from the pop-up menu, or select the Add Bookings button on the Actual Account tab.
- If necessary, make your changes to defaulted entries by selecting entries from drop-down list in the columns of the first booking row and enter the entry code, amount and notes (if necessary).
To add more booking lines one by one, select Add New Booking from the menu or click the Add Bookings button.
If you want the entries of the last booking line to be copied onto several booking lines, enter the required number in the text box next to the Add Bookings button (SICS lets you enter up to 99 booking lines) and then click the Add Bookings button.
Add New Bookings using the Quick Entry Feature on the Technical Worksheet #
Using this feature, all editable columns in the worksheet except Entry Code and Amount, are disabled. When you tab between the columns, you navigate only between the Entry Code column and the Amount column. As these are the columns you are most likely to edit, this enables fast and easy entry of bookings.
- Open your Technical Worksheet and complete the initial booking procedure.
- Select the Quick Entry check box, add the number of new rows and click the Add Bookings button.
- Enter the entry codes and amounts for each of the booking lines in the Technical Worksheet.
By clearing the Quick Entry box again, you can edit all the other columns again.
Amount Multiplier on the Technical Worksheet #
If you want the amounts to be multiplied or sign of amount to be changed, enter the required multiplier e.g. -1 in the text box next to Multiply Button and then click Multiply. Multiplication applies to all booking details per business per currency in a worksheet. Actual Accounts and Estimates are treated separately for multiplication.
Use Selected Value to Populate a Technical Worksheet #
When you have entered several bookings into your worksheet and you find that for instance the Booking Period for some or all of the bookings should have been changed. Rather than changing the value in each and every booking line, you may use this feature to update all lines in one go.
You can select to change:
- All bookings - if the value is to be copied to all booking lines of the worksheet.
- All bookings below current - if the value are to be copied only to the booking lines below the line from where you selected the value.
- All bookings without a value - if the value is to be copied to all the booking lines with empty fields.
- All bookings without a value below current - if the value is to be copied only to the booking lines with empty fields below the line from where you selected the value.
- Open your Technical Worksheet. Refer to Open a Technical Worksheet for a Business on page 11-12 for more information about how to open a worksheet.
- Select a ledger currency or select Add Currency from the pop-up menu in the Currency display list to add a currency.
- Add your bookings on the Actual Account tab.
- Select the entry that you want to populate in the Technical Worksheet.
- Select Use Selected value to Populate from the pop-up menu and select one of the listed options.
- The system updates the fields in all rows in accordance with your option in the previous step.
Delete a Booking Line from the Technical Worksheet #
When you, for example, have copied too many booking lines or find that a line with incorrect information has been added, you can delete this from the Technical Worksheet.
- On your technical worksheet, select any field in any column of the row you want to delete.
- Select Delete from the pop-up menu.
- The system removes the row and recalculates the Worksheet Balance (if necessary).
Note! When the Government Tax Framework is in use and the line to be deleted from the worksheet includes a booking detail linked to one or more other booking details, system automatically removes the Government Tax link for all details included in the linkage.
Delete multiple Booking Lines from the Technical Worksheet #
When you, for example, have copied too many booking lines or find that some lines with incorrect information has been added, you can delete these from the Technical Worksheet.
- On your technical worksheet, select the Quick delete box. This will disable all editable columns in the worksheet except the Delete column.
- Select the Delete column in one of the rows you want to delete and use the Space button to switch the value from No to Yes (or double click)
- Move to the next row to be deleted by use of the Tab button and press Space again
- When completed select the Delete Selected Details from the pop-up menu
- The system removes the rows and recalculates the Worksheet Balances (if necessary)
Split Selected Booking per Accounting Classification
You can reduce the time used for booking accounts by using the Split Selected Bookings per Accounting Classification option in SICS. This option allows you to capture a percentage split across the Accounting Classifications for this agreement’s Insured Period. This option also ensures that the accounting complies with the underwriting split.
(When processing manual booking entries on Technical Worksheets, this percentage split of Accounting Classifications is applied automatically.)
If you want the system to automatically suggest the split per accounting classification, you need to set the ‘Default Bookings to be split per Accounting Classifications’ system parameter. Refer to the Base Company Specific Settings/Classification Rules 1 in the System Administrator’s Guide for more information about how to set the system parameter.
In addition, this option requires a Split % to be defined for each Accounting Classification and that the total of split is 100%. Refer to the chapter Maintain Accounting Classification’).
- Open your Technical Worksheet.
- Select a ledger currency or select Add Currency from the pop-up menu in the Currency display list to add a currency.
- Select Add New Booking. The Column ‘To be Split’ is switched to Yes when a section with 100% AC split is selected.
- Register Entry Code and Amount for one booking line and select Split Selected Bookings per Accounting Classification from the pop-menu. Or, enter several booking rows with the different entry codes and amounts before you select Apply Split from the Edit Menu button.
The system automatically splits each booking line into two or more booking lines; one booking line per Accounting Classification defined for the section. The amount is split according to the Split % defined for the Accounting Classifications of the Section. The column ‘To be Split’ is switched to No.
Split selected Booking per Amendment/Effective Period #
When the Proportional Protection Assignment for an Assumed Business has been amended and more than one effective period exists because of this amendment, this can impact on the Accounting. The different Effective Periods may have different Gross Retroceded Shares. When you make bookings to an Accounting Period that covers more than one Effective Period, the system provides you with an option to automatically split the booking detail pro-rata according to the Accounting Period and Effective Periods.
- Open your Technical Worksheet. Refer to Open a Technical Worksheet for a Business on page 11-12 for more information about how to open a worksheet.
- Select a ledger currency or select Add Currency from the pop-up menu in the Currency display list to add a currency.
- Make your bookings on the Technical Worksheet.
- If you know that a Protection Assignment has been amended and that more than one effective period exists for an accounting period, you can select one detail at the time and select Split Selected Booking per Amendment/Effective Period from the menu.
- If you are not aware of the situation, or if there are many booking details to be split, you receive a Confirmation message when you select the Appl y button or Change Status from the Edit menu button. SICS informs you about the split and asks if you want to continue.
If you select Split Selected Booking per Amendment/Effective Period from the pop-menu or select Yes to the Confirmation message, the system splits each booking details by Effective Period/Amendment.
| Example | |
|---|---|
| Insured Period: | 1st January 2002 - 31st December 200 |
| Amendment of PA from 1st July.2002: | |
| Effective Period 1: | 1st January 2002 - 30th June 2002 |
| Effective period 2: | 1st July 2002 - 31st December 2002 |
| Proportional Protection Assignment: | |
| Effective period 1: | 15% share to Retrocessionaire’s Participation 50% share to Outward Cedent Contract |
| Effective Period 2: | 15% Share to Retrocessionaire’s Participation 75% share to Outward Cedent Contract |
| Assumed Business’ Manually Technical booking of Premium for Accounting Period 1st January 2002 - 31stDecember 2002: | |
| 10 Premium 100.000,- |
The Split Selected Bookings per Amendment/Effective Period option results in the following bookings:
Assumed Business:
Effective Period 1: 10 Premium49.589,04 (100.000/365 x 181)
Effective Period 2: 10 Premium50.410,96 (100.000/365 x 184)
Outward Cedent Contract (as Original):
Effective Period 1: 10 Premium -24.794,52 (49.589,04 x 50%)
Effective Period 2: 10 Premium -37.808,22 (50.410,96 x 75%)
Retrocessionaire’s Participation (as Booking):
Effective Period 1: 10 Premium -7.438,36 (49.589,04 x 15%)
Effective Period 2: 10 Premium -7.561,64 (50.410,96 x 15%)
Allocate Occurrence Year #
When you make claim bookings on the Technical Worksheet and you have premium bookings with different Accounting Years on open/closed Worksheet(s), you can let the system allocate occurrence years to claim detail by using the Allocate Occurrence Year option in SICS.
If you want the system to automatically allocate the Occurrence Year for a claim detail, you need to define the premium and loss basis to be used in the calculation. (Refer to fields Occ. Year Split Prem. Basis and Occ. Year Split Loss Basis in chapter Define Accounts Conditions in the User Guide for more information).
Claim detail split into Occurrence Year is calculated of claim details made on the current Technical Worksheet multiplied by cumulated premium for one Accounting Year divided by cumulated premium for all relevant Accounting Years.
- Open your Technical Worksheet.
- Select a ledger currency or select Add Currency from the pop-up menu in the Currency display list to add a currency.
- Select Add New Booking.
- Register Entry Code and Amount for one or more claim details before you select Allocate Occurrence Year from the Menu. (Entry Code(s) must be according to the Entry Code(s) defined for the basis selected in field Occ. Year Split Loss Basis).
The system automatically splits each booking line into two or more booking lines;
one booking line per Occurrence Year. The amount is split according to number of Accounting Years made for the premium bookings being basis for the calculation.
Only premium booked to Accounting Years equal to or less than the year of the Accounting Period To Date on the Loss detail will be used as basis for the calculation of the split according to Occurrence Year.
Example:
Insured Period: 1st January 2010 - 31st December 2010
Occ Year Split Prem Basis = Entry Code 10 (Premium)
Occ Year Split Loss Basis = Entry Codes 30 (Paid Loss) + 83 (Orig Loss Reserve)
Cumulated Premium bookings on Business Ledger, Underwriting Year 2010;
Accounting Year 2010; Premium = 30.000
Accounting Year 2011; Premium = 20.000
Accounting Year 2012; Premium = 10.000
Accounting Year 2013; Premium = 15.000
Accounting Year 2014; Premium = 25.000
Claim Bookings on current Technical Worksheet;
Accounting Year 2012; Paid Loss = -6.000; Accounting Period From - To: 01.11.12 - 31.01.13 and
Accounting Year 2012; Orig Loss Reserve = -1.800; Accounting Period From - To: 01.11.12 - 31.01.13
Claim details split into Occurrence Years by selecting option Allocate Occurrence Year is calculated according to following formula
(per Currency/Insured Period/Accounting Classification);
Claim detail * Premium Accounting Year ‘X’/Total Premium Insured Period
Claim detail * Premium Accounting Year ‘X+1’/Total Premium Insured Period
Etc.
Result of the calculation;
Paid Loss:
-6.000 * 30.000 / 75.000 = -2.400 (Occurrence Year 2010)
-6.000 * 20.000 / 75.000 = -1.600 (Occurrence Year 2011)
-6.000 * 10.000 / 75.000 = -800 (Occurrence Year 2012)
-6.000 * 15.000 / 75.000 = -1.200 (Occurrence Year 2013)
Orig Loss Reserve:
-1.800 * 30.000 / 75.000 = -720 (Occurrence Year 2010)
-1.800 * 20.000 / 75.000 = -480 (Occurrence Year 2011)
-1.800 * 10.000 / 75.000 = -240 (Occurrence Year 2012)
-1.800 * 15.000 / 75.000 = -360 (Occurrence Year 2013)
Automatic Booking of Deductions, Premium Deposit and Automatic Gross up of Premium and Booking of Deduction #
To ensure that the Deductions, Premium Deposits and Gross Premium are calculated and booked correctly according to the Business Conditions, SICS can calculate these entries automatically. You can select between:
- Automatic Booking of Deductions
- Automatic Booking of Premium Deposits
- Automatic Bookings of both Deductions and Premium Deposit
- Automatic Gross-up of Premium and Booking of Deductions
- Open your Technical Worksheet. Refer to Open a Technical Worksheet for a Business for more information about how to open a worksheet.
- Select a ledger currency or select Add Currency from the pop-up menu in the Currency display list to add a currency.
- Make your bookings on the Technical Worksheet.
- Select the booking row from where you want to start the automatic booking and select Automatic Bookings from the pop-up menu.
- Select the scope of calculation by making further selections from the sub menus.
SICS calculates the Deduction-, Premium Deposit-, and Gross Premium amounts in accordance with the corresponding conditions of the Business and adds the result to the Technical Worksheet. The calculation of the deposit can be performed independently of the frequency defined on the deposit conditions.
Automatic Booking of Deductions #
The calculation of the various deductions is performed according to the search priority entered in the Reference Date for the Deduction Types. The calculation also depends on the selected Entry Code Group in the field Deduction Basis on the condition. Your System Administrator defines the Entry Code Group.
What entry code the different deduction types will be booked as is defined in the System Parameter Maintenance window, in the page Accounting, Entry Codes. Dependent of the business you are booking on the entry codes used for the different deductions can vary. Below you will find a list of Accounting Functions and the related businesses:
If you are booking on a Proportional or a Non-Proportional Facultative business, both inward and outward or you are booking on a Proportional or a Non-Proportional Direct business, or a Master Agreement the system will use the entry codes defined in the Accounting Function Instalment Premium, Fac
If you are booking on an inward Proportional or a Non-Proportional Treaty business, including Administrative Business, the system will use the entry codes defined in the Accounting Function Instalment Premium, Treaty Inward
If you are booking on an outward Non-Proportional Treaty business the system will use the entry codes defined in the Accounting Function Instalment Premium, Outward
Note! If Sliding Scale Commission or Stepped Sliding Scale Commission is defined as a Deduction Method, the values entered as Provisional Commission apply
The results of the Automatic Booking of Deduction are booked with Entry Codes defined in the System Parameter Accounting/Entry Codes/Accounting Function (refer to the Accounting Functions listed below). The Accounting Function used for the calculations depends on the Type of Business and the Level of Business:
- Instalment Premium, Fac (Inward and Outward Facultative Business and Direct Business)
- Instalment Premium, Treaty Inward (Inward Proportional and Non Proportional Treaty)
- Instalment Premium, Treaty Outward (Outward Treaty Business)
Automatic Booking of Stepped-/ Sliding Scale Commission #
To ensure that the Stepped Sliding Scale Commission and the Sliding Scale Commission are calculated and booked correctly according to the Business conditions, SICS can calculate these entries automatically;
1.Open your Technical Worksheet. Refer to Open a Technical Worksheet for a Business for more information about how to open a Worksheet.
2.Select a ledger currency or select Add Currency from the pop-up menu in the Currency display list to add a currency.
3.Make your bookings on the Technical Worksheet.
4.Select the booking row from where you want to start the automatic booking and select Automatic Bookings from the pop-up menu.
5.Select the scope of calculation by making further selections from the sub menu. If no new bookings are entered on the Worksheet, no automatic calculation of Stepped Sliding Scale Commission/Sliding Scale Commission is performed.
SICS calculates the Stepped Sliding Scale Commission and the Sliding Scale Commission in accordance with the corresponding conditions of the Business (Commission with Deduction Type = Stepped Sliding Scale/Sliding Scale and Premium Basis, Loss Ratio Definition, Provisional Commission, if any, and Percent and Premium Basis. In addition, the Stepped Sliding Scale, respectively the Sliding Commission/Loss Ratio definition must be defined for the Business). The definition of the Entry Code Groups entered in the fields Loss Ratio Definition and Premium Basis are defined by your System Administrator. The calculation will be performed independently of the frequency defined on the conditions. Any Deficit Carried Forward is not taken into consideration when calculating the Stepped Sliding Scale Commission/Sliding Scale Commission amount. The conditions from the newest Amendment will be used.
*The calculation of Stepped Sliding Scale Commission/Sliding Scale Commission will be performed for cumulative bookings per Insured Period/Section/Accounting Classification (open/closed Technical Worksheets)
*The calculation of the Stepped Sliding Scale Commission/Sliding Scale Commission will be performed across all currencies on Technical Worksheet/Business Ledger. All details in the calculation are converted to the currency of the current Technical Worksheet, at Newest Daily Rate.
*The Stepped Sliding Scale Commission/Sliding Scale Commission amount will be booked per Insured Period/Section/Accounting Classification.
*If this calculation is for the 2nd (or a subsequent) time, meaning a Stepped Sliding Scale Commission/Sliding Scale Commission is already booked on this business, only the Stepped Sliding Scale Commission/Sliding Scale Commission adjustment amount will be booked.
You can select between the following scopes of calculations: (Both scopes are for the Business in Focus only);
*For Selected Insured Period; Calculates the Stepped-/ Sliding Scale Commission for cumulative figures for the selected Insured Period (i.e. from current Worksheet and from Business Ledger).
*For All Insured Periods ….; Calculates the Stepped-/ Sliding Scale Commission for cumulative figures (i.e. from current Worksheet and from Business Ledger) per Insured Period for all Insured Periods included in the Worksheet
The results of the Automatic Booking of Stepped-/ Sliding Scale Commission are booked with Entry Codes defined in the System Parameter Accounting/Entry Codes/Accounting Function (refer to the Accounting Functions listed below). The Accounting Function used for the calculations depends on the Type of Business and the Level of Business;
*Instalment Premium, Fac (Facultative/Direct Business)
*Instalment Premium, Treaty Inward (Inward, Proportional Treaty / Non Proportional Treaty)
Note! The calculations overwrite any manually entered Stepped Sliding Scale Commission amount/Sliding Scale Commission amount
Stepped Sliding Scale Commission Amount
The calculation is performed according to below;
Loss Ratio % = Loss/Premium * 100 (refer to entered Premium/Loss groups on conditions)
Stepped Sliding Scale Commission Rate
- If Loss Ratio for Stepped Sliding Scale Commission is higher than or equal to the Max Loss Ratio defined, then the Min Commission Rate is used
- If Loss Ratio for Stepped Sliding Scale Commission is higher than the Min Loss Ratio and less than the Max Loss Ratio, then the Commission Rate defined in the scale for the calculated Loss Ratio is used is used
- If Loss Ratio for Stepped Sliding Scale Commission is equal to or less than the Min Loss Ratio defined, then the Max Commission Rate is used
Provisional Commission Amount (if any) = Premium basis * Rate
Stepped Sliding Scale Commission Amount = Premium Basis * Stepped sliding Scale Commission Rate
Final Stepped Sliding Scale Commission Amount = Stepped Sliding Scale Commission Amount - Provisional Commission Amount (= amount automatically booked)
Sliding Scale Commission Amount
The calculation is performed according to below;
Loss Ratio % = Loss/Premium * 100 (refer to entered Premium/Loss groups on conditions)
Sliding Scale Commission Rate
- If Loss Ratio for Sliding Scale Commission is higher than or equal to the Max Loss Ratio defined, then the Min Commission Rate is used
- If the Loss Ratio for Sliding Scale Commission is higher than the Min Loss Ratio and less than the Max Loss Ratio defined, then an accurate rate is calculated;
- (Max Loss Ratio - Loss Ratio for Sliding Scale Commission) * (Max Commission percent - Min Commission percent) / (Max Loss Ratio - Min Loss Ratio).
- The result is then added to the Min Commission percent
- (Max Loss Ratio - Loss Ratio for Sliding Scale Commission) * (Max Commission percent - Min Commission percent) / (Max Loss Ratio - Min Loss Ratio).
- If Loss Ratio for Sliding Scale Commission is equal to or less than the Min Loss Ratio defined, then the Max Commission Rate is used
Provisional Commission Amount (if any) = Premium basis * Rate
Sliding Scale Commission Amount = Premium Basis * Sliding Scale Commission Rate
Final Sliding Scale Commission Amount = Sliding Scale Commission Amount - Provisional Commission Amount (= amount automatically booked)
Automatic Booking of Premium Deposit #
The calculation of the Premium Deposit depends on the selected Entry Code Group in the field for Premium Basis on the condition. Your System Administrator defines the Entry Code Group.
The results of the Automatic Booking of Premium Deposit Retained are booked with Entry Codes defined in the System Parameter Accounting/Entry Codes/Accounting Function Automatic Booking. If the Type of Security in the deposit conditions is liquid, then the Entry Code defined in the Calculation Liquid Premium Deposit Retained is used. If the Type of Security in the deposit conditions is non-liquid, then the Entry Code defined in the Calculation Non Liquid Premium Deposit Retained is used.
Automatic Gross-up of Premium and Booking of Deductions #
The calculation of the Gross Premium amount is performed according to the entered Net Premium amount and the conditions entered on the Deduction condition. The calculation of the various deductions is performed according to the search priority entered in the Reference Date for the Deduction Types. The calculation also depends on the selected Entry Code Group in the field Deduction Basis on the condition. Your System Administrator defines the Entry Code Group.
Note! If Sliding Scale Commission or Stepped Sliding Scale Commission is defined as a Deduction Method, Provisional Commission will not be included in the calculation of the Gross Premium amount. This automatic booking should therefore not be used as the Gross Premium amount and consequently the Deduction amounts will not be correct
Note! The calculations overwrite any manually entered deductions and/or premium deposits.
You can select between the following scopes of calculations:
- For Selected Details, Currency and Section: Calculates for all details with the selected currency and section.
- For Selected Details, Currency and Sections: Calculates for all details and sections with the selected currency.
- For Selected Business, Currency and All Details: Calculates for all details for selected business/currency.
- For Selected Business, Currencies and All Details: Calculates for all details and all currencies for selected business.
- For All Businesses, Currencies and Details: Calculates for all details within the worksheet.
To ensure that the Profit Commission and the Management Expenses are calculated and booked correctly according to the Business conditions, SICS can calculate these entries automatically. You can select;
Automatic Booking of Profit Commission #
- Open your Technical Worksheet. Refer to Open a Technical Worksheet for a Business for more information about how to open a Worksheet.
- Select a ledger currency or select Add Currency from the pop-up menu in the Currency display list to add a currency.
- Make your bookings on the Technical Worksheet or leave it blank for calculating the Profit Commission - and Management Expenses amounts only.
- Select the booking row from where you want to start the automatic booking and select Automatic Bookings from the pop-up menu.
- Select the scope of calculation by making further selections from the sub menu. If no new bookings are entered on the Worksheet, only the option For All Insured Periods on the Business is enabled.
SICS calculates the Profit Commission in accordance with the corresponding conditions of the Business (Profit Commission Percent, Profit/Loss Basis, Management Expenses Percent and Premium Basis). The definition of the Entry Code Groups entered in the fields Profit/Loss Basis and Premium Basis are defined by your System Administrator. The calculation can be performed independently of the frequency defined on the conditions. Any Deficit Carried Forward is not taken into consideration when calculating the Profit Commission amount. The conditions from the newest Amendment will be used.
- The calculation of Profit/Loss will be performed for cumulative bookings per Insured Period
- The calculation of the Profit/Loss will be performed on overall level, i.e. for all Accounting Classifications defined for the lowest Section(s) owing the Profit Commission conditions.
- The Profit Commission amount will be booked on the lowest Section owing the Profit Commission condition.
- The Profit Commission /Management Expenses amount will be booked on the Accounting Classification marked as default or will be split and booked according to the split percent entered on the Accounting Classification. If neither a default nor a split percentage is entered, the user must select the Accounting Classification to book on.
- If this calculation is for the 2ndtime, meaning a Profit Commission is already booked on this business, only the Profit Commission adjustment amount will be booked.
You can select between the following scopes of calculations: (All scopes are for the Business/Currency in Focus only);
- For Selected Insured Period; Calculates the Profit Commission and the Management Expenses for cumulative figures for the selected Insured Period (i.e. from current Worksheet and from Business Ledger).
- For All Insured Periods Included in the Worksheet; Calculates the Profit Commission and the Management Expenses for cumulative figures (i.e. from current Worksheet and from Business Ledger) per Insured Period for all Insured Periods included in the Worksheet
- For All Insured Periods on the Business; Calculates the Profit Commission and the Management Expenses for cumulative figures (i.e. from current Worksheet and from Business Ledger) per Insured Period for all Insured Periods on the Business. Note! The Profit Commission amount is booked only when the overall level result of the Profit/Loss calculation is a profit. (For overall level, refer to the above definition).
The results of the Automatic Booking of Profit Commission are booked with Entry Codes defined in the System Parameter Accounting/Entry Codes/Accounting Function (refer to the Accounting Functions listed below). The Accounting Function used for the calculations depends on the Type of Business and the Level of Business:
- Instalment Premium, Fac (Facultative/Direct Business)
- Instalment Premium, Treaty Inward (Inward, Proportional Treaty / Non Proportional Treaty)
- Instalment Premium, Treaty Outward (Outward Business)
Automatic Booking of Loss Participation #
To ensure that the Loss Participation is calculated and booked correctly according to the Business conditions, SICS can calculate this entry automatically.
- Make your bookings on the Technical Worksheet or leave it blank for calculating the Loss Participation:
- You may select a booking row (if any)
- Select ‘Automatic Booking of Loss Participation’ from the menu
- You can select between the following calculations;
- For Selected Insured Period
- For All Insured Periods Included in the Worksheet
- For All Insured Periods on the Business
SICS calculates Loss Participation in accordance with the business conditions i.e. according to the selected Entry Code Groups defined in the Loss Ratio Definition for Premium and Loss and the Loss Participation scheme defined on the condition. Your system Administrator defines the Entry Code Groups. The result of the Automatic Booking of Loss Participation are booked with Entry Codes defined in the System Parameter Accounting/Entry Codes/Accounting Function. The Accounting Function used depends on the Level of Business/Type of Business you book on.
- The calculation will be performed independent of the frequency defined on the conditions.
- The conditions from the newest Amendment will be used.
- The calculation of Loss Participation will be performed for cumulative bookings i.e. for both closed and open worksheets per Insured Period/ Section/Accounting Classification
- If this calculation of Loss Participation is for the 2nd time, meaning a Loss Participation is already booked on this business, only the Loss Participation adjustment amount will be booked
- The calculation of Loss Participation will be performed across different currencies converted according to newest daily rate and booked on the currency from which the automatic booking is performed
Loss Participation amount will be calculated according to following;
Cumulated Premium: The system finds the bookings to use by looking at the selected Premium Basis found in your contract’s Loss Participation conditions.
Cumulated Loss: The system finds the bookings to use by looking at the selected Premium Basis found in your contract’s Loss Participation conditions.
Loss Ratio Incurred Losses in percent of Earned Premium (refer to Cumulated Premium/Loss)
Loss Participation Limit; Earned Premium * Min Loss Ratio Incurred Loss in Excess of Limit; Incurred Loss - Loss Participation Limit
Provisional Loss Participation Amount; Incurred Loss in Excess of Limit * Loss Participation Rate
Max Loss Participation Amount; Earned Premium * Max Loss Rate
Final Loss Participation Amount;
If Loss Ratio <= Min Loss Ratio, then Final Loss Participation Amount = zero
If Loss Ratio > Min Loss Ratio AND Loss Ratio <=Max Loss Ratio,
then Final Loss Participation Amount = Provisional Loss Participation Amount
If Loss Ratio > Max Loss Ratio, then Final Loss Participation Amount =
(Max Loss Participation Amount - Loss Participation Limit Amount) * Loss Participation Rate
Earlier Booked Loss Participation: In the current currency, the system calculates also earlier Loss Participation: It converts all the earlier booked ‘Loss Participation’ and summarises these.
Loss Participation Adjustment: Cumulated Loss Participation - Earlier Booked Loss Participation
The Loss Participation Adjustment amount is the one the system books.
Accuracy Validation - Loss Participation #
Manual checks of a ‘Loss Participation’ to be booked could be a source of error. An automatic validation of this improves data quality and SICS accuracy validation facility offers validations of manually booked ‘Loss Participation’.
Check ‘Loss Participation’ Terms and Conditions Present #
The system checks if this contract has ‘Loss Participation’ terms and conditions registered. If there aren’t, the system stops you from booking such Loss Participation.
Check for Loss Participation #
If the system finds that the contract has ‘Loss Participation’ terms and condition registered with Loss Ratio Definition and the Loss Participation scheme, the system checks the manually booked Loss Participation amount.
The system finds the bookings to use by looking at the selected Loss Ratio Definition in your contract’s Deductible/Loss Participation conditions.
Before summing, the system converts all previous bookings and current bookings into the currency you are now working with. It converts these according to this currency’s newest daily exchange rate.
The system sums these and finds the Loss Participation amount based on cumulative Premium and Loss details per Insured Period/Section/Accounting Classification. The system then checks the Loss Participation amount. If there already exists a ‘Loss Participation amount’ only the adjusted Loss Participation amount is checked. The system calculates the amount to compare with your ‘Loss Participation’ booking as follows:
Cumulated Premium; The system finds the bookings to use by looking at the selected Premium Basis found in your contract’s Loss Participation conditions.
Cumulated Loss; The system finds the bookings to use by looking at the selected Premium Basis found in your contract’s Loss Participation conditions.
Loss Ratio; Incurred Losses in percent of Earned Premium (refer to Cumulated Premium/Loss)
Loss Participation Limit; Earned Premium * Min Loss Ratio
Incurred Loss in Excess of Limit; Incurred Loss - Loss Participation Rate
Provisional Loss Participation Amont; Incurred Loss in Excess of Limit * Loss Participation Rate
Max Loss Participation Amount; Earned Premium * Max Loss Rate
Final Loss Participation Amount;
If Loss Ratio <= Min Loss Ratio, then Final Loss Participation Amount = zero

If Loss Ratio > Min Loss Ratio AND Loss Ratio <=Max Loss Ratio,
then Final Loss Participation Amount = Provisional Loss Participation Amount

If Loss Ratio > Max Loss Ratio, then Final Loss Participation Amount =
(Max Loss Participation Amount - Loss Participation Limit Amount) * Loss Participation Rate
Earlier Booked Loss Participation; In the current currency, the system calculates also earlier Loss Participation: It converts all the earlier booked ‘Loss Participation’ and summarises these.
Loss Participation Adjustment; Cumulated Loss Participation - Earlier Booked Loss Participation
The Loss Participation Adjustment amount is the one the system uses to compare to your ‘Loss Participation’ entry.
Automatic Reinstatement Calculation #
The option is enabled if enabled by your System Administrator, and Insured Period has a Reinstatement calculation which is Per Insured Period. For further details, refer to the Claim Accounting chapter.
Automatic Booking of Government Taxes #
To ensure that the Government Tax is calculated and booked correctly and according to the Government Tax Table, SICS can calculate this entry automatically.
- Make your bookings on the Technical Worksheet
- Select a ledger currency or select Add Currency from the pop-up menu in the Currency display list
- Make your Trigger detail booking(s) (e.g. Premium, Commission, Claim Paid etc.) on the Technical Worksheet
- Right mouse click and select Automatic Bookings and then Automatic Booking of Government Taxes from the pop-up menu.
- You can select between the following calculations;
- For Selected Business, Currency and All Details
- For Selected Business, Currencies and All Details
Note: The Automatic Booking of Government Taxes can only be calculated for Assumed Business and is dependent on the system parameter ‘Government Tax Framework in use’ being active and that the system parameter ‘Government Tax Table’ is defined.
SICS calculates the Government Tax details in accordance with the Validation Indicator of the Business Insured Period (i.e. Government Tax Validation Indicator is ‘None’ or ‘CL WS only - Always Stop if Trigger/Target EC is booked’ or ‘CL WS only excluded from Validation’) and the definition of the Government Tax Table for the respective Rule Ref number.
If system finds (according to the Government Tax Validation Indicator) that automatic booking of Government Tax can be performed for the Business Insured Period/Section, system is checking whether the entered detail on the Worksheet is a Trigger Entry Code or not.
A Trigger Entry Code is an Entry Code defined within one of the Entry Code Groups within the Entry Code Category ‘VAT/Government Tax Calculation Basis. If the Entry Code on the worksheet is a Trigger Entry Code, the Entry Code is a candidate for Automatic Booking of Government Tax.
The classification made with the Trigger Entry Code and the information on the Business Insured Period/Section is used to search in the Government Tax Table to find the respective Government Tax Rule and thereof the Target Entry Code and Tax Percentage to be used for the automatic Government Tax Booking.
Details from the table to be checked against the business are; Tax Country, Base Company Affected, Base Company/Cedent/Producer/Broker within Tax Country, Cedent/Producer within EU, Cedent/Broker in State, Cover Area, Class of Business, Special Taxes for Business Partners.
If one or more matching active Government Tax Rule is found, system is checking whether Government Tax is applicable or not (refer to field Tax Applicable and Tax % Applicable valid From-To Dates in Government Tax Table). If applicable, the automatic booking of the Government Tax can be performed using the Government Tax percentage found in the table.
Depending on the definition of the respective Government Tax Rule, the Government Tax detail is calculated on Gross or on Net basis.
Example when field Calculate Tax on Gross = selected (means is on Gross);
Government Tax = 6% Trigger Premium detail (basis) present on worksheet = 1.000 System calculates Government Tax (X + (X*6/100) = 1.000. Automatically booked by SICS = Trigger Premium detail 943,40 (replaces the premium 1000 entered by user Government Tax 943,60 * 6% = 56,60 Total Premium + Government Tax = 1.000
Example when field Calculate Tax on Gross = deselected (means is on Net, default value); Government Tax = 6% Trigger Premium detail (basis) present on worksheet = 1.000 System calculates Government Tax 1.000*6/100 = 60. Total Premium + Government Tax = 1.060
Furthermore, SICS is checking for more Target Entry Code details to be booked for the same Trigger Entry Code. This will be the case when more than one Government Tax Rule with the same information/classification is defined for one Trigger Entry Code. This procedure is repeated for all Trigger Entry Codes within the worksheet.
- The Entry Code assigned to the Target detail is the Entry Code defined for the respective Government Tax Rule.
- The fields Government Tax Rule Ref, Tax Country, Tax % and Tax Type are automatically updated from the Government Tax Table for the respective Government Tax Rule.
- Government Tax Trigger Entry Code(s) and Target Entry Code(s) are automatically linked during the Automatic Booking process
Note! If the field ‘Automatic Booking’ in the Government Tax Table is selected, automatic booking of Government Tax will be performed when user press the ‘Apply’ button or select ‘Change Status’ on the Technical Worksheet or when processing a TechAccount eMessage - it will not be necessary to select the ‘Automatic Booking’ option from the pop-up menu.
Government Tax Validation #
To verify that the Government Tax detail is in accordance with the definition of the respective Rule in the Government Tax Table, system performs a validation. The validation is triggered when user press the ‘Apply’ button, select ‘Change Status’ or when closing a Technical Worksheet through eMessaging.
Check if Government Tax Validation is to be performed for Business Insured Period #
To check if a validation is to be performed or not for the details, the system first checks if the flag Government Tax Validation Active on the business Insured Period is selected or not. If this flag is not selected, no validation is performed. It this flag is selected, an automatic validation of the Government Tax detail may be performed
Entry Codes to be checked on Technical Worksheet #
System checks Trigger and/or Target Entry Codes on Technical Worksheet;
- Trigger Entry Code is an Entry Code defined within one of the Entry Code Groups within the Entry Code Category ‘VAT/Government Tax Calculation Basis.
- Target Entry Code is an Entry Code defined within one of the Entry Code Groups within the Entry Code Category ‘Government Tax Target’.
If system finds either a Trigger Entry Code and/or Target Entry Code on the Technical Worksheet, the booking line is checked against the respective rule in the Government Tax Table. If a respective, active and applicable rule is found, the validation is performed. System gives an error message in the following scenarios;
- If a Trigger Entry Code is found, but the Target Entry Code is missing for the same granularity (*)
- If a Target Entry Code is found, but the Trigger Entry Code is missing for the same granularity (*)
- If both a Trigger and a Target Entry Code is found, but the Government Tax detail is above the tolerance limit given for the respective Government Tax Rule
- A respective Government Tax Rule for the current Insured Period is defined in the Government Tax Table and the value in the column ‘Always Stop if Trigger/Target EC is booked’ is true and the current Technical Worksheet contains a Trigger and/or Target Entry Code
- A Target Entry Code is found, but no respective Government Tax Rule is found for the current Insured Period in the Government Tax Table
- The Government Tax Validation Indicator on the current Insured Period/Section is ‘TA WS only - Always Stop if Trigger/Target EC is booked’ and the current Technical Worksheet includes a Trigger and/or Target Entry Code
- No validation is performed when neither a Trigger Entry Code nor a Target Entry Code is found.
Note! Same granularity is same values for currency, booking year/period, accounting year, accounting period, accounting period from-to, business, insured period, underwriting year, occurrence year, original underwriting year, section, accounting classification..
The Government Tax Validation is repeated for all Trigger/Target Entry Codes included in the Technical Worksheet. To be able to ‘Apply’ or ‘Change Status’ the Technical Worksheet, user must either correct the error(s) found or override on Technical Worksheet by selecting a Government Tax Category and giving a Government Tax Comment. Another possibility is to mark a booking line and to select the option Government Tax Validation Error details from the pop-up menu. The Government Tax Validation Error Details window appears from which the user can select a Government Tax Category and to give a Government Tax Comment to override the error.
Check if Trigger/Target Entry Codes are linked when ‘Change Status’ on Technical Worksheet #
If a Target Entry Code is booked on the Technical Worksheet, system checks if this Entry Code is linked to a corresponding Trigger Entry Code. If the Trigger/Target Entry Codes are not linked, or a corresponding Trigger Entry Code is not booked on the Technical Worksheet, system issues an error message. Depending on what is missing, the user must either link the Trigger/Target Entry Codes or create a corresponding Trigger Entry Code to be able to ‘Change Status’. Refer to chapter Link Government Tax Trigger/Target Entry Codes on an Assumed Business from the Technical Worksheet for more information regarding linking.
Select Accounting Classification from a Technical Worksheet #
You can select Accounting Classifications already linked to the section to which you are making your booking. If more than one section is defined for the business, the Section, Legal Area and Accounting Classification fields of the booking line are empty. If one section is defined with more than one Accounting Classification, the Section value is displayed but the Legal Area and Accounting Classification fields are empty.
- Open your Technical Worksheet. Refer to Open a Technical Worksheet for a Business on page 11-12 for more information about how to open a worksheet.
- Select a ledger currency or select Add Currency from the pop-up menu in the Currency display list to add a currency.
- Select Add Bookings in order to get a booking line. If the section field is empty, select a section from the drop-down list.
- Open Select Accounting Classification from the pop-up menu in order to display the Accounting Classifications defined on the section.
 5. Select one of the Accounting Classifications. The classification is automatically transferred back to the worksheet.
Once a section has been added to your worksheet you can also select between the Accounting Classifications in the drop-down list of the Accounting Classification column. If the Accounting Classifications include a Legal Area, you can narrow down the list of available Accounting Classifications by making a selection in the Legal Area drop-down list. Only the Accounting Classifications that use the selected Legal Area are displayed in the Accounting Classification drop-down list.

Create and Select Accounting Classifications from a Technical Worksheet #
While making your bookings in a Technical Worksheet you may discover that you need to view and maintain existing Accounting Classifications, or even create new ones.
- Open your Technical Worksheet. Refer to Open a Technical Worksheet for a Business on page 11-12 for more information about how to open a worksheet.
- Select a ledger currency or select Add Currency from the pop-up menu in the Currency display list to add a currency.
- Select Add Bookings to add a booking row.
- If no Accounting Classifications are defined for the business, no booking line is added and the system asks if you want to add an Accounting Classification.
- If Accounting Classifications are defined, a booking row is added and you have to select an accounting classification from the drop-down list or via the menu option Select Accounting Classification. (Refer to the chapter Select Accounting Classification from a Technical Worksheet).
- If no Accounting Classifications are defined, or you do not find an appropriate Accounting Classification among the defined ones, you can create a new by selecting Create/Select Accounting Classification from the menu.
You see the Accounting Classification window in edit mode. Define the required classification item by removing values until each classification type only has one value selected. 5. When you save the Accounting Classification window it is allocated to the booking that you selected in the Technical Worksheet.
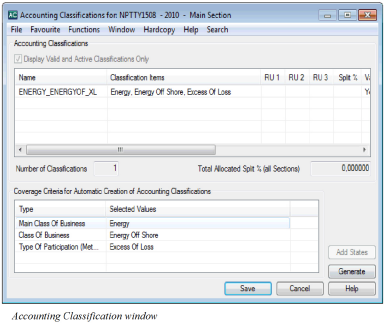 Whether a classification type is mandatory or not depends on rules defined in the system parameters. These rules can depend on, for example, the Base Company of the business. For further description of the Accounting Classification feature and the Accounting Classification fields, refer to the chapter Maintain Accounting Classification.)
Link Bookings on Outward Business to Insured Period from a Protected Business #
This feature is only enabled when you make manual bookings on an Outward Business, and is used when you want to establish the link between the Outward Business and the protected source business.
- Open a Technical Worksheet from an Outward Business or other parts of SICS.
- Select a ledger currency or select ‘Add Currency’from the pop-up menu in the Currency display list to add a currency.
- Add your bookings on the Technical Worksheet.
- Select the booking row to which you want to link the protected business.
Select ‘Link Insured Period from protected business ‘from the menu. You see a window presenting the protected businesses for the Insured Period of the selected booking line. A window presenting the protected businesses for the Insured Period of the selected booking line opens. 5. Select the source business you want to link and select ‘Transfer’ from the menu.
Note! Either the Accounting system parameter ' Trace Source Business from Outward Bookings’ or the trace option ‘Source Business’ on the Business tab in the Business Properties window must be selected. Refer to the System Administrator’s Guide, chapter Maintain System Parameters\Miscellaneous.
Note! When the System Parameter Mandatory Retro Bookings Detail Link is selected it will be mandatory to establish a link to the protected inward businesses before you can close or validate the worksheet. When the System Parameter Auto Link When Only One Protected Business is active, the system automatically links the booking details to the protected business, if only one inward business is protected for the Insured Period. (Refer to System Parameter Maintenance, Accounting, Miscellaneous in the System Administrator’s Guide).
Link Bookings on Outward Business to Claim from a Technical Worksheet #
You can link a claim to bookings made manually on an Outward agreement.
This feature is only enabled when you book on outward business. The feature gets enabled when either the Accounting system parameter ‘Trace Claim from Outward Bookings’ or the trace option ‘Claim’ on the Business tab in the Business Properties window has been selected. Refer to the System Administrator’s Guide, chapter Maintain System Parameters\Miscellaneous.
- Open a Technical Worksheet from an Outward Business or other parts of SICS.
- Select a ledger currency or select Add Currency from the pop-up menu in the Currency display list to add a currency.
- Add your bookings on the Technical Worksheet.
- Select the booking line to which you want to link a claim.
- Select Link Claim from the menu. You see the Find: Claims window.
- Select the appropriate claim from the list and select Transfer from the menu.
The Claim is now linked to the booking detail. When you open the Business Ledger Account Balances and inspect the details, the transferred claim can be found in the column ‘Claim ID’. (Refer to section View Account Balances from Business Ledger).
Link Bookings to a Headline Loss from a Technical Worksheet #
You are allowed to link a booking on a Technical Worksheet to a Headline Loss. For inwards business, the main reason is to enable bookings to be included in recovery calculations without creating claims. For outwards business, the purpose may be to facilitate Headline Loss Net Reporting.
- Open a Technical Worksheet
- Select a ledger currency or add a currency in the currency display list.
- Add your bookings on the Technical Worksheet.
- Select the booking detail to which you want to link a Headline Loss.
- Select Link Headline Loss from the menu. You see the Find: Headline Loss window.
- Select the appropriate Headline Loss from the list, and select Transfer from the menu. (Refer to the section Find Headline Loss in the Claims chapter.)
The Headline Loss column of the Technical Worksheet is updated with the Headline Loss ID, - Name and - Date of Loss.
Note that if the business is an Assumed Proportional Treaty and system parameter Use FX Headline for Technical Worksheet Details linked to Headline is activated; the OccYR column is updated to the year of the Headline Loss, and can no longer be modified; if the detail is loss related (entry code is also enabled for claim worksheets.) If you select to remove the link to a Headline Loss; the OccYR is set back to the regular default value, and can be modified.
When you apply the worksheet the system validates the from/to dates of the Headline Loss. If one or both of the dates are not within the Insured Period From and -To dates, the system returns with an error message. By selecting the booking line with the incorrect headline loss and opening the menu, the system offers you to remove the linked Headline Loss.
When you open the Business Ledger Account Balances and inspect the details, the transferred Headline Loss can be found in the ‘Headline Loss Id’ column.
Link Bookings on Outward Business to a Base Company of the Protected Business’ Insured Period from a Technical Worksheet #
This feature is only enabled when you make manual bookings on an Outward Business and is used when you want to establish the link between the Outward Business and the original base company.
- Open a Technical Worksheet from an Outward Business or other parts of SICS.
- Select a ledger currency or select Add Currency from the pop-up menu in the Currency display list to add a currency.
- Add your bookings on the Technical Worksheet.
- Select the booking row to which you want to link the base company. Select ‘Link Base Company’ from the menu. A window presenting the protected businesses and their base company(-ies) for the Insured Period of the selected booking line opens. If more than one base company (reinsurer) is registered for the Source Business’ Insured Period, the first one will be defaulted by the system, but you can select another one.
- Select the base company you want to link and select Transfer from the menu.
Note! Either the Accounting system parameter ‘Trace Base Company from Outward Bookings’, or the trace option ‘Base Company’ on the Business tab must be selected. Refer to the System Administrator’s Guide, chapter Maintain System Parameters\Miscellaneous.
Link Bookings on Outward Business to the original Base Company that the Technical Worksheet detail applies to #
This feature is only enabled when you make manual bookings on an Outward Cedent’s Contract or it’s placements. It may be used when you want to establish a link between the outward booking detail and the original base company. This option (Link OCC Base Company) does not require that a physical link to a protected business already exists but link can only be established to base companies assigned to the OCC.
- Open a Technical Worksheet from an Outward Business or other parts of SICS.
- Select a ledger currency or select Add Currency from the pop-up menu in the Currency display list to add a currency.
- Add your bookings on the Technical Worksheet.
- Select the booking row to which you want to link the base company.
- Select Link OCC Base Company from the menu. You see the OCC Base Companies.
- Select the base company you want to link by double click or highlight and select Transfer from menu.
- You see the selected base company for the detail in the Original Base Company column.
If the OCC has a Main Base Company this base company will be linked to the balance while each detail may be linked to a selected OCC Base Company.
If the selected Base Company is marked with Special Balance on the OCC, Partners tab, then both the details and the balance will get this Base Company.
If the OCC has no Main Base Company, the selected OCC Base Company for a detail will also be linked to the balance (balance split according to base company).
If the system parameter Booking on Accounting Classification valid for Original Base Company under Accounting, Retrocession, General page, is selected, and the user link the detail to an Original Base Company from the OCC, the system will use this Base Company to validate which Accounting Classifications on the OCC/ORP is valid for this detail. If an Accounting Classification has been selected first and then an Original Base Company is linked to this detail, then the system will check if this Accounting Classification is valid or not and remove it from the field if it is not valid.
NB! Even if the Accounting Classification is shown as Invalid on the OCC itself, because on the business it is the first Base Company in the list or the Main Base Company that decides which Accounting Classifications that are valid, it can still be used on the worksheet details if it is valid for the selected Original Base Company.
Link Bookings on Outward Business or Assumed Proportional Treaty to an Original Responsible Partner from a Technical Worksheet #
This feature is only enabled when you make manual bookings on an Outward Cedent’s Contract or it’s placements, or when you are booking on an Assumed Proportional Treaty and accounting system parameter Use FX Headline for Technical Worksheet Details linked to Headline is activated. It may be used when you want to establish a link between the outward booking detail and the original responsible partner (e.g. the Cedent of an assumed business covered by the OCC).
- Open a Technical Worksheet from an Outward Business or other parts of SICS.
- Select a ledger currency or select Add Currency from the pop-up menu in the Currency display list to add a currency.
- Add your bookings on the Technical Worksheet.
- Select the booking row to which you want to link the original responsible partner.
- Enter the name, or ID (using the type-ahead functionality), or select ‘Link Original Responsible Partner’ from menu. The Find: Business Partner opens.
- Search and select the business partner you want to link by double click or highlight and select Transfer from menu.
- You see the selected partner for the detail in the ‘Original Responsible Partner’ column.
The Original Responsible Partner can be made mandatory on Assumed Proportional Treaty, and if so a default partner will be set on all details which have been linked to a Headline Loss where no specific partner has been defined. This default partner is defined in Accounting System Parameters.
Note! Either the Accounting system parameter ‘Trace Original Responsible Partner from Outward Bookings’, or the trace option ‘Original Responsible Partner’ on the OCC Business tab must be selected. Refer to the System Administrator’s Guide, chapter Maintain System Parameters\Miscellaneous and User Guide 5.5 “Add Business Information”.
View Government Tax Linkage from the Technical Worksheet #
This feature is only enabled when you make manual bookings on an Assumed Business and accounting system parameter Government Tax Framework in use is activated. It may be used when you want to check if Government Tax Trigger/Target details are linked or not.
- Open an existing Technical Worksheet from an Assumed Business.
- Select a currency in the Currency display list.
- Select the option Government Tax Linkage from the pop-up menu. The Government Tax Linkage window opens for the selected currency on the worksheet.
- From the Government Tax Linkage window select the currency you want to inspect.
- You will see if details are linked or not for the selected currency.
- Select another currency in the drop-down list of currencies if you want to inspect the linked details for another currency.

Link Government Tax Trigger/Target Entry Codes on an Assumed Business from the Technical Worksheet #
This feature is only enabled when you make manual bookings on an Assumed Business and accounting system parameter Government Tax Framework in use is activated. It may be used to establish a link between the Government Tax Trigger detail and the Government Tax Target detail(s) when not automatically linked.
- Open a Technical Worksheet from an Assumed Business.
- Select a currency in the Currency display list.
- Add your bookings on the Technical Worksheet i.e. a Trigger Entry Code detail(s) and Target Entry Code detail(s).
- Select the option Government Tax Linkage from the pop-up menu. The Government Tax Linkage window opens presenting the Trigger Entry Code detail(s) and the Target Entry Code detail(s) from the Technical Worksheet.
- Select the Trigger Entry Code detail and the Target Entry Code detail(s) you want to link, both a Trigger and a Target must be selected. All details must have the same granularity, i.e. the same values for Currency, BYR/BPeriod, AccYR/AccPeriod, Accounting Period, Business Id, Insured Period, UwYR, OccYR, Original UwYR, Section and AccClassification.
- Select the option Create Government Tax Link from the pop-up menu.
- The Government Tax Trigger detail(s) and the Target Entry Code detail(s) are now linked. Status is changed from Unlinked to Linked.

View Government Tax Link #
When you want to view the linked Government Tax details you can view the details from the Government Tax Linkage
- From the Government Tax Linkage window, select a Currency.
- Select a Trigger Entry Code detail or a Target Entry Code detail.
- Select View Government Tax Link from the pop-up menu. The Government Tax Linkage Details window opens presenting the selected Entry Code detail and the linked Entry Code detail(s).
Edit Government Tax Link from Government Tax Linkage #
When you want to remove a Government Tax Link you can edit the linkage from the Government Tax Linkage
- From the Government Tax Linkage window, select a Currency.
- Select a Trigger Entry Code detail or a Target Entry Code detail.
- Select Edit Government Tax Link from the pop-up menu. The Government Tax Linkage Details window opens in Edit mode presenting the selected Entry Code detail and the linked Entry Code detail(s).
- Select one or more linkage(s) and select the option Remove Government Tax Link from the pop-up menu. Select the Save button. Depending on your selection one or more linkages is(are) removed.
Automatic Linkage of Government Tax Trigger detail and Government Tax Target detail #
SICS allows you to have the Government Tax Target detail(s) automatically calculated when the flag ‘Automatic Booking’ is selected for the Government Tax Rule matching your business insured period and classification, or when selecting the option ‘Automatic Booking of Government Taxes’ from the Technical Worksheet or you can manually book the Government Tax Trigger/Target details on the worksheet. For the automatic booking of Government Taxes, the system automatically links the Trigger Entry Code and the Target Entry Code during the booking process. When a Trigger Entry Code and a Target Entry Code are manually booked/booked through TechAccount message, the details are automatically linked when selecting the ‘Apply’ button or when ‘Change Status’. The automatic linkage is based on the Government Tax Table. For the system to be able to link the Trigger/Target Entry Codes automatically, some preconditions must be fulfilled:
- The system parameter ‘Government Tax Framework in use’ must be active
- The booking takes place on an Assumed Business
- Both a Trigger Entry Code and a respective Target Entry Code must be present on the open worksheet.
- Trigger Entry Code is an Entry Code included in one of the Entry Code Groups within the Entry Code Group Category ‘VAT/Government Tax Calculation Basis’ e.g. Premium, Commission Entry Codes
- Target Entry Code is an Entry Code included in one of the Entry Code Groups within the Entry Code Group Category ‘Government Tax Target’ e.g. Gov Tax on Premium, Gov Tax on Commission Entry Codes
- The Trigger Entry Code and the Target Entry Codes must have the same granularity (i.e. the following fields must be the same; Currency, Booking Year/Period, Accounting Year, Accounting Period, Accounting Period From-To, Business Insured Period, Underwriting Year, Occurrence Year, Original Underwriting Year, Section and Accounting Classification)
- One or more Government Tax Rule(s) in the ‘Government Tax Table’ matching the business classification and the booking details made on the worksheet must be present.
- The bookings may include one Trigger Entry Code and one Target Entry Code, one Trigger Entry Code and multiple Target Entry Codes, multiple Trigger Entry Code and one Target Entry Code and multiple Trigger Entry Codes and multiple Target Entry Codes.
When the preconditions are fulfilled, the system creates a link between the Trigger/Target Entry Code details and the Gov Tax Link Status is updated to Linked for the details included in the linkage.
Note! If, for some reason, the automatic linkage of Government Tax Trigger/Target cannot be performed, the user must manually create the linkage. Refer to chapter View Government Tax Linkage from the Technical Worksheet for more information. The linked details may be inspected/edited, refer to chapters View Government Tax Link and Edit Government Tax Link from Government Tax Linkage for more information.
View Balance Changes of the Technical Worksheet #
While entering details into your Technical Worksheet you may need to inspect the Balances created from your bookings. One reason could be that you want to see how the Balances are split. You can also view the balance changes in real-time while you book the account details on the worksheet by keeping the Worksheet Closing window open.
- Open a Technical Worksheet from a business or other parts of SICS.
- Select a ledger currency or add a currency in the currency display list.
- Add your bookings into the Technical Worksheet.
- Select View Balance Changes from the pop-up menu. The Worksheet Closing window is opened in view mode.
- Select the Technical Worksheet window and do further updates without closing the Worksheet Closing window. You may inspect the balance changes in real-time.
- When you are satisfied with your worksheet details and the balances you created, you can exit the balance viewer by closing the window.
To manipulate the balance creation, you may Indicate Balance Split Options for the Technical Worksheet in the upper right-hand corner. (Refer to the chapter Indicate Balance Split Options from the Technical Worksheet).
View Cessions from the Technical Worksheet #
When you are booking details into your Technical Worksheet, you may find it necessary to view the cessions associated with the business for which you are doing the bookings. Only in Life.
- Open a Technical Worksheet from a business or other parts of SICS.
- Select a ledger currency or add a currency in the currency display list.
- Add your bookings into the Technical Worksheet including.
- Select a booking line including a Cession value and select View Cession form the menu.
- You are transferred to the Business Properties for the specific Cession.
Reverse Estimates from a Technical Worksheet #
If estimates have been booked on a business ledger, it is possible to automatically reverse estimates when the actual account is booked.
- Open a Technical Worksheet from a business or other parts of SICS.
- Select the currency to which ledger the estimates are booked.
- On the Actual Account tab enter at least one row with details from the actual account where you indicate the Accounting Year and Accounting Period.
- Select the row and select Reverse Estimates from the pop-up menu.
- SICS searches on the ledger to find estimates booked with the same Accounting Year/Period and present these on the Select Estimate window. If no estimates are found, the window is empty.
- Select one or more of the shown estimates and transfer them back to the worksheet by selecting Transfer from the pop-up menu.
When this is done, SICS reverses the selected estimates and enters these on the Estimates tab on the same worksheet. You are able to maintain (change/delete) the reversed estimates, add new estimates and/or book estimates with the special flag (only estimates). When you close the worksheet a message will appear and inform you that the estimate balances (both the source and the target balances) will be settled.
Reverse Estimates with Corrections from a Technical Worksheet #
If estimates have been booked on a business ledger and you find that your actual account differs from the estimates, you may correct your estimates during reversal.
- Open a Technical Worksheet from a business or other parts of SICS.
- Select the currency to which ledger the estimates are booked.
- Enter your bookings on the Actual Account tab for the Accounting Year and Period of the Estimates.
- Select a row and select the option Reverse Estimates with Corrections from the pop-up menu.
- SICS searches on the ledger to find estimates booked with the same Accounting Year/Period and present these on the Select Estimate window. If no estimates are found, the window is empty.
- Select one or more of the shown estimates and transfer them back to the worksheet by selecting Transfer from the pop-up menu.
When this is done, SICS reverses the selected estimates and enters these on the Estimates tab on the same worksheet. In addition the difference between the Estimates and Actual Account is booked on the Estimates tab. The result is that the actual figures and the corrected estimate figures equal the original estimated figures. When you close the worksheet a message will appear and inform you that the estimate balances (both the source and the target balances) will be settled.
Release Bookings from a Technical Worksheet #
When Cash Claims, Premium Due Later, Deposits and/or Non-Liquid Deposits are relevant for a business, the Release Bookings options ensure a quick and secure way to release bookings.
- Open your Technical Worksheet from a business or other parts of SICS.
- Select the currency to which the figures to be released are booked.
- Enter your bookings on the Actual Account tab.
- Select the Release Bookings option from the pop-up menu. Do a further selection of:
-
Cash Claim
-
Premium Due Later
-
Deposit
-
Non-Liquid Deposit
You see a window with unreleased booking details.
- Select the detail that you want to release and select Transfer to Worksheet from the pop-up menu. You can select more than one detail at the time.
The booking detail or details are added to the Technical Worksheet with the appropriate released Entry Code. The Entry Code and the Amount are ‘Greyed’ and cannot be edited. In case Interests and Tax on Interest conditions apply for Deposit, these bookings are calculated and automatically added to the Technical Worksheet.
You can also release bookings from the Business Ledger.
When the worksheet status is changed to Closed, or the worksheet is stored as an open worksheet (in any pending statuses), a detail pairing between the retained and the new released booking is established and the Released column and the Unreleased Amount column on the Business Ledger are updated accordingly. In case an open worksheet is later inactivated the above detail pairing is removed and the above mentioned columns are again updated accordingly
Note! If the system parameter Automatic Release Pairing on Prop Fac Retrocessionaire is activated all detail pairings between e.g. retained and released premium deposit details or cash claim details on assumed business will automatically be released and paired on the proportional fac retrocessionaires protecting the assumed business. For further information see the System Administrator Guide.

Enable Update of Accounting Period #
You may be prevented from making changes to the values in the Accounting Period From/-To field in a Technical Worksheet for certain Types of Business. (See your System Administrator for further information). The functionality applies for Assumed Business.
You are however able to overrule the protection of the Accounting Period From -To field by using a menu option.
- Open your Technical Worksheet from an Assumed Business or other parts of SICS.
- Select a currency.
- Add a booking line. The Accounting Period From -To field is disabled when your Business has a Type of Business value protected by a System Parameter.
- Select Enable Update of Accounting Period from the pop-up menu. The Accounting Period From/-To values in all booking lines are open for changes.
- Adjust the Accounting Period From-/To values.
- Click Apply. The Accounting Period From/-To field is again protected.
If further changes of Accounting Period From/-To values are required after apply has been clicked, the menu option has to be selected again.
In order to use the menu options ‘Use Selected Value to Populate…’ to populate values in the Accounting Period From/-To field, the field has to be open for update.
Calculate Shares on the Technical Worksheet #
You may record the figures of the accounts using different shares, e.g. by selecting 100%, a specific percent or from Share Conditions. If you for instance receive an account with 100% figures, this functionality enables you to record the figures as 100% while the system calculates your share.
The system behaviour depends on the value of the Accounting System Parameter Automatic Conversion to Our Share located in the Worksheet tab. Below we describe how to calculate shares when the system parameter is:
- Selected
- Not Selected
System Parameter selected:
You have to select your share option before you add a booking line to your worksheet (except for the 100% Figures).
- Open a Technical Worksheet from a business or other parts of SICS.
- Select a ledger currency or add a currency in the currency display list.
- Select one of the share options.
- Add a booking line. The Share options are disabled (except for 100% Figures).
- Book the figures of the account in the worksheet.
- Click the Apply button or select Change Status/UNFI. The figures are recalculated according to Our Share and the share option selected above is cleared.
System Parameter NOT selected:
You may select your share option before or after you add a booking line to your worksheet.
- Open a Technical Worksheet from a business or other parts of SICS.
- Select a ledger currency or add a currency in the currency display list.
- Add you bookings to the worksheet and select the required share option. Or select the required share option before you add your bookings into the worksheet. (What you select depends on the account to be booked).
- You must manually clear the selected share option before you can save your bookings. The figures are recalculated according to the share option.
- Save your bookings.
| Field | Description | Location |
|---|---|---|
| 100% Figures | To be used when the figures in the account are presented as 100%. Values: Inactive, Active Default: Inactive Validations: If the Accounting System Parameter Automatic Conversion to Our Share is not selected, a validation message appears whenever a Share Condition is selected and you attempt to save the worksheet. You have to clear the Share condition manually before you save the worksheet. Calculation: If you clear the check box after your bookings of 100% figures: (Amount x Signed Share) If the check box is selected after your bookings: (Amount/Signed Share) Mandatory: No Functional Impact: None |
Technical Worksheet/ Actual Account tab or Estimates tab |
| Figures for Our Share | To be used when the figures in the account are presented, neither as your share nor as a percentage stored in the Share Conditions. Values: Inactive, Active + fixed percentage Default: Inactive + 100% Validations: If the Accounting System Parameter Automatic Conversion to Our Share is not selected, a validation message appears whenever a Share Condition is selected and you attempt to save the worksheet. You have to clear the Share condition manually before you save the worksheet. Calculation: If the percentage is 100 then nothing happens with the amounts if select or clear the check box. If you clear the check box after you do your bookings: (Amount x Fixed percentage) If the check box is selected after your bookings: (Amount x Fixed Percentage) Mandatory: No Functional Impact: None |
Technical Worksheet/Actual Account tab or Estimates tab |
| Figures from Share Condition | To be used when the figures in the account are presented as a percentage from Share Conditions (not 100%), e.g. Brokers Order. (Refer to the chapter ‘Share Conditions’ for further information). Values: Inactive, Active_+_ Of, Of Of, From Brokers Order, Ceded Share (The check box is only available if the Accounting System Parameter _Display figures from share conditions_ located in the Worksheet tab is selected.) _Default:_ Inactive + None _Validations:_ If the Accounting System Parameter _Automatic Conversion to Our Share_ is not selected, a validation message appears whenever a Share Condition is selected and you attempt to save the worksheet. You have to clear the Share condition manually before you save the worksheet. _Calculations:_ If the value is None then nothing happens with the amounts if select or clear the check box. If you clear the check box after you do your bookings: (Amount x Fixed percentage). If the check box is selected after your bookings: (Amount x Fixed Percentage) _Mandatory:_ No _Functional Impact:_ None |
Technical Worksheet/Actual Account tab or Estimates tab |
Apply Split of Accounting Classifications on the Technical Worksheet #
The To be Split feature splits all the bookings in the Technical Worksheet into Accounting Classifications according to a predefined percentage. The feature require that:
- Percentage Split is defined for the Accounting Classifications of the business and that the total of percentages is 100.
- The column ‘To be Split’ is switched to YES in the worksheet.
See the chapter Split Selected Bookings per Accounting Classification for description of the procedure.
- Open your Technical Worksheet. Refer to Open a Technical Worksheet for a Business on page 11-12a Business for more information about how to open a worksheet.
- Select a ledger currency or select Add Currency from the pop-up menu in the Currency display list to add a currency. .
- Add you bookings on the worksheet.
- Select Apply Split from the Edit Menu button.
Calculate non-liquid tax on interest #
SICS allows you to have non-liquid tax of interest automatically calculated when the Technical Worksheet is applied/saved to the database. To have this non-liquid tax automatically calculated some preconditions must be fulfilled:
- The booking takes place on an Assumed Business
- The business must have a non-liquid tax on interest percentage defined; refer to the chapter Add Accounting Information on Business
- An entry code must be defined in the calculation Non-Liquid Tax on Interest in the Accounting Function Automatic Booking in the system parameters under Accounting, Entry Codes.
- The worksheet must contain source interest entry codes defined in an Entry Code Group within the Entry Code Group Category Basis for Non-Liquid Tax On Interest and the interest amount must be positive.
- Open your Technical Worksheet, select a ledger currency and make your booking on the worksheet.
- Make a booking with a source interest entry code as defined above.
- Select any of the options Apply button or Apply and UNFI or Change Status from the Menu button.
- The system will present a message telling you that a non-liquid tax on interest has been calculated.
For each time the worksheet is applied to the database the above calculation takes place, and if a non-liquid tax already exists on the worksheet it will be removed and a new automatic calculation will take place.
Note! The non-liquid tax on interest is calculated additional to and independent of the tax on interest defined on the deposit conditions. The non-liquid tax on interest amount will be part of the balance where the source interest detail is, but do not have any effect on the liquid balance. An automatic calculated non-liquid tax on interest detail cannot be deleted and cannot be changed. The only way it can be changed is to have the source interest amount changed (or deleted).
Note! The source interest booking must be positive amount, but in case a worksheet with a positive interest and a calculated non-liquid tax is reversed, so that the interest becomes a negative amount, then the system keeps the reversed non-liquid tax. It is not removed even if the worksheet does not contain a positive interest.
Save the Technical Worksheet as Unfinished (UNFI) #
SICS allows you to save the bookings of the Technical Worksheet as ‘unfinished’. You may want to use this feature of closing an ‘unfinished’ worksheet because you need to collect some more information about the business or attend a meeting. When the worksheet has been saved as UNFI, you can reopen the worksheet later point and complete your bookings.
- Open your Technical Worksheet. Refer to Open a Technical Worksheet for a Business on page 11-12a Business for more information about how to open a worksheet.
- Select a ledger currency or select Add Currency from the pop-up menu in the Currency display list to add a currency.
- Make your bookings in the worksheet.
- Select the Edit Menu button.
- Select UNFI. The UNFI option is enabled once a booking line is added to the worksheet.
SICS assigns an ID to the Technical worksheet and closes the Technical Worksheet window. The worksheet is stored with less validation than if you had selected the Apply or Change Status option. The worksheet status is Open and you can continue your work with the worksheet later.
Note! When you apply changes to a worksheet and later cancel the worksheet, it is saved with the status ‘Open’. This worksheet is also unfinished, but it has lost the bookings made (if any) since you last selected Apply.
Note! If Discrepancy worksheets are created for manual worksheets as well (Confirm with your SICS System Administrator), the status of the WS will be ‘Unfinished’ when you select UNFI. When you later apply changes to unfinished worksheet and then Close them, the system will ask you whether or not a Discrepancy worksheet should be created.
Inactivate a Technical Worksheet #
The Inactivate option enables you to inactivate and exit the worksheet without opening the Close Worksheet window.
-
Open your Technical Worksheet. Refer to Open a Technical Worksheet for a Business on page 11-12 for more information about how to open a worksheet.
-
Select a ledger currency or select Add Currency from the pop-up menu in the Currency display list to add a currency.
-
Book the figures from your account on the Technical Worksheet.
-
If you realise that the Technical Worksheet should not have been created, select the Inactivate option from the Edit Menu button. You will be prompted with a confirmation message whether you want to inactivate the worksheet and on clicking yes, the worksheet will be inactivated. You only need to inactivate the worksheet if it has a worksheet ID, (it has been applied to the database). If the worksheet does not have an ID you can just cancel the worksheet by clicking Cancel on the worksheet.
-
The system stores the worksheet and its ID with status Inactivated and can only be retrieved from the Find Worksheet window.
The Inactivate option is only available on the Edit menu when a booking line is added to the worksheet.
You can also inactivate a Technical Worksheet from the Worksheet Closing window. (Refer to the chapter ‘Change the Status of the Technical Worksheet’)
Open and Manipulate the Worksheet Closing Window #
When you have completed your bookings in the Technical Worksheet window, you want to continue with the next step of the booking process. This enables you to, e.g. view balances, create account balances, add notes/references to the balances and change the status of the worksheet.

- Select the Change Status option from the Edit menu button of the Technical Worksheet window.
- The system validates the entries on the worksheet.
Make the required changes if you receive an error message and select Change Status again. - The Worksheet Closing window opens and a worksheet identifier is applied to the worksheet.
If required, make your updates in the Worksheet Closing window. - When all details of the worksheet are complete, change the status of the Technical Worksheet. (Refer to the_Change the Status of the Technical Worksheet_ section).
When you select the Change Status option from the Edit Menu button of the Technical Worksheet window, the system performs the following procedures:
- Checks that mandatory inputs are entered.
- Validates booking details against information on the business scope of cover. Refer to Accounting System Parameters Validation Rules and Accuracy Validation in the System Administration’s Guide for more information regarding the various validations.
- Validates amendments of the Proportional Protection Assignments.
- Validates limits.
- Completes security checks.
- Warns user if insured period is marked as To be Commuted
Note! When you select Apply or Change Status, Automatic Bookings take place when applicable. Certain Entry Codes such as Loss Reserves can be automatically generated for the next Insured Period and appropriate Accounting Year, Occurrence Year and Booking Period depending on the Accounting Basis of the business. Only manual worksheets allow automatic booking. (Refer to the Entry Code Maintenance chapter ‘Generate New Entry Code for Automatic Booking’ in the System Administrator’s Guide.
Depending on system parameter settings, if due date is missing for non-liquid balances only, the system defaults due date in the worksheet to all details without a due date.
Also note that when you select Apply or Change Status, the system validates if any of the worksheet details point to an amendment of a Proportional Protection Assignment where the Accounting Period ‘From and To’ date affects both Effective Periods of the Amendment. When you select Yes to the validation message, the system automatically splits each booking detail according to the effective periods of the amendments. If you select No, you are brought back to the worksheet in order to make manual changes. (Refer to the chapter ‘Amend Business’, also refer to the chapter ‘Split selected booking per Amendment/Effective Period’.)
| Field | Description | Location |
|---|---|---|
| Estimates | Indicates if the balance is an estimate or an actual account Values: Yes, No Derived from: The Technical Worksheet Mandatory: Yes |
Closing worksheet window |
| Business ID | The identifier of the business for which the balance has been created Values: Business Identifier Derived from: The Technical Worksheet Mandatory: Yes |
Closing worksheet window |
| Currency | The currencies of the account being booked Values: The ISO alpha definition, e.g. NOK, USD, GBP, etc. Derived from: The Technical Worksheet Mandatory: Yes |
Closing worksheet window |
| Balance | The Balance of the account split according to system-and user settings Values: Amount Derived from: The Technical Worksheet Mandatory: Yes |
Closing worksheet window |
| Due Date | The date when the balance is due for settlement Values: Date Derived from: The Technical Worksheet Mandatory: Yes |
Closing worksheet window |
| Booking Year/Period | The Year and Period when the balance was booked Values: Year and Period (Month 1, Month 2, etc.) Derived from: The Technical Worksheet Mandatory: Yes |
Closing worksheet window |
| Accounting Year | The Year of the account balance Values: Year Derived from: The Technical Worksheet Mandatory: Yes |
Closing worksheet window |
| Insured Period | The period when the agreement is in force for which the account balances applies. If the balance covers more than one period the field is empty, but you can inspect the values by selecting the field. Values: Date From -To (mm/dd/yy - mm/dd/yy) Derived from: The Technical Worksheet Mandatory: Yes |
Closing worksheet window |
| Underwriting Year | The year against which the result of a reinsurance agreement is measured. Normally this is the year when it was incepted or renewed. If the balance covers more than one year you can inspect the values by selecting the field. Values: Year Derived from: The Technical Worksheet Mandatory: Yes |
Closing worksheet window |
| Amendment | A change of business conditions in effect from a specific date. If the balance covers more than one amendment the field is empty, but you can inspect the values by selecting the field. Values: Amendment no. + effective from date (x(mm/dd/yy)) Derived from: The Technical Worksheet Mandatory: Yes |
Closing worksheet window |
| Section | The agreement may be split into different components according to the agreement’s classification. If the balance covers more than one section the field is empty, but you can inspect the values by selecting the field. Values: The name of the section Derived from: The Technical Worksheet Mandatory. Yes |
Closing worksheet window |
| Accounting Classification | A unique combination of the agreement’s classification components. If the balance covers more than one classification the field is empty, but you can inspect the values by selecting the field. Values: The name of the accounting classification Derived from: The Technical Worksheet Mandatory: Yes |
Closing worksheet window |
| Payment Partner | The Payment Partner of the balance. Values: The name of the Payment Partner Derived from: The Business Partners of the agreement and default value is the partner with a payment task Mandatory: Yes |
Closing worksheet window |
| Responsible BP | The Legal responsible Business Partner of the business. Which Business Partner depends on the Level-and Type of business. Values: Business Partner name Derived from: The Business Partners of the agreement. Depending on whether the system parameter Responsible Business Partner from Last Insured Period has been selected or not, the Business Partner name is taken from the last Insured Period of the Agreement or from the Insured Period equal to the Insured Period of the booking Mandatory: Yes |
Closing worksheet window |
| Original Cession | The Insured Object Cessions of the business to which you are making your bookings. Only in Life. Values: The Cession name Derived from: Sections (The structure tab of the business). Mandatory: No |
Closing worksheet window |
| BP Reference | A Business Partner reference helping you to identify/verify balances in the Business Partner Ledger and/or Business Ledger. (Refer to the Field Descriptions - Balance Details View). Values: Free-text, maximum 40 characters Mandatory: No Functional Impact: None |
Closing worksheet window |
| LM Reference | A London Market Reference helping you to identify/verify balances in the Business Partner Ledger and/or the Business Ledger. Values: Free-text, maximum 30 characters Mandatory: No |
Closing worksheet window |
| TA Process ID |
A reference that helps you identify the balance. Could be used to indicate the process number balance has been allocated in an external application. Values: Free-text, maximum 30 characters Mandatory: No |
|
| CL Process ID |
A reference that helps you identify the balance. Could be used to indicate the identifier of a scanned accounting document. Values: Free-text, maximum 30 characters Mandatory: No |
|
| Hash Amount | A summary amount updated by an EDI transfer. Values: Amount Mandatory: No |
Closing worksheet window |
| Control Amount | The balance of the account Values: Amount, maximum 20 characters Derived from: The Balance Control Amount of the Technical Worksheet. (Refer to the chapter Book Technical Worksheet in Post Mode). Mandatory: No |
Closing worksheet window |
| Control Settlement Amount | An amount updated by an EDI transfer. Values: Amount Mandatory: No |
Closing worksheet window |
| Received | The date when the account of the booked balance was received. Values: Date (mm/dd/yy) Derived from: Date entered in the Received field of the Technical Worksheet Mandatory: Yes Functional Impact: None |
Closing worksheet window |
| Invoice No |
Unique identification number allocated to set of transactions in order to pay GST to the authorities. Values: Free-text, maximum 100 characters Mandatory: No |
Closing worksheet window |
| Government Invoice Ref No |
Unique identification number, post implementation of e-invoices as per GST notification. Values: Free-text, maximum 100 characters Mandatory: No No |
Closing worksheet window |
| Invoice Date | The date of the Invoice. Values: Date (mm/dd/yy) Mandatory: No Functional Impact: None |
Closing worksheet window |
| Notes | Enter a reference making it easier for you to locate/identify the balance in the Business Ledger and Business Partner Ledger Values: Free-text Mandatory: No |
Closing worksheet window |
Maintain More Balance Information on the Worksheet Closing Window #
If you need more information about a balance, you can open the Balance Property window. Parts of the window are editable and you can, for example, change the Business Partner in the Payment Information section, record Cedent/Broker and EDI references. In addition, you can enter expected payment currency and amount for the balance. You can view the Functional Currencies for a balance from the Balance Property window by use of the option in the Menu button. You can also apply and/or change the Internal References in the More information tab.
- Select a balance on the Worksheet Closing window. For more information about how to access the Worksheet Closing window, refer to_Open and Manipulate the Worksheet Closing Window on page 11-92_.
- Select More Balance Information from the pop-up menu. You see the Balance Details View for the selected balance.
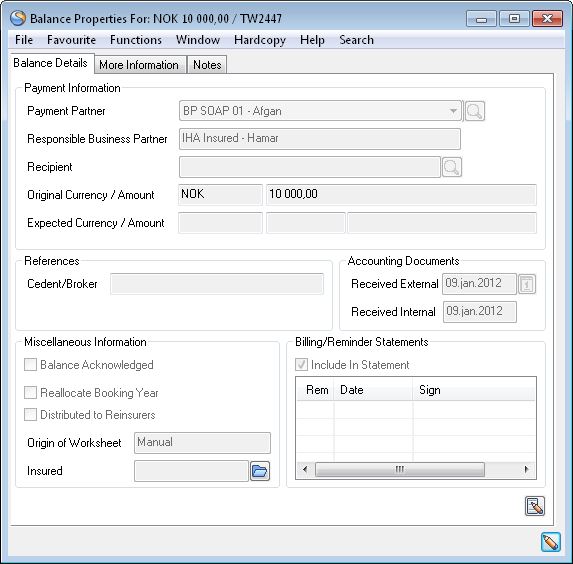 3. Select the More Information tab to see Internal References, eMessaging Settlement information and the EDI suppressed reason for the selected balance.

Enter Expected Payment Currency and Expected Payment Amount on the Worksheet Closing Window #
When you look at the details on the Closing window for a worksheet, you see all account balances created in the original currency. However, when you know that the account should be paid in a different currency, you can change the currency of the account balance.
- Select a balance from the Worksheet Closing window. For more information about how to access the Worksheet Closing window, refer to_Open and Manipulate the Worksheet Closing Window on page 11-92_.
- Select More Balance Information from pop-up menu. You see the Balance Details View window for the selected balance.
- Click the Edit button. The window is changed to edit mode. From Worksheet Closing Window you access this window directly in edit modus.
- Select the option Create/Edit Expected Payment from the Edit button. The selected balance in its original currency is displayed in the Expected Payment window.
- Select another currency from the drop-down list. If required, change the suggested rate of exchange and/or the converted amount and click OK.
Note! If the worksheet is linked to a Joint Contract placement, changes made for Administrator’s balance are not automatically reflected on the other placements, but must be registered specifically for each.
Delete Expected Payment on the Worksheet Closing Window #
If expected payment details exists for a balance and you find that you have to remove this information before you close the worksheet, you can delete the information by using the More Balance Information option from Worksheet Closing window.
- Select a balance with Expected Payment defined on the Worksheet Closing window. For more information about how to access the Worksheet Closing window, refer to_Open and Manipulate the Worksheet Closing Window on page 11-92_.
- Select More Balance Information from pop-up menu. You see the Balance Details View for the selected balance.
- Click the Edit button. The window is changed to edit mode. From Worksheet Closing Window you access this window directly in edit modus.
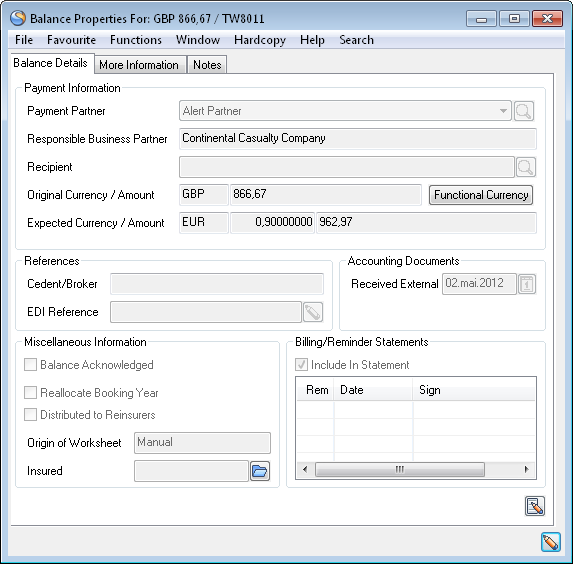 4. Select the option Delete Expected Payment from the Edit button. The selected balance in expected payment currency is deleted from the Balance Details view window.
5. Click OK to save your changes.
4. Select the option Delete Expected Payment from the Edit button. The selected balance in expected payment currency is deleted from the Balance Details view window.
5. Click OK to save your changes.
| Field | Description | Location |
|---|---|---|
| Business Partner | The expected payment partner of the balance. Values: Business Partner name Derived from: The Business Partners of the agreement and default value is the partner with a payment task Mandatory: Yes Functional Impact: The balance will appear on the Business Partner Ledger for this Business Partner in the column Payment Partner. |
Balance Details View window |
| Responsible Business Partner | The Legal responsible Business Partner of the business. Which Business Partner depends on the Level-and Type of business? Values: Business Partner name Derived from: The Business Partners of the agreement. Depending on whether the system parameter Responsible Business Partner from Last Insured Period has been selected or not, the Business Partner name is taken from the last Insured Period of the Agreement or from the Insured Period equal to the Insured Period of the booking.Mandatory: Yes Functional Impact: Business Partner Ledger in the As Responsible Business Partner view. |
Balance Details View window |
| Original Currency/ Amount | The Currency and Balance amount of the selected Business Ledger balance. Values: Currency and Amount Mandatory: Yes |
Balance Details View window |
| Original Currency/ Amount | The Currency and Balance amount of the selected Business Ledger balance. Values: Currency and Amount Mandatory: Yes |
Balance Details View window |
| Expected Currency/ Amount | The Currency, Exchange rate and Amount you expect the balance to be paid. Values: Currency/Amount Mandatory: No Functional Impact: Business Partner Ledger |
Balance Details View window |
| Cedent/Broker | A reference helping you to identify/verify balances in the Business Partner Ledger and/or the Business Ledger. (Refer to Field description - Worksheet Closing Window (upper half).) Values: Free Text, Maximum 30 characters Mandatory: No |
Balance Details View window |
| EDI Reference | A London Market Reference helping you to identify/verify balances in the Business Partner Ledger and/or the Business Ledger Values: Free Text, Maximum 30 characters Mandatory: No |
Balance Details View window |
| Accounting Documents Received (External) | The date when the account of the booked balance was received. This field gets changed to ‘Received External’ if the system parameter ‘Is Received Internal Date On Worksheet In Use’ has been activated. Values: Date (mm/dd/yy) Derived from: Date entered in the Received (External) field of the Technical Worksheet. Mandatory: No |
Balance Details View window |
| Received Internal | The date when the account was received at your company’s technical account department. This field gets available if the system parameter ‘Is Received Internal Date On Worksheet In Use’ has been activated for the base company you book on. Values: Date (mm/dd/yyyy). Output field only. Derived from: The date entered in the Received Internal field of the technical worksheet. Mandatory: No |
|
| Balance Acknowledged | The field is not in use. | Balance Details View window |
| Reallocate Booking Year | The field is not in use. | Balance Details View window |
| Distributed to Reinsurers | The field is not in use. | Balance Details View window |
| Origin of Worksheet | Indicates from which type of Worksheet the Balance origin. Values: Manual, Automatic, Migrated, REAC Preliminary, REAC Temporary, REAC Account Mandatory: Yes |
Balance Details View window |
| Include in Billing/ Reminder Statement | A log of when the balance has been included in the statements, and by whom the balance was included. Values: Dates and names Mandatory: No Derived from: Billing/Reminder Statement orders |
Balance Details View window |
| TA Process ID |
A reference that helps you identify the balance. Please refer to the Process ID chapter of the Handle Reference Items chapter in the System Administration Guide for more details about the Process ID. Values: Free-text, maximum 30 characters Mandatory: No Functional Impact : if the System Parameter Enable Accounting Worksheet Process ID Validation is activated, the Process ID must exist in the Process ID table and the Status must be either Open or Re-Open when Worksheet has Status ‘Closed’. |
More Information view |
| CL Process ID |
A reference that helps you identify the balance. Please refer to the Process ID chapter of the Handle Reference Items chapter in the System Administration Guide for more details about the Process ID. Values: Free-text, maximum 30 characters Mandatory: No Functional Impact : if the System Parameter Enable Accounting Worksheet Process ID Validation is activated, the Process ID must exist in the Process ID table and the Status must be either Open or Re-Open when Worksheet has Status ‘Closed’. |
More Information view |
| Invoice No |
Unique identification number allocated to set of transactions in order to pay GST to the authorities. Values: Free-text, maximum 100 characters Mandatory: No |
|
| Government Invoice Ref No |
Unique identification number, post implementation of e-invoices as per GST notification. Values: Free-text, maximum 100 characters Mandatory: No |
|
| Invoice Date | The date of the Invoice. Values: Date (mm/dd/yy) Mandatory: No Functional Impact: None |
|
| Lloyd’s settlement currency | The currency in which this balance will eventually be settled. Recorded here for reporting purposes only. (Expected payment cannot be used as it applies to reserve only bookings, where the balance is zero). Values: SICS Currency Mandatory: No, but must be given if one of the exchange rates is supplied. |
|
| Lloyd’s Settlement Rate of Exchange | The exchange rate supplied by the broker for payments on this balance. Values: Number Mandatory: No, but one of the exchange rates must be supplied if settlement currency is selected. |
|
| Lloyd’s Reserve Rate of Exchange | The exchange rate supplied by the broker for reserve amounts on this balance. Values: Number Mandatory: No, but one of the exchange rates must be supplied if settlement currency is selected. |
|
| Suppressed Reason | A reference that helps you identify the reason why the business is suppressed. Values: Customised by you company e.g. Commuted, Liquidation, Require Manual Review, etc Mandatory: No |
|
| Is Original Signing | If the value is selected it indicates that the worksheet is created by the FIRST Signing Message on a business, else it is created by a subsequent Signing Message. Values: Selected or Not Selected Mandatory: No |
View Balance Details from the Worksheet Closing Window #
If you want to see the details of one balance or multiple balances, you select the View Balance Details option. The details are the same as the details of the Business Ledger. Refer to section ‘View Account Balance Details from Business Ledger’.
- Select a Balance (or select multiple balances by pressing the ‘Ctrl’ key) on the Worksheet Closing window. For more information about how to access the Worksheet Closing window, refer to Open and Manipulate the Worksheet Closing Window.
- Select View Balance Details from the pop-up menu. A view Balance Details window is displayed containing all the details of the balance. You can check the balance details in 100% figures by selecting the_‘100% figures’_ tick box when your system administrator enables the function of _‘Automatic Conversion to Our Share’_. If any of the details in the list contain Entry Codes with the Calculated Based on As Of Date selected, you can check the _‘Previous Amount’_ and _‘New Amount’_ columns for these details by selecting the _‘As of Date’_ tick box.
You can also return to the Technical Worksheet window to see the details by selecting the Worksheet button from the Worksheet Closing window. All details of the worksheet are then presented and you can make changes if required.
View Online Statistics from the Worksheet Closing Window #
If you want to see the Online Statistics and inspect the result of your bookings BEFORE you close the worksheet, you select a balance for a business and select View Online Statistics option. The Online Statistics for this business appears. Refer to ‘Examine Business Actual Results’ for more information of the Online Statistics.
- Select a Balance on the Worksheet Closing window. For more informationof how to access the Worksheet Closing window, refer to Open and Manipulate the Worksheet Closing Window.
- Select View Online Statistics from the pop-up menu. The Online Statistics for the business of the selected balance is displayed.
Make Minor Adjustment on the Worksheet Closing Window #
You can book a Minor Adjustment for a balance on the Worksheet Closing window. If the balance differ with a minor amount from the balance of the received account, this booking may be necessary. Also, if the account has previously been booked in Post Mode and a discrepancy between the technical account and the control amount in Post mode exists, a minor adjustment of the difference is necessary. (Refer to the chapter ‘Book Technical Worksheet in Post Mode.)
- Select a balance to be adjusted from the Worksheet Closing window. For more information about how to access the Worksheet Closing window, refer to Open and Manipulate the Worksheet Closing Window on page 11-89
- Select Make Minor Adjustment from the pop-up menu.
- Type the adjustment amount in the Amount column of the Minor Adjustment Detail window and click Save.
- The balance of the Worksheet Closing window is adjusted accordingly.
When viewing the Business Ledger Account details for this balance, you will notice that a Minor Adjustment booking detail has been added to the other details of the balance.
Note! Note that a maximum value can be defined for the Minor Adjustment entry. The value is defined in the Tolerance Limits tab of the Accounting System Parameters. (Refer to the chapter ‘Setting Accounting Values’ in the System Administrator’s Guide.)
Create an Account Balance Group from the Worksheet Closing Window #
You can group balances of the Worksheet Closing window in order to view them as one balance in the Business Partner Ledger.
- Select a balance that you want to include in an account group from the Worksheet Closing window. For more information about how to access the Worksheet Closing window, refer to_Open and Manipulate the Worksheet Closing Window on page 11-92_.
- Select Create Account Balance Group from the pop-up menu. Your see the Create Account Balance Group window.
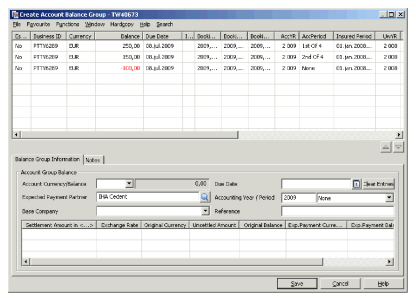 3. You can select balances to be included in the Account Balance group from the upper half of the window.
4. When you have finished including balances in the group, you must enter a Due Date and a Reference.
5. Click OK to return to the Worksheet Closing window.
3. You can select balances to be included in the Account Balance group from the upper half of the window.
4. When you have finished including balances in the group, you must enter a Due Date and a Reference.
5. Click OK to return to the Worksheet Closing window.
The Included in Account Balance Group column of the Business Ledger and Business Partner Ledger is updated with the value Yes for each of the included balances_. (_ For further reference, see the _chapters ‘Create Account Balance Group from Business Ledger’ and ‘Create Account Balance Group from Business Partner Ledger’_.)
| Field | Description | Location |
|---|---|---|
| Account Currency/ Balance | The Currency of the account balance group. The total amount of the balances included in the group, i.e. original and converted balances. Values: Currency/Amount Derived from: Currency is taken from the first included balance and the Amount is the total of all included balances. Mandatory: Yes |
Create Account Balance Group window/Balance Group Information tab |
| Expected Payment Partner | The Business Partner to/from whom the Account Balance Group is to be settled. Values: Business Partner name Mandatory: Yes |
Create Account Balance Group window/Balance Group Information tab |
| Base Company | The Base Company connected to the Account Balance Group Values: Business Partner name Default: Empty Mandatory: No |
Create Account Balance Group window/Balance Group Information tab |
| Due Date | Enter the date when the Account Balance Group is due for Settlement Values: Date (mm/dd/yy) Default: Empty Mandatory: Yes |
Create Account Balance Group window/Balance Group Information tab |
| Accounting Year/Period | The Year and period of the year to which the Account Balance Group applies. Values: Year (yyyy) and Period, i.e. 1st of 12, 4thof 4, 1st of 2, Yearly, None, etc. Default: Current Year and Period = None Mandatory: No |
Create Account Balance Group window/Balance Group Information tab |
| Reference | A text helping you to identify/verify the Account Balance Group in the Business Partner Ledger Values: Free-text, maximum 30 characters Mandatory: Yes |
Create Account Balance Group window/Balance Group Information tab |
| Settlement Amount in <…> | The Amount per included balance converted to the Currency of the driving balance. Values: Amount Mandatory: Yes |
Create Account Balance Group window/Balance Group Information tab |
| Exchange Rate | The exchange rate between the original currency of the included balance and the currency of the account balance. Values: Rate of Exchange with 7 decimals Mandatory: Yes |
Create Account Balance Group window/Balance Group Information tab |
| Original Currency | The original currency of the balance included in the group. Values: Currency Mandatory: Yes |
Create Account Balance Group window/Balance Group Information tab |
| Unsettled Amount | The Unsettled part of the included balance. Values: Amount Mandatory: Yes |
Create Account Balance Group window/Balance Group Information tab |
| Original Balance | The Original amount of the included balance. Values: Amount Mandatory: Yes |
Create Account Balance Group window/Balance Group Information tab |
| Expected Payment Currency | If the included balance has an Expected Payment Currency defined, the currency is displayed in this field. (Refer to the chapters ‘Open and maintain More Balance Information from Business Ledger’ and ‘Open and Maintain More Balance Information from Worksheet Closing window’.) Values: Currency Derived from: Balance Details view window Mandatory: No |
Create Account Balance Group window/Balance Group Information tab |
| Expected Payment Balance | If the included balance has an expected payment amount defined, the amount is displayed in this field. (Refer to the chapters ‘Open and maintain More Balance Information from Business Ledger’ and ‘Open and Maintain More Balance Information from Worksheet Closing window’.) Values: Amount Derived from: Balance Details view window Mandatory: No |
Create Account Balance Group window/Balance Group Information tab |
Maintain Functional Currency from the Worksheet Closing Window #
If you want to inspect or change the Functional Currency Exchange Rates before closing a worksheet, you select the Functional Currency Maintenance option. This option is available in the Worksheet Closing window of an open Worksheet. The defaulted exchange rates can be overruled depending on system parameter settings.
The Functional Currency Maintenance option is disabled for Proportional OCC/RP when system parameter Use FC Rate From Source Business is active.
See Currency under Accounting chapter of Maintain System Parameters in the System Administrator Guide for more details.
The Functional Currency Maintenance option is disabled on the Worksheet Closing window if the worksheet contains Accounting Classifications with different Reporting Units and at least one Reporting Unit with special Functional Currency defined. See Define New Functional Currency per Legal Reporting Unit under Currency in the_Accounting_ chapter of _Maintain System Parameters_ in the _System Administrator Guide_ for more details.
The Functional Currency Maintenance option is disabled on the Worksheet Closing window if the worksheet contains several businesses with different Base Companies containing different Base Currencies.
To maintain a functional currency for a non-reversed worksheet:
- From the Worksheet Closing window, select Functional Currency Maintenance from the pop-up menu. You see the Functional Currency Maintenance window.
 2. Select Calculate Default Rate for Non-Reversed Detail from the pop-up menu.
The current exchange rate is displayed per currency. 3. Manually overrule the given exchange rates.
The saved exchange rate will be used when closing the worksheet. If you do not overrule the given exchange rates, default rates will be used. To maintain a functional currency for a reversed worksheet:
- From the Worksheet Closing window, select Functional Currency Maintenance from the pop-up menu. You see the Functional Currency Maintenance window.
- Select Calculate Default Rate for Reversed Detail from the pop-up menu.
The current exchange rate is displayed per currency. 3. Manually overrule the given exchange rates and save.
The saved exchange rate will be used when closing the worksheet. If you do not overrule the given exchange rates, default rates will be used. To maintain a functional currency for both a reversed and non-reversed worksheet:
- From the Worksheet Closing window, select Functional Currency Maintenance from the pop-up menu. You see the Functional Currency Maintenance window.
- Select Calculate Default Rate All Details from the pop-up menu.
The current exchange rate is displayed per currency for both Reversed and Non-Reversed Worksheet. 3. Manually overrule the given exchange rates and save. 4. Select Calculate Default rate for Reversed Detail again, to overrule the manual exchange rates. 5. The saved exchange rate will be used when closing the worksheet. If I do not overrule the given exchange rates, default rates will be used.
To reset functional amounts:
- From the Worksheet Closing window, select Reset Functional Amounts from the pop-up menu in the worksheet closing window.
The manually overruled currency exchange rates are removed. Current exchange rates will be used when closing the worksheet. The Reset Functional Amounts option is disabled for Proportional OCC/RP when system parameter Use FC Rate From Source Business is active. See Currency under Accounting chapter of Maintain System Parameters in the System Administrator Guide for more details.
Note! When a Functional Currency Exchange Rate is overruled and a functional amount is saved on at least one detail that is not a reversed detail, you cannot access the original worksheet details in edit mode unless you remove the exchange rate manually, or select the Reset Functional Amounts option. In situations where functional amounts exist the system only allows you to open the worksheet closing window for changing the status. If functional amounts exist on one or more details but only on reversed details then the system still allows the user to open the worksheet in edit mode because the reversed details can not be modified.
| Field | Description |
|---|---|
| Functional Currency 1 | Functional Currency 1 is defined in the System Parameters Maintainancefolder, Accountingtab, Currencysubtab. Values: E xpressed according to ISO definition, e.g. USD, GBP, etc Functional Impact: The functional currency amount is calculated in addition to the existing booking detail, and saved as an additional value to each booking detail. Mandatory: Yes |
| Functional Currency 2 | Functional Currency 2 is defined in the System Parameters Maintainance folder, Accounting tab, Currency subtab. Values: E xpressed according to ISO definition, e.g. USD, GBP, etc Functional Impact: The functional currency amount 2 is calculated in addition to the existing booking detail, and saved as a second additional value to each booking detail. Mandatory: Yes |
| Original Currency | The currency of the original booking detail. If the worksheet has more than one original currency, this will be shown as a new row in the display list. Values: E xpressed according to ISO definition, for example, USD, GBP, etc Functional Impact: Basis currency for the exchange rate calculation against Functional currencies. Mandatory: Yes |
| FC1 Rate | The current exchange rate between the original currency and Functional Currency 1. Values: Number with 8 decimals Functional Impact: The exchange rate is used to calculate the functional currency amount 1when you close the worksheet. If you manually enter a rate, this rate will also be set in the FC1 Rate Reveral column and used to calculate the functional currency for reversals. You will get a warning message if the manually input exchange rate exceeds the Tolerance Limit. See Tolerance Limit in the Maintain System Parameters chapter, Accounting section in in the System Administrator Guide. . Mandatory: Yes, to be able to store any manual changes to the functional currency rates, all original currencies must have the FC1 Rate filled in. |
| FC1 Rate Reversal | The current exchange rate between the currency of the reversal and Functional Currency 1. The exchange rate will be copied from the original booking when the ‘Overrule the copied Functional Currency amount’system parameter is set. When the ‘Reverse with Re-calculation’system parameter is set, the current exchange rates will be used. Values: Number with 8 decimals Functional Impact: Basis currency for the exchange rate calculation against Functional Currency 1. Mandatory: Yes |
| FC2 Rate | The current exchange rate between the original currency and Functional Currency 2. Values: Number with 8 decimals Functional Impact: The exchange rate is used to calculate the functional currency amount 2, and is saved to the booking detail when you close the worksheet. If you manually enter a rate, this rate will also be set in the FC2 Rate Reveral column and used to calculate the functional currency for reversals. You will get a warning message if the manually input exchange rate exceeds the Tolerance Limit. See Tolerance Limit in the Maintain System Parameters chapter, Accounting section in in the_System Administrator Guide._ _Mandatory:_ Yes, to be able to store any manual changes to the functional currency rates, all original currencies must have the FC2 Rate filled in. |
| FC2 Rate Reversal | The current exchange rate between the currency of the reversal and Functional Currency 2. The exchange rate will be copied from the original booking when the ‘Overrule the copied Functional Currency amount ‘system parameter**_is set. When the Reverse with Re-calculationsystem parameter is set, the current exchange rates will be used._ _Values:_ Number with 8 decimals _Functional Impact:_ Basis currency for the exchange rate calculation against Functional Currency 2. _Mandatory:_ Yes |
If you want to inspect or change the Functional Currency Exchange Rates before closing a worksheet, you select the Functional Currency Maintenance option. This option is available in the Worksheet Closing window of an open Worksheet. The defaulted exchange rates can be overruled depending on system parameter settings.
The Functional Currency Maintenance option is disabled for Proportional OCC/RP when system parameter Use FC Rate From Source Business is active.
See Currency under Accounting chapter of Maintain System Parameters in the System Administrator Guide for more details.
The Functional Currency Maintenance option is disabled on the Worksheet Closing window if the worksheet contains Accounting Classifications with different Reporting Units and at least one Reporting Unit with special Functional Currency defined. See Define New Functional Currency per Legal Reporting Unit under Currency in the_Accounting_ chapter of _Maintain System Parameters_ in the _System Administrator Guide_ for more details.
The Functional Currency Maintenance option is disabled on the Worksheet Closing window if the worksheet contains several businesses with different Base Companies containing different Base Currencies.
To maintain a functional currency for a non-reversed worksheet:
- From the Worksheet Closing window, select Functional Currency Maintenance from the pop-up menu. You see the Functional Currency Maintenance window.
2. Select Calculate Default Rate for Non-Reversed Detail from the pop-up menu.
The current exchange rate is displayed per currency. 3. Manually overrule the given exchange rates.
The saved exchange rate will be used when closing the worksheet. If you do not overrule the given exchange rates, default rates will be used. To maintain a functional currency for a reversed worksheet:
- From the Worksheet Closing window, select Functional Currency Maintenance from the pop-up menu. You see the Functional Currency Maintenance window.
- Select Calculate Default Rate for Reversed Detail from the pop-up menu.
The current exchange rate is displayed per currency. 3. Manually overrule the given exchange rates and save.
The saved exchange rate will be used when closing the worksheet. If you do not overrule the given exchange rates, default rates will be used. To maintain a functional currency for both a reversed and non-reversed worksheet:
- From the Worksheet Closing window, select Functional Currency Maintenance from the pop-up menu. You see the Functional Currency Maintenance window.
- Select Calculate Default Rate All Details from the pop-up menu.
The current exchange rate is displayed per currency for both Reversed and Non-Reversed Worksheet. 3. Manually overrule the given exchange rates and save. 4. Select Calculate Default rate for Reversed Detail again, to overrule the manual exchange rates. 5. The saved exchange rate will be used when closing the worksheet. If I do not overrule the given exchange rates, default rates will be used.
To reset functional amounts:
- From the Worksheet Closing window, select Reset Functional Amounts from the pop-up menu in the worksheet closing window.
The manually overruled currency exchange rates are removed. Current exchange rates will be used when closing the worksheet. The Reset Functional Amounts option is disabled for Proportional OCC/RP when system parameter Use FC Rate From Source Business is active. See Currency under Accounting chapter of Maintain System Parameters in the System Administrator Guide for more details.
Note! When a Functional Currency Exchange Rate is overruled and a functional amount is saved on at least one detail that is not a reversed detail, you cannot access the original worksheet details in edit mode unless you remove the exchange rate manually, or select the Reset Functional Amounts option. In situations where functional amounts exist the system only allows you to open the worksheet closing window for changing the status. If functional amounts exist on one or more details but only on reversed details then the system still allows the user to open the worksheet in edit mode because the reversed details can not be modified.
| Field | Description |
|---|---|
| Functional Currency 1 | Functional Currency 1 is defined in the System Parameters Maintainancefolder, Accountingtab, Currencysubtab. Values: E xpressed according to ISO definition, e.g. USD, GBP, etc Functional Impact: The functional currency amount is calculated in addition to the existing booking detail, and saved as an additional value to each booking detail. Mandatory: Yes |
| Functional Currency 2 | Functional Currency 2 is defined in the System Parameters Maintainance folder, Accounting tab, Currency subtab. Values: E xpressed according to ISO definition, e.g. USD, GBP, etc Functional Impact: The functional currency amount 2 is calculated in addition to the existing booking detail, and saved as a second additional value to each booking detail. Mandatory: Yes |
| Original Currency | The currency of the original booking detail. If the worksheet has more than one original currency, this will be shown as a new row in the display list. Values: E xpressed according to ISO definition, for example, USD, GBP, etc Functional Impact: Basis currency for the exchange rate calculation against Functional currencies. Mandatory: Yes |
| FC1 Rate | The current exchange rate between the original currency and Functional Currency 1. Values: Number with 8 decimals Functional Impact: The exchange rate is used to calculate the functional currency amount 1when you close the worksheet. If you manually enter a rate, this rate will also be set in the FC1 Rate Reveral column and used to calculate the functional currency for reversals. You will get a warning message if the manually input exchange rate exceeds the Tolerance Limit. See Tolerance Limit in the Maintain System Parameters chapter, Accounting section in in the System Administrator Guide. . Mandatory: Yes, to be able to store any manual changes to the functional currency rates, all original currencies must have the FC1 Rate filled in. |
| FC1 Rate Reversal | The current exchange rate between the currency of the reversal and Functional Currency 1. The exchange rate will be copied from the original booking when the ‘Overrule the copied Functional Currency amount’system parameter is set. When the ‘Reverse with Re-calculation’system parameter is set, the current exchange rates will be used. Values: Number with 8 decimals Functional Impact: Basis currency for the exchange rate calculation against Functional Currency 1. Mandatory: Yes |
| FC2 Rate | The current exchange rate between the original currency and Functional Currency 2. Values: Number with 8 decimals Functional Impact: The exchange rate is used to calculate the functional currency amount 2, and is saved to the booking detail when you close the worksheet. If you manually enter a rate, this rate will also be set in the FC2 Rate Reveral column and used to calculate the functional currency for reversals. You will get a warning message if the manually input exchange rate exceeds the Tolerance Limit. See Tolerance Limit in the Maintain System Parameters chapter, Accounting section in in the_System Administrator Guide._ _Mandatory:_ Yes, to be able to store any manual changes to the functional currency rates, all original currencies must have the FC2 Rate filled in. |
| FC2 Rate Reversal | The current exchange rate between the currency of the reversal and Functional Currency 2. The exchange rate will be copied from the original booking when the ‘Overrule the copied Functional Currency amount ‘system parameter**_is set. When the Reverse with Re-calculationsystem parameter is set, the current exchange rates will be used._ _Values:_ Number with 8 decimals _Functional Impact:_ Basis currency for the exchange rate calculation against Functional Currency 2. _Mandatory:_ Yes |
View Government Tax Log Messages from the Worksheet Closing Window #
If an error message has been overridden/commented due to Government Tax Validation, the error may be shown to the ‘Government Tax Log Messages’ window. You can inspect the Government Tax Log Messages from the Worksheet Closing window by selecting the Government Tax Log Messages from the pop up menu.
- Select a balance including Government Tax Target details on the Worksheet Closing window. For more information about how to access the Worksheet Closing window, refer to Open and Manipulate the Worksheet Closing Window.
- Select Government Tax Log Messages from pop-up menu. You see the Government Tax Log Messages for the selected balance.

| Field | Description |
|---|---|
| Government Tax Rule Ref | The Government Tax Rule reference number of the matching rule from the Government Tax Table Values: A number Derived from: The Technical Worksheet Mandatory: Yes (unless the field Government Tax Validation Indicator on the Business Insured Period has the value Always Stop if Trigger/Target EC is booked for the relevant Worksheet Type |
| Error message text | The error message text given on the worksheet due to Government Tax Validation Values: Text Derived from: The error message given on the worksheet. Mandatory: Yes |
| Worksheet Id | The worksheet identifier of the Technical Worksheet. Values: Worksheet identifier Derived from: The Technical Worksheet Mandatory: Yes |
| Worksheet Status | The status of the Technical Worksheet Values: A value from the reference data Worksheet Status Derived from: The Technical Worksheet closing Mandatory: Yes |
| Business Id | The identifier of the business for which the detail has been created Values: Business Identifier Derived from: The Technical Worksheet Mandatory: Yes |
| Insured Period | The Insured Period of the booking detail Values: The From- and To date of the Insured Period Derived from: The Technical Worksheet Mandatory: Yes |
| Section | The Section of the booking detail Values: Section name given on the agreement Derived from: The Technical Worksheet Mandatory: Yes |
| Accounting Classification | Accounting Classification of the booking detail Values: Accounting Classification name defined for each classification Derived from: The Technical Worksheet Mandatory: Yes |
| Trigger Entry Code | The Entry Code of the Trigger detail Values: Entry Code Derived from: The Technical Worksheet Mandatory: Yes |
| Booked Trigger Amount | The amount of the Trigger detail Values: Amount Derived from: The Technical Worksheet Mandatory: Yes |
| Target Entry Code | The Entry Code of the Target detail. Values: Entry Code Derived from: The Technical Worksheet Mandatory: Yes (but only when deviation is found) |
| Booked Target Amount | The amount of the Target detail Values: Amount Derived from: The Technical Worksheet Mandatory: Yes (but only when deviation is found) |
| Computed Target Amount | The calculated amount of the Target detail Values: Amount Derived from: The Trigger detail multiplied with the Government Tax percentage from the respective rule in the Government Tax Table Mandatory: Yes (but only when deviation is found) |
| Discrepancy Amount in Base Currency | The amount representing the difference of the Booked Target amount and the Computed Target amount converted to Base Currency Values: Amount in Base Currency Derived from: Booked Target Amount less Computed Target Amount converted to Base Currency Mandatory: Yes (but only when deviation is found) |
| Gov Tax Category | An acceptance category selected when user wants to override an error message given due to Government Tax validation Values: Values defined in the reference data ‘Government Tax Category’ Derived from: The Technical Worksheet Mandatory: Yes |
| Gov Tax Comment | An acceptance comment given when user wants to override an error message given due to Government Tax validation Values: Text Derived from: The Technical Worksheet Mandatory: Yes |
Change the Status of a Technical Worksheet
#
When you have finished your bookings in the Technical Worksheet- and the Worksheet Closing window, you can change the status of the Worksheet. The current status is displayed in the Properties tab of the Worksheet Closing window.
1. On the Close Worksheet window, select the Change Status check box of the Properties tab. For more information about how to access the Worksheet Closing window, refer to Open and Manipulate the Worksheet Closing Windowon page 11-92
2. A new drop-down list (Change To) appears on the window. The options available in the list depend on the current status. In case your company have decided to review all Technical Worksheets the status “Closed” is not available. Instead you must select the “In Review” check box (this is enabled only if the system parameter “Prevent Manual update of technical worksheets” is activated). If you later are allowed to change the status to “Closed” or if you are allowed to deselect the “In Review” check box, is defined in the security part of the system ( see your system administrator for more information). When a Technical worksheet is Closed or Inactivated the In Review check box is deselected.
3. Select the appropriate status from drop-down list and type a comment in the Reason text box when necessary.
If the Accounting System Parameter Advanced Use of Worksheet Status is selected from the Worksheet tab, the numbers of available statuses are increased. (Refer to the chapter ‘Setting Accounting values’ of the System Administrator’s Guide.)
The possibility to change status may also be limited by the domain restriction ‘Accounting Claim- and Technical Worksheet status with Liquid and None Liquid amount’ connected to your user roles. (Refer to the Security Handling chapters ‘Maintaining User Roles’ and ‘Using Domain Restrictions’ in the System Administrator’s Guide.)
SICS updates the date when and by whom the status field is updated in the Status History tab of the Worksheet Closing window.
Note! If discrepancy worksheets are created for automatic and/or manually created worksheets (check with your SICS System Administrator if the SICS has been set this way) when the user close them, the system will ask the user whether or not a Discrepancy worksheet should be created. A Discrepancy worksheet can later be found in the same way as other pending worksheets. The worksheet origin is Discrepancy, the status is Open and it can be Closed/Inactivated as other worksheets.
| Field | Description | Location |
|---|---|---|
| Title | A Worksheet title to be displayed next to the Worksheet ID in the Select Open Worksheet window. Values: Free-text, maximum 30 characters Mandatory: No |
Worksheet Closing window/Properties tab |
| Current | Shows the current status of the Worksheet Values: Open, Inactive, etc. Mandatory: Yes |
Worksheet Closing window/Properties tab |
| Change Status | A check box to indicate that you want to change the status of the worksheet. Values: Active, Inactive Default: Inactive Mandatory: No |
Worksheet Closing window/Properties tab |
| In Review | A check box to ensure that the technical worksheet is not modified in any way between cretion and approval. (this is enabled only if the system parameter “Prevent Manual update of technical worksheets” is activated) Values: Active, Inactive Default: Inactive Mandatory: No |
Worksheet Closing window/Properties tab |
| Change to | The available statuses to which you can change your worksheet. Values: Closed, Rejected, Inactive, Suspended, etc. Depends on system parameter Advanced Use of Worksheet Status. Derived from: The Change Status check box being activated Validations: -Domain Restriction Accounting Claim- and TW status with liquid and none liquid amount. -Amendments - Proportional Protection Assignment. Mandatory: No |
Worksheet Closing window/Properties tab |
| Reason | State a reason for the selected status. Values: Free-text, maximum 30 characters Mandatory: No |
Worksheet Closing window/Properties tab |
Mark a Worksheet Special for the Document Production in Retrocession Accounting #
In the Closing window for a technical worksheet, you can indicate that details on the worksheet can be handled separately when producing an Retrocession Calculation Order and an Retrocession Account Order for the assigned proportional OCCs. When documents are produced from the Retrocession Account Order, only details from the ‘Special’ worksheets will be included. (Refer to Create and Run the Retrocession Calculation Orderand Create and Run a Retrocession Account Order).
Note! You activte this option via the ‘Worksheet Marked as Special for Document Production in REAC’ system parameter.
To mark a worksheet ‘special’:
1. Open the Worksheet Closing window.
2. Click in display list at the top and and select ‘Mark Worksheet as Special’from the pop-up menu.
A checkmark appears in front of the menu option.
- To unmark a worksheet as ‘Special’, repeat the steps 2 and 3and the checkmark disappears from the menu option.
Create Balance Pairing with Unallocated Remittance Balance automatically #
Unallocated Remittance Balances may exist for the business your Technical-/Claim Worksheet applies for. When closing your worksheet the system checks if any of the Unallocated Remittance balances match exactly the Technical-/Claim Balance of your Worksheet in order to pair these balances. The check for Unallocated Remittance Balances and the automatic pairings takes place on Assumed and Administrative business only.
- Open the Worksheet Closing window
- Activate the Change Status check box.
- Change Worksheet Status to ‘Closed’+ c lick OK to book the worksheet.
- When an Unallocated Remittance Balance matching the Technical-/Claim balance exists on the Business, a window appears asking for pairing confirmation.
- Select Yes to confirm a pairing between the Technical-/Claim Balance and the original Driving Remittance Balance from which the Unallocated Remittance Balance was created.
- Or, you select No to abort the pairing and close the worksheet as unsettled.
- When more than one Unallocated Remittance Balance matches the Technical-/Claim Balance these balances are presented in the Select Balance for Pairing window.
 6. Select one of the balances and click OK.
When you confirm a pairing between a Technical-/Claim Worksheet and an Unallocated Remittance Balance, the system is:
- Performing an automatic pairing between the Technical-/Claim Balance and the original Driving Remittance Balance from which the Unallocated Remittance Balance was created.
- Reverting/annulling the link between the Driving Remittance Balance and the Unallocated Remittance Balance.
- Changing the Unallocated Remittance Balance’s status to Allocated in the Business Ledger.
- Updating the Technical-/Claim Balance as Settled in the Business Ledger/Business Partner Ledger
- Adjusting the Unsettled Balance and Unallocated Remittance fields of the Liquid area of the Account Balances Summary tab in the Business Ledger.
When you select No to abort the paring, you can later select to pair the Unallocated Remittance Balance with the matching Technical-/Claim balance manually.
Create Balance Pairing with Technical-/Claim Balance Manually #
You are allowed to start a Balance Pairing process from the Unallocated Remittance Balance tab of the Business Ledger.
This may be relevant when an Automatic Balance Pariring between a Technical-/Claim Worksheet anda matching Unallocated Remittance balance has been aborted from the Worksheet Closing window. (Refer to the chapter Change the Status of the Technical-/Claim Worksheet.) Manual pairing is also relevant when Techincal-/Claim Balance and Unallocated Remittance Balance do not match or if the Unallocated Remittance belongs to an outward business.
View Online Statistics from the Worksheet Closing Window #
You can inspect the Online Statistics from the Worksheet Closing window to see the result of your bookings BEFORE you close the worksheet, by selecting the button Online Statistics. The Online Statistics appears. Refer to ‘Examine Business Actual Results’ for more information of the Online Statistics.
- Select the button Online Statistics on the Worksheet Closing window. For more information about how to access the Worksheet Closing window, refer to Open and Manipulate the Worksheet Closing Window.
- The Online Statistics for the business included in the Technical Worksheet is displayed. If more than one business is included in the Technical Worksheet, the Online Statistics for the business highlighted on the Technical Worksheet is displayed.