Set up Mail Groups
SICS let you specify mail groups of partners with their addresses. Typical uses of mail groups are:
- Mass correspondence (for example, sending newsletters or Christmas cards). Correspondence indicating which address to use when sending different types of documents (for example, Statement of Account) to partners.
The following can be made part of a mail group:
- Business Partners
- Individual Persons
- Banks
- Other Mail Groups
Create a Mail Group #
- Click the Mail groups' icon in the Partners folder on the desktop to open the Mail group Management window.
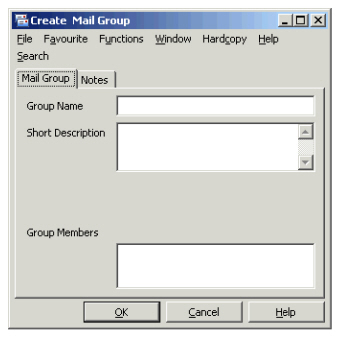
- Select New from the pop-up menu. You see the Create Mail Group window
- Enter Name and Short Description of the group.
- Click in the Group Members box.
- From the pop-up menu, select New Member and type of member from the sub menu to assign your members in the group.
- Click OK.
Delete a Mail Group
If you have removed/deleted all members of a group you may delete the mail group.
- Open the open the Mail group Management window.
- Click the mail group you want to delete and select Delete from the pop-up menu.
Field description 16. - Mail Groups
| Field | Description |
|---|---|
| Group Name | The name of the mail group. Values: Free-text, maximum 30 characters Mandatory: Yes |
| Short Description | Own reference description of the group. Values: Free-text, maximum 150 characters Functional impact: None Mandatory: No |
| Group Members | The member companies or persons of the group. Values: Members Validation: Number of members unlimited. Mandatory: No |
View Members of a Mail Group #
- Double-click the Mail groups' icon in the Partners folder on the SICS desktop.
- Select View from the pop-up menu in the Mail group Management window or double-click a group to open the View Mail group window. In the Group Members box, you see the assigned members.
View Mail Groups of Business Partners #
- Double-click the Business Partner icon in the Partners folder on the SICS desktop to open the Find: Business Partner window.
- Find and open your required business partner.
- Click the Details tab.
- In the Properties display list, select Mail Group.
- In the display list you see the assigned mail groups listed.
Assign a Member and Address to a Mail Group #
- Double-click the Mail groups icon in the Partners folder on the SICS desktop. You see the Mail group Management window.
- Double-click the required mail group.
- In Group Members display list, select New Member from the pop-up menu and then select the type of member from the sub menu (for example, Partner, Individual, Bank or Group).
- In the Find: window, select the required partner and transfer it by double-clicking or selecting Transfer on pop-up menu. You see the Mail group Membership window.
- Select the required address and then select Change Address Use from the pop-up menu.
- Click Save to save your new member to the group.
Change Member’s Address for Mail Group #
- Double-click the Mail groups' icon in the Partners folder on the SICS desktop.
- Open your mail group.
- Click Edit button.
- Double-click the member you want to change, or select the member and then select Addresses/Recipients from the pop-up menu. You see the Membership Mail group window
- Select the required address and then select Change address use.
Specify a Contact Person for a Mail Group Member #
- Double-click the Mail groups' icon in the Partners folder on the SICS desktop.
- Open your mail group and click the Edit button.
- Select a Group Member by double-clicking it or selecting Addresses/Recipients from the pop-up menu. You see Mail group Membership window.
- Select the required address by double-clicking it. You see Mail group Recipients window with all contact people for the business partner.
- Select the contact person(s) that you want to use as a recipient(s).
- Select Change Included from the pop-up menu to turn the Included field to Yes.
Delete a Mail Group Member #
You may want to remove/delete a member of the group that is not pertinent for the group anymore.
- Open the mail group.
- Click the pertinent member and select Delete from the pop-up menu.