Claim Description, Claim Summary, Comments and Notes
For various reasons you may want to record comments and notes to a loss. These comments could be a short description of the loss occurrence that you could use in reports and claim advices you send out to your own retrocessionaires, or it could be a longer description of the loss, actions that you have taken, or even a loss report you have received. SICS allows you to record all this information on a claim. Refer to Getting Started chapter for linking documents.
Maintain Short Description #
The Short description enables you to record a limited description of the loss occurrence.
- Find and open the Claim you want to record a short description for.
- Click Claim properties.
- Click the Edit button next to the Short Description field.
- Edit the short description.
- Click OK.
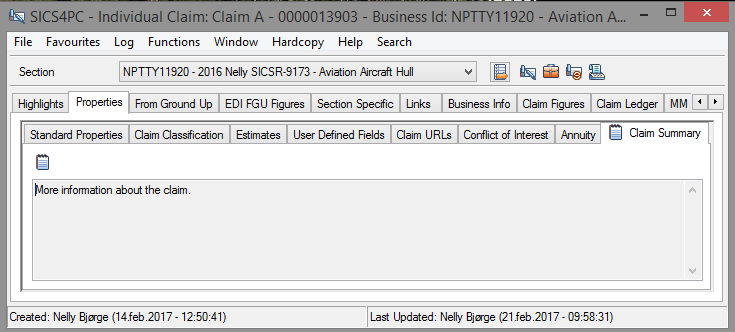
Enter Claim Summary
Claim summary is available for all claims and gives you an option to record notes relevant for current claim.
- Find and Open the Claim where you want to record a Claim summary.
- Click Properties, and then Claim Summary
- Click edit in the pop-up menu.
- Record relevant information
- Click OK; information is updated and marked with an indicator which shows that information exists.
Signature Notes #
The Claim Signature Notes replace the Notes tab found in other parts of the system. The Signature Notes are a collection of notes, and each note can be seen separately, or all can be viewed together as a collected note. The Signature Notes can be used to describe the loss in greater detail than in the space available to you in the ShortDescription field. Refer to Create Short Description. The Claim Signature Notes are general for all linked sections of the claim.
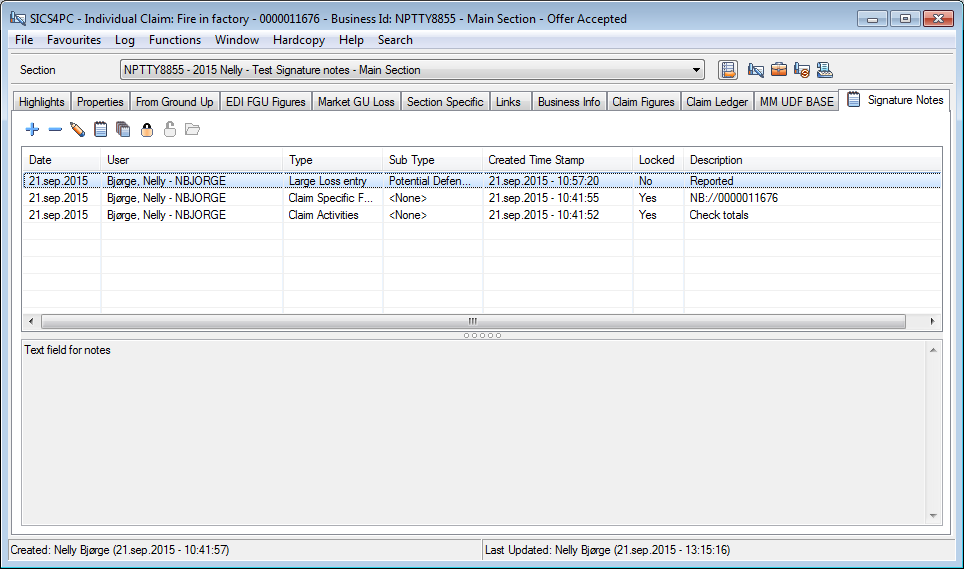
Add a Signature Note #
- Open the Claim for which you want to add a Signature Note.
- Open the Signature Note tab and select Add from the toolbar
- Specify the Signature Date, Type, and Subtype (if required), Description, and the actual note content and click OK.
If the Signature note has type “Large Loss Event” or “Claim Activities” the Signature Note date is saved with current date, regardless of what is entered whilst registering. If the Signature Note is of type “Claim Activities” the note is saved as “Locked”.
Note! All toolbar items are available for selection from the popup menu as well.
Add a Signature Note from the Collected Note #
- Open the Claim for which you want to add a Signature Note
- Select View All from toolbar
- From the “Collected Signature Note”, select Add from popup menu
- Specify the Signature Date, Type and Subtype (if required), description, and note content, and click OK.
If the Signature Note is of type “Large Loss Event” or “Claim Activities”, the date is set to current date, regardless of what was entered in creation form. If the Note is of type “Claim Activities”, the note is automatically “locked” when saving.
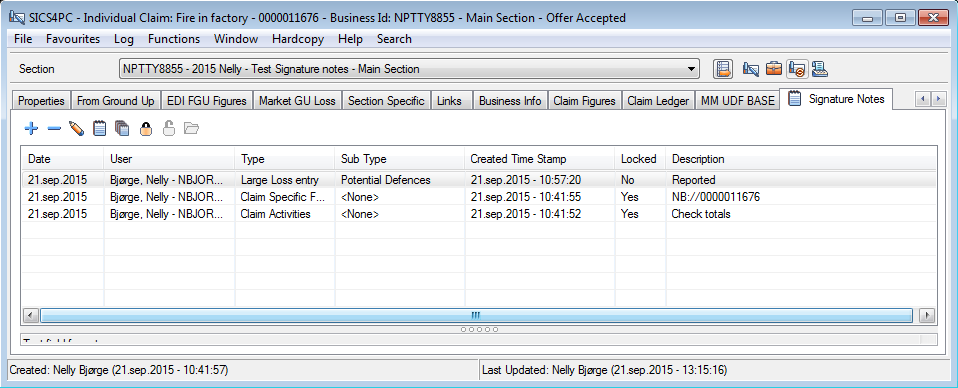
Read/View a single Signature Note #
- Select the Signature Note you want to read
- Read content in the lower frame, or select View from toolbar.
Read/View collected Signature Note #
- From the Signature Note display list, select View all from toolbar
- The system opens the collected signature note
Edit Signature Note #
You can only edit signature notes which are not locked.
- Open the Claim for which you want to edit a Signature Note, or read an existing one.
- Open the Signature Note tab and select the Signature Note you want to edit or read
- Select Edit from the toolbar.
- If you want to edit the existing information, change as required and click OK.
Note! If type is “Claim Activities” or “Large Loss Event” you cannot edit type or date.
Delete a Signature Note #
You can only delete signature notes which are not locked.
- Open the Claim for which you want to delete a Signature Note.
- Click the Signature Note tab and select the Signature Note you want to delete.
- Select Delete from the toolbar.
When the last Signature Note for a claim has been deleted, SICS also removes the “Book icon” from the Signature Note tab.
|
The Signature Notes tab containing a note. |
When a Signature Note has been created for a claim, SICS automatically adds a little red book to the tab to indicate that there is a note on the tab |
Lock a Signature Note #
To prevent other users from editing or removing signature notes, you can lock this. When a Signature Note has been locked, it can no longer be edited or deleted.
- Open the Signature Note display list
- Select the Signature Note you want to lock
- Select Lock Signature Note from toolbar
Note! A signature note of type “Claim Activities” is automatically locked when saved (after creation and/or edit.)
Unlock a Signature Note #
In order to unlock a signature note, thus enabling it to be edited or removed, the system requires a special access right.
- Open the Signature Note display list
- Select the Locked Signature Note
- Select Unlock Signature Note from toolbar
Print a Signature Note #
- Open the Signature Note you want to print in Edit or View mode
- 358Select Print from popup menu
Print the Collected Signature Note #
- Open the Claim for which you want to print the entire Signature Note.
- Open the Signature Note tab and select View All from the toolbar
- The system opens the entire Signature Note description.
- Select Print from the popup menu
- Select printer
Note! Using the Hardcopy with Print window function will only print the visible part of the window.
Claim Specific Folder Signature Note #
If your System Administrator has activated the functionality, SICS automatically creates a dedicated folder on the disk whenever you create a new claim. The link to this folder is displayed under Signature Notes, as type Claim Specific Folder. This Signature Note type is created as a locked note, and any modifications, or deletion thereof requires that the note is unlocked.
Navigate to Claim Specific Folder #
You can navigate to the folder from the Signature Notes List, or from the specific Signature Note itself. (The navigation is also enabled from within the Signature Notes section of the Individual Claim Snapshot.)
- Open the Signature Note tab and select a Signature Note of type Claim Specific Folder
- From toolbar, select Open Claims Specific Folder
- The system opens the specified folder.
Or
- Open the Claim Specific folder Signature note in View mode
- Click once on the link in the description field
Add Claim Specific Folder #
Sometimes there is a need to define the Claim Specific folder yourself. This could be the case if you have activated this functionality after claims for which you require such a folder have been created.
- Open the Signature Note tab
- Create a new Signature Note
- Define type Claim Specific folder
- Enter prefix and folder name in description field - using this format PPP://folder name
Note that the prefix must be according to System Parameter setup.
Edit Claim Specific Folder #
If you have modified the prefix after claims and Claim Specific folders already have been created, you must update the prefix on the claim manually in order for the direct navigation to work.
- Open the Signature Note tab
- Select the Claim Specific Folder Signature Note which you want to modify
- If required, unlock the Signature Note by selecting this option from toolbar
- Open the Signature Note in Edit mode, and make the required changes.
| Field | Description | Location |
|---|---|---|
| Signature | Output field with the creator’s user name and user ID. Functional impact: User displayed in Signature Note List |
Signature Notes |
| Signature Date | The date the note shall be associated with. Value: Date Default: Today’s date. Mandatory: Yes Functional impact: Determines the order of appearance in the Signature Note list. |
Signature Notes |
| Created TM | Output field only: he Signature note’s timestamp, when it was created.. Values: Date and Timestamp Mandatory: Yes Functional impact: None |
|
| Type | The “category” of the signature note. Values: Large Loss Entry, Claim Activities, Worksheet Note, Claim Specific Folder and any other values as customized by your System Administrator Default: Worksheet Note, when Signature Note is created from a claim worksheet (not changeable), Claim Specific Folder when the Signature Note is created automatically, eMessaging note, when Signature note is created from an eMessage otherwise no default Mandatory: No Functional impact: If type is Claim Activities, or Worksheet Note (and Signature Note is created from a claim worksheet)the signature note is automatically locked |
|
| Sub Type | A further description of selected type of signature note Values: Values defined as child value of selected type, and other values without any parent dependency. Available values are Circumstances of Loss, Damages, Litigation Venue, Original Policy / Reinsurance Policy Coverage, Potential Defences, Reserve Rationale, TP Contributions, and any other values your System Administrator may have defined. Functional impact: None |
|
| Description | The “title” of the note, describing its content for easy identification and referral. When Signature Note is created from a Claim Worksheet, the worksheet identifier is defaulted. Value: Free-text entry. Mandatory: Yes Functional impact: Text displayed in Signature Note List |
Signature Notes |
| Note | The actual note or description. Value: Free-text entry. |
Signature Notes |
| Locked | Indicator of whether the signature note is locked. Value: Yes / No. Mandatory: Yes Functional impact: When locked, the note can no longer be edited or deleted. |