Claim Non-Proportional (XL) and Proportional US Quota Share Recovery
In order to calculate the Non-Proportional XL Recovery Calculation you need to indicate that the claim is either a single loss, or part of a Headline Loss. Claims protected by a US Quota Share treaty do not need to be flagged as single claims, or Headline Losses; they are all subject to the simplified recovery calculation. The claims must also contain a link to the relevant proportional US Quota Share and/ or non-proportional XL protections under which it may be recoverable. The US Quota Share link is normally present provided that it has been registered on the business/policy. If the business/policy has not registered the US Quota Share it is not possible to link the claims either.
Below we will describe the various processes from the claim perspective. For further details about the Recovery calculation itself, both Non-Proprotional and US Quota Share refer to the Non-Proportional Retrocession Accounting chapter, as well as the Appendix.
Headline Loss included in Recovery #
Refer to Claims and Headline Losses.
Risk Losses with Event Limit #
Even though a claim is part of a Headline Loss, there is a possibility to denote the claim as a Risk Claim that shall be considered separately within the Headline Loss.
- Find and retrieve the assumed claim you want to denote as a Risk Claim.
- Click the Properties tab.
- Click the Edit button in the Heading Information section (in the lower right-hand corner of the window) and select Edit Claim Properties. You see the Edit Claim Heading Information dialog box.
- Enter a risk name in the Risk Name text box.
- Click OK.
If the claim is not a Risk loss (i.e. the Risk Event indicator on Claim Classifications is either Event or not defined), the system returns a warning. 6. Click OK to close the Warning dialog box.
To set the Risk/Event indicator, refer to Classify Claim.
When the claim is linked to the same Headline Loss, the system will consider each risk claim with the same risk name as the same risk. These claims will be considered against the Risk Limit in the Non-Proportional Recovery Calculation, provided that the claim is linked to a Protection.
Single Loss included in Recovery #
SICS allows you to include single losses not part of a Headline Loss in a Recovery Calculation:
- Find and open the claim you want to include in the recovery calculation as a separate claim.
- Open the Claim Properties window.
- Select Include Claim from the pop-up menu, and click OK
Note! This is not required for recovery from a US Quota Share - all claims on protected business are subject to the recovery calculation.
.
| Field | Description | Location |
|---|---|---|
| Recovery Calculation (individual and interlocking) | Indicator of whether the claim shall be included in the Non-Proportional Recovery Calculations as a single claim (and not part of a Headline Loss). Value: Claim Included/Claim Excluded. Default: Claim Excluded Mandatory: No Functional impact: Claim will be included in Non-Proportional Recovery Calculations, Headline Loss assignment prevented. |
Claim Properties |
Risk Claim Included in Recovery #
The Risk Name on Claim can be used to register the risk which suffered the loss. The name can be recorded for informational purposes only, but it is also a key attribute in Non-Proportional Recovery:
- The Risk Name can be used as a “grouping level”, replacing the Headline Loss. To calculate recovery, this requires that the “Include in Recovery” is set on Claim properties.
- When a Risk Name is used in combination with a Headline Loss, it impacts recovery calculation for Per Risk Covers, Per Risk or Event Covers, and also enables the claim to be subject to an Event Cover with a Risk Warranty.
For further details about Recovery calculation, please refer to Non-Proportional Retrocession Accounting chapter, as well as the Appendix.
To enter a Risk Name:
- Open the claim for which you want to register a risk name
- Open Claim Properties, and select Edit Claim Properties from the menu button
- In Risk Name field, enter the risk name, and press OK. The system converts the risk name into upper case. If the claim’s “include in recovery” indicator is set, the system compares the risk name with other risk names in the system. If the system finds a matching risk name, the system returns a warning that other claims with same risk name is defined.
View Linked Claims with same Risk Name
When your claim is registered with a risk name, it may be useful to be able to see which other claims are registered with the same risk name. Particularly when the risk name is used as the recovery grouping level, it is important to ensure that the grouped claims are in fact one and the same. SICS allows you to view claims registered with the same risk name.
- On Claim Properties, select the menu button next to the Risk Name field, and select View Claims with Same Risk Name. The option is only enabled if your claim has a risk name defined. The system opens View Claims with Same Risk Name window, and lists all claims with the same risk name in a tree view. Navigation to these claims is not enabled from this window.

SICS supports grouping of claims by their Risk Name without linking the claim to a Headline Loss.
- Find and retrieve the inward claim you want to denote as a Risk Claim.
- Click the Properties tab.
- Click the Edit button in the Heading Information section (in the lower right-hand corner of the window) and select Edit Claim Properties.
- Enter a risk name in the Risk Name text box.
- Select Include Claim from the pop-up menu, and click OK.
- Open the Claim Classification tab on the same claim and select Edit Claim Classification from the pop-up menu.
- Select the Claim Risk Event Indicator option from the pop-up menu.
- Select Risk and click OK.
Claims with the same Risk Name and the Claim Risk Event Indicator set to Risk, are considered as one claim in the Non-Proportional Recovery Calculation, provided that the non-proportional OCC is a Per Risk or Per Risk Or Event Cover.
| Field | Description | Location |
|---|---|---|
| Risk Name | The individual risk name. Value: Free-text entry Mandatory: No Functional impact: Non-Proportional Recovery Calculation |
Claim Properties |
Defaulted Protection Assignment on Claim #
The link to the protection is created and maintained on each claim. The link may be defaulted from the section to which the claim is linked when you create the claim, if your System Administrator has enabled this option.
Non-Proportional Treaty, Non-Proportional Facultative Outward Cedent’s Contract and Proportional US Quota Share will then be defaulted to the claim, provided the protections of the business section matches the Claim scope of cover.
The system gives a warning if an assigned protection can not be defaulted. Note that warnings also appears if one or more layers within a Protection Program section is not matching the claim. The link to the Protection Program section will be defaulted if at least one layer is matching the claim.
The link to the proportional US Quota Share is defaulted regardless of parameter setting, provided the classifications matches the Claim scope of cover.
Assign the Claim Automatically to a Single OCC or a Protection Program #
If no protection allocation is automatically copied from the business section in the Create Claim wizard or you want to define the protection on an existing claim, you must link the claim yourself.
For existing claims, you must first go through steps 1-2:
- Find and open the claim you want to link to a protection.
- Click the Links tab and then the Protection Allocations sub-tab.
- Click in the display list and select Edit from the pop-up menu and select one of the options on the pop-up menu;
-
Automatic Assignment to Protection Program or
-
Automatic Assignment to Outwards Cedent’s Contract.
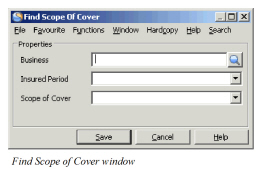
The system searches for a valid protection for the claim and presents a proposal in the Find Scope of Cover window. If multiple protections are found, the system lets you select one of the protections before proceeding to the Find Scope of Cover window.
- If no valid protections are found in the Find Scope of Cover window, you can enter the business identifier of the Protection Program, Single OCC or XL CA Of Outward.
Alternatively, you can use the ‘typeahead’ facility. Type in the business title or part of the title in the field, and you will receive possible matches for the text. You can also click the Find button to open the Find Business window. By default, SICS has selected the appropriate level of business and base company for you. Transfer the selected Protection Program, OCC or XLCA back to the Find Scope of Cover window.
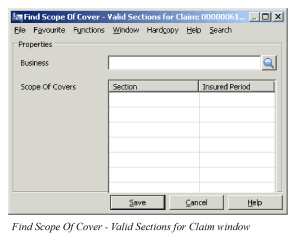
To see the other sections matching the classifications, click More. 5. Select the appropriate section and click Save. If no sections are displayed, the selected business does not cover the claim. Click Cancel.
For information about reasons why SICS cannot find any matching protection, refer to Reasons for Missing Defaults .
Note! If you select the Automatic Assignment to Protection Program option, the system searches for a valid protection program and then propose this in the Find Scope of Cover window.
Assign the Claim Manually to a Single OCC or a Protection Program #
If you could not find a matching Protection Program, OCC or XLCA with an automatic assignment, or if you wonder why the selected Protection Program section or OCC is rejected, you can do a manual assignment.
For existing claims, you must first go through steps 1-3:
- Find and open the claim you want to link to a protection.
- Open the Links tab - sub-tab Protection Allocations.
- Select Edit from the pop-up menu.
- In the Create Claim wizard, on Protection Assignment page, select one of the options on the pop-up menu; Manual Assignment to Protection Program, or Manual Assignment to Outwards Cedent’s Contract.
- In the Find Scope of Cover window enter the business identifier of the Protection Program or Single OCC/XLCA respectively.
Alternatively, you can use the ‘typeahead’ facility. Type in the business title or part of the title in the field, and you will receive possible matches for the text. You can also click the Find button to open the Find Business window.
- Select the Insured Period and Section, and click Save. If there is any mismatch, the system will return error and warning messages. Refer to Reasons for Missing Defaults.
- Edit the Allocation Percentage if required.
- Save
If you linked the claim to a Protection Programme’s sub-limit section, the system will automatically change the link to the selected section’s parent section. A warning is presented.
Assign to US Quota Share Protections #
Only US Quota Share Protections that have been registered on the business/policy are available for selection. As a general rule, the US Quota Share will be displayed when claim is created.
If the link is not yet displayed on the claim; create the assignment as follows:
- Find and open the claim you want to link to the US Quota Share protection.
- Open the Links tab - sub-tab Protection Allocations.
- Select Edit from the pop-up menu.
- Select “US Quota Share Protection Assignment” from popup menu.
The US Quota Share treaty, or treaties, that are protecting the business will be displayed.
Reasons for Missing Defaults/failed Assignment #
If no defaults appear, or if your attempt to assign the claim to a Protection failed,the reasons might be:
- No OCCs have been defined on the Business.
- XLCA is protecting a Proportional OCC not assigned to the business.
- Base Company not covered by the selected Protection.
- Claim Basis is not defined on the OCC.
- Date of Loss outside the period of the OCC.
- Claim Classifications are not covered by the OCC.
- Claim location is not covered by the OCC.
- OCC is a per risk cover, and Claim is not coded as a Risk
- OCC is a per event with a risk warranty, and Claim does not have both Headline Loss link as well as a Risk Name
Mandatory classification items are those classification items that have been defined as mandatory for the Base Company, Reporting Unit and Main Class of Business combination, and always include: Main Class of Business, Class of Business, Base Company, Type of Participation and Country.
Non-mandatory classification items are optional classification items defined for the Base Company, Reporting Unit and Main Class of Business combination.
Mandatory and non-mandatory classifications are validated in the claim protection allocation if your System Administrator has classified them as mandatory in the accounting classification.
A claim is valid for a Risk Warranty cover only when it has been linked to a Headline Loss, and has a Risk Name. If either one is missing, the OCC is not valid, and the system returns reason “Non-compliant with Risk Warranty.”
For further details about mandatory and optional classification items, refer to the System Parameter chapter/ Base Company Specific Settings in the System Administrator’s Guide.
| Field | Description | Location |
|---|---|---|
| Business | The Business identifier of the Protection Program, OCC or XL CA Of Outward Value: SICS identifier Mandatory: Yes Functional impact: Non-Proportional and Proportional US Quota Share Recovery Calculation |
Find Scope of Cover (Assignment) |
| Insured Period | The Insured Period of the selected business, under which the claim is recoverable. Values: Available Insured Periods of selected Program, OCC or XL CA Of Outward Mandatory: Yes Functional impact: Non-Proportional and Proportional US Quota ShareRecovery Calculation |
Find Scope of Cover (Assignment) |
| Scope of Covers | The section to which the claim should be linked, and is recoverable. Values: Available sections for the selected Insured Period for selected Program, OCC or XL CA of Outward Default: If Automatic Assignment is chosen, the section most “fitting” to the claim. Mandatory: Yes Functional impact: Non-Proportional and Proportional US Quota Share Recovery Calculation |
Find Scope of Cover (Assignment) |
| Business ID | The Business identifier of the Protection Program, OCC or XL CA Of Outward. | Claim - Links - Protection Allocation |
| Business Level | Indicator of whether displayed business is Protection program, OCC or XL CA Of Outward. | Claim - Links - Protection Allocation |
| Insured Period | The selected Insured Period | Claim - Links - Protection Allocation |
| Section | The selected Section | Claim - Links - Protection Allocation |
| Allocation Pct | The percentage by which the claim is allocated to the selected protection. Values: Percentage Default: 100% Mandatory: Yes Validations: Cannot exceed 100% for same Insured Period. Functional impact: Non-Proportional Protection Allocation. |
Claim - Links - Protection Allocation |
Delete Protection Allocation #
If you have defined the wrong Protection Allocation, you can freely edit this, as long as no recovery calculations have been created. (If Recovery Calculations exist, you must edit the Protection Allocation Percentage to 0% instead.) This option is not available for US Quota Share allocations.
To edit/delete the protection allocation:
- Find and open the claim you want to edit the Protection Allocation for.
- Open the Links tab, sub-tab Protection Allocations.
- Select Edit from the pop-up menu.
- Select the Protection Allocation you want to edit or remove.
- Select Delete Link from the pop-up menu.
Edit Protection Allocation Percentage #
If you have defined the wrong Protection Allocation, but are not allowed to delete the Protection because a Recovery Calculation has been created you can edit the Allocation Percentage to zero. This is not available for US Quota Share allocations.
- Find and Open the Claim you want to edit the Protection Allocation Percentage for.
- Open the Links tab, sub-tab Protection Allocations.
- Select Edit from the pop-up menu.
- Select the Protection Allocation Percentage you want to edit.
- Enter the correct Allocation Percentage.
- Click Save.