Create and Maintain Processes
There are several ways to create a new process in SICS:
- Pre-programmed logic in SICS workstation
- Web services
- Manually
The two first possibilities are described in the System Administration Guide / Set Up Task Management.
Process Owner #
A process has a list of Potential Owners defined at the process level in the template the process was created from.
When a process is about to be activated (set to In Progress status, which happens immediately when a process is created), there will be an attempt to assign a process owner.
- If the list of Potential Owners is empty, the current user will be assigned.
- If the list of Potential Owners contains just one user, he/she will be assigned.
- If the list of Potential Owners contains more than one user, and the current user is among them, the current user will be assigned.
- If the list of Potential Owners contains more than one user, and the current user is not among them, no user will be assigned.
If an actual owner has been assigned, then the process will appear on this user’s ‘My Processes’ only.
If an actual owner has not been assigned, then the process will appear on the ‘My Processes’ list of all Potential Owners.
Manually Create new Process #
When staring a process, you create a new process tree (process and belonging sub process and tasks) from an existing template.
Create a new Process when no Inputs Required #
Start a new process from a template that require no additional input.
- Open the Task Management Desktop from SICS Desktop
- Expand the Start Process tree item. You see all the available process templates
- Select wanted process and click the Start Process button.
- If the first task is assigned to the same person who created the process, the Task Side window will open. The user now has several options, which will be described in detail later in this chapter
- To save the task in My Tasks / In Progress folder, click on the upper right red “X” of the window
- If the first task is assigned to another User(s) or User Groups, the Process Started window will open
- To view the process details press View Details and the process template will open
- To complete the creation of the process, press Close Window. The task will appear in the assigned user’s My Tasks /Reserved folder.
- If the task is assigned to more than one user (has more than one potential owner) the task will appear in all the assigned user’s My Tasks /Ready folder

Create a new Process when Input Data is Required #
Start a new process from a template that has a Start Action which require an input value.
- Open the Task Management Desktop from SICS Desktop
- Expand the Start Process tree item. You see all the available process templates
- Select wanted process and click the Start Process button. The Input Data window is opened
- Enter values for the Start Action and other Input Data values, if wanted
- If Start Action e.g. is to open a business and the business identifier is entered, the system will
- If task is assigned to the same user as started the process, open the requested business and the Task Side Window
- If task is assigned to another user, the Process Started window will open (the same business will automatically open when the assigned user starts the task)

Create a new Process from Other Parts of the System #
It is possible to start a new process from other parts of SICS. A direct access button is available from the following windows:
- Business (all level)
- View Business Partner
- Individual Claim
- Worksheet Closing (technical and claim worksheets)
- Remittance worksheet
- eMessage

Starting a process using this direct access button, the system gives a list of relevant templates, i.e. templates with a Start Action that corresponds with where you start the process from. The new process requires the different identifiers as Input Data.
| Process Started From | Start Action | Input Data |
|---|---|---|
| Business | Open Business | Business ID |
| Business Partner | Open Business Partner | Business Partner ID |
| Claim | Open Claim | Claim ID |
| Worksheet Closing | Open Claim Worksheet | Worksheet ID |
| Worksheet Closing | Open Technical Worksheet | Worksheet ID |
| Remittance Worksheet | Open Worksheet | Worksheet ID |
| eMessage | Open eMessage | UUID (Universal Unique ID) |
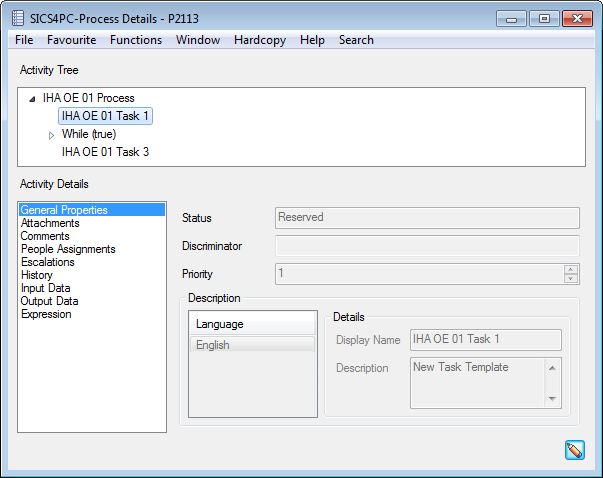
Manage Activity Details #
The data belonging to an activity ( process or task), has been grouped into a number of categories or Activity Details. The layout of the Activity Details screens are similar for all activities..
In the following we will give a short description of how to maintain each screen. For further details, refer to the fielddescription at the end of this chapter.
When opening a process or a task, the Activity tree is always displayed in the upper section of the screen. The Activity Tree shows the structure of the process. The root / top level is always the process itself. Underneath the process is a tree of sub-processes and tasks. By clicking one of the activities, the Activity Details for the selected activity is displayed.

Maintain General Properties #
Contains general information about the activity.
Change General Properties for an Activity
- Open the Task Management Desktop from SICS Desktop
- Expand My Tasks or My Processes
- Select to view details for an activity
- If needed, change activity in the activity tree, and open in edit mode
- If wanted, enter or change Discriminator
- If wanted, change Priority
- Press OK
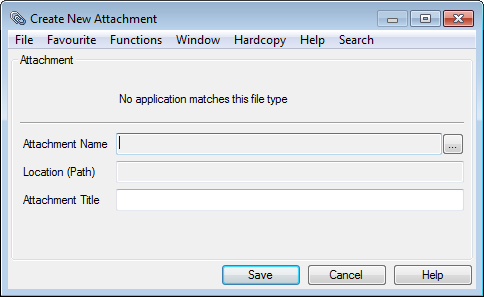
Maintain Attachments #
A list of documents attached to the activity, to provide more information to the user who will execute the task.
Add Attachments to an Activity
- Open the Task Management Desktop from SICS Desktop
- Expand My Tasks or My Processes
- Select to view details for an activity
- Select Attachments in the Activity Details list and open in edit. Alternatively, open in edit first, then select Attachments in the Activity Details list
- Select New from file from pop-up menu and press the button next to the Attachment Name field. Alternatively, if your company uses the Document Management System Interface, you may select New from DMS from the pop-up menu
- Attach wanted document
- Enter an Attachment Title
- Press Save
Note! It is also possible to add attachments from the Task Side Window
View Attachments
- Select Attachments in the Activity Details list
- Highlight wanted attachment and select Open from the pop-up menu
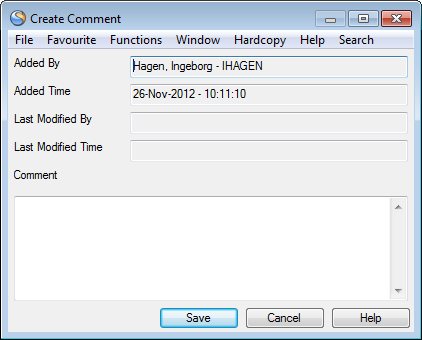
Maintain Comments #
Comments may be made to give task executioner more details and hints.
Add a new comment
- Open the Task Management Desktop from SICS Desktop
- Expand My Tasks or My Processes
- Select to view details for an activity
- Select Comments in the Activity Details list and open in edit. Alternatively, open in edit first, then select Comments in the Activity Details list
- Select New from pop-up menu and enter comments
- Press Save
Note! It is also possible to add attachments from the Task Side Window
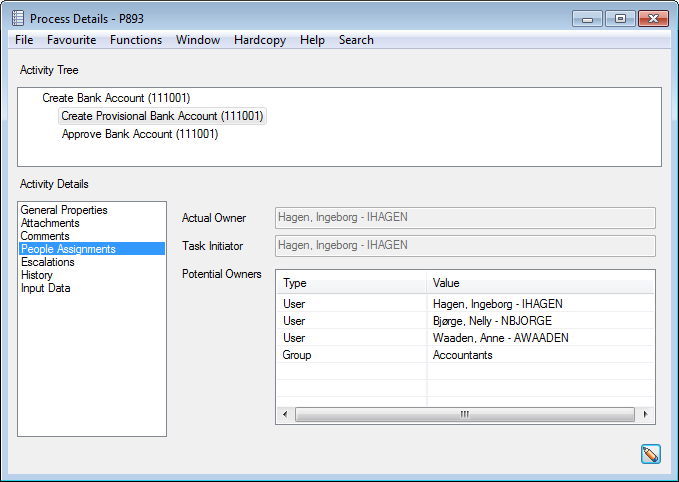
People Assignments #
List showing people currently assigned to an activity. This list is not editable on an activity and shows the list as defined in the template. Exception, the activity has been escalated with reassignment, in which case the Potential Owners is the list of “reassigned to” users.
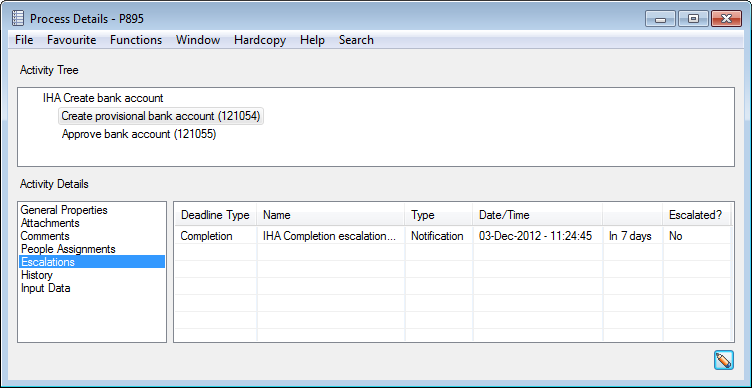
Escalations #
Shows escalation rules that have been triggered and escalation rules that may possibly be triggered in the future.
Escalation rules are defined in the template and cannot be altered on an activity.
Escalation rules can be defined as:
- Start Escalation- this will be triggered if the task is not started within a certain time after creation
- Completion Escalation- this will be triggered if the task is not completed within a certain time limit
History #
Shows a list of historical events for the selected activity. The list is automatically updated, and cannot be manually changed

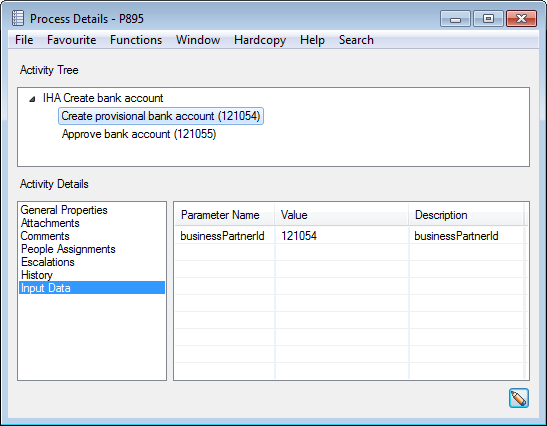
Input Data #
A list of possible input data for the activity.
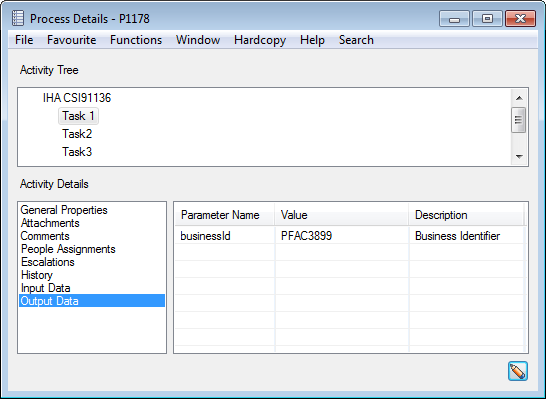
Output Data #
List displaying the result of a Start Action, e.g. create new business or create new claim worksheet. Output data will be the new business identifier or the new claim worksheet identifier
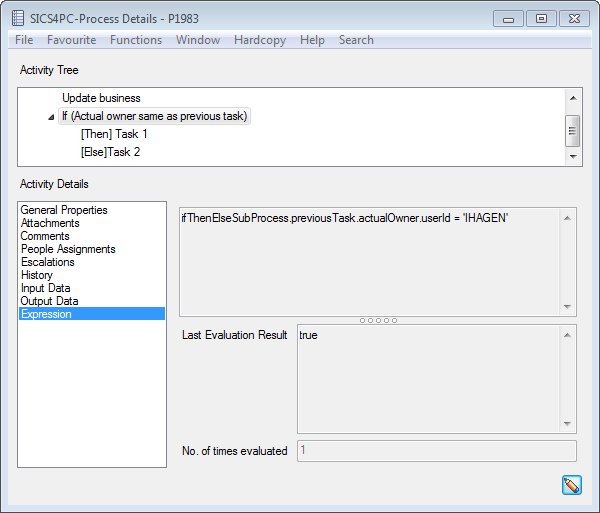
Expression
Relevant for the the conditional logic sub processes (If-Then-Else and While sub processes) only.
Shows the expression and the evaluation of the condition to that is tested
Follow up Processes #
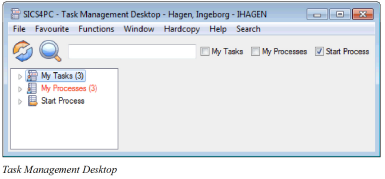
The Task Management Desktop is the main starting point for following up processes.
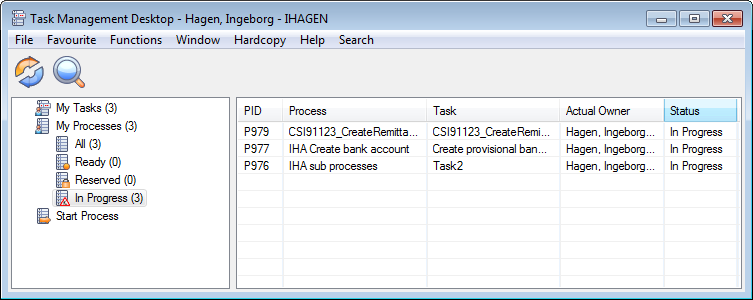
View My Processes #
The “My Processes” element contains four “views” of processes relevant to the user.
- Ready - Processes where the current active task is not yet reserved by anyone
- Reserved- Processes where the current active task has status Reserved, i.e. is reserved by some user but not yet started
- In Progress- Processes where the current active task has status In Progress, i.e. reserved by some user and started
- All - All processes in the three other “views”.
Only processes with an active status, i.e., Ready, Reserved and In Progress, are displayed.
Initially, when a process is first created from a template, its status will be In Progress.
Later when the task is finished, the process will automatically be set to Completed. The exception is when a task is marked as Failed, in which case the process till be marked as Failed as well.
Processes with statuses Completed, Skipped or Failed, are called “finished”.
The number in parenthesis to the right for each element tells how many processes there are in this view.
The user can see all processes where (s)he is the actual or potential owner of the process (not necessarily the active task) and also processes started by you and which has no potential owner(s).
The following details are displayed for the processes:
| Display List Item | Description |
|---|---|
| PID | Process' unique identifier, typically a prefix and a number |
| Process | Name of Processes defined in the template |
| Task | Name of the process' active task, as defined in the template |
| Actual Owner | User the active tasks assigned to. No user is displayed if active task is not yet assigned to one specific user, e.g. task is assigned to a User Group and no member of the group has picked it up yet |
| Statues | Description of which step the process' active task is in |
View Process Details #
View active processes where you are the process owner.
- Open the Task Management Desktop from SICS Desktop
- Expand the My Processes tree item..
- Highlight on wanted process, and right mouse click
- Select option View Details and system opens the Process Details
- You can navigate between the different Activity Details and also open process in edit mode and make adjustments
Take Process Ownership #
An active process which has no actual owner, will appear in the “My Processes” list for all its Potential Owners. If a user who is among these Potential Owners wants to have exclusive ownership (s)he can choose the “Take Process Ownership”.
- Open the Task Management Desktop from SICS Desktop
- Expand the My Processes tree item and click on the process for which you want to take ownership
- From pop-up menu, select Take Process Ownership. The user will become the actual owner of the process and the process will disappear from the My Processes list of the other potential owners
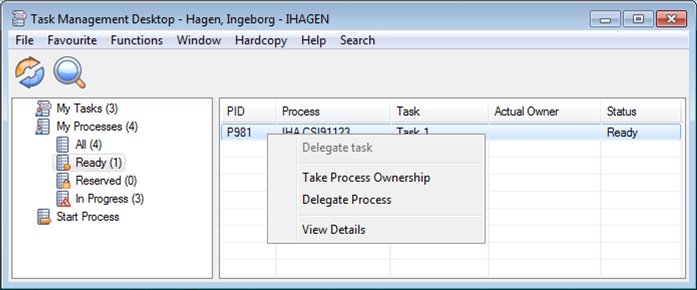
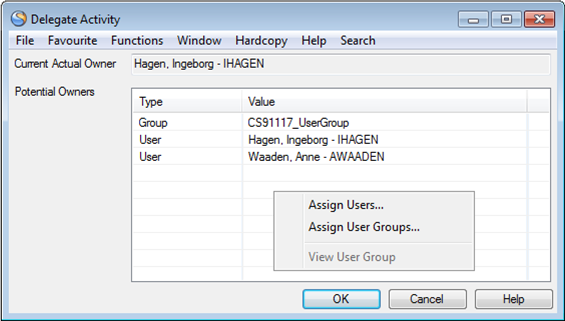
Delegate Process #
As process owner, you can delegate or reassign a process to another user or user group.
- Open the Task Management Desktop from SICS Desktop
- Expand the My Processes tree item and click on the folder containing the process you want to reassign
- Highlight on wanted process, and right mouse click
- Select option
- Delegate Process In the Delegate Activity, right mouse click and select Assign Users or Assign User Groups
- In the Assign Users / User Groups, move user(s) / user group(s) from the Available to the Selected and vice versa until the process is assigned to correct User(s) and / or User Group(s)
- Click Save
- Click OK.